
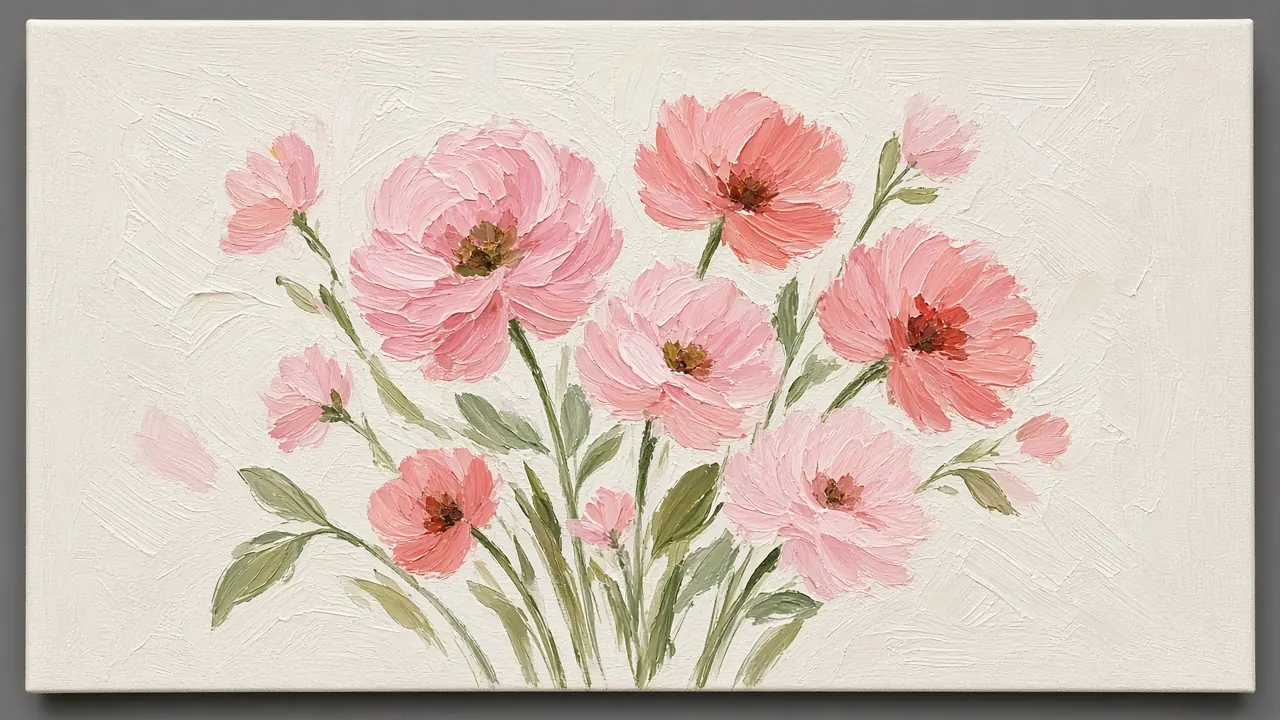
Loose florals are forgiving because the flower is suggested rather than drawn petal by petal. A single round brush can block a bloom, add a center and drag a stem without switching tools. This approach suits beginners who want a finished-looking painting in one sitting.
Load the brush once, paint a petal in one stroke
Dip a medium round into a mid-value petal color, then touch one side of the tip into a lighter tint (the same color plus white). Press the brush down so the belly spreads, then lift as you pull outward. The two-tone load gives each petal a soft highlight without a second pass.
Rotate the canvas or your wrist so petals radiate from a shared center. Leave small gaps of background between petals; overlapping every edge makes the flower look flat.
Centers and stems
Drop a small dark accent (burnt umber + a touch of the petal color, or a deep green) into the center while the petals are still slightly tacky so the mark softens. A few short liner strokes suggest stamens. Stems are thin, slightly curved lines with a liner or the tip of the round; avoid ruler-straight green sticks.
Backgrounds that help the flowers
A soft, slightly muted background makes bright petals pop. Block it in first with a large flat, keep edges soft, and avoid pure white unless you want a botanical-illustration look. If the background fights the flowers, glaze a thin neutral wash over it once dry.
When to stop
Loose florals get worse when overworked. If you have three to five readable blooms and some leaf shapes, stop. Add one sharper detail near the focal flower and leave the rest soft. For more floral subjects, see the Flowers & Botanicals hub and our notes on layering petals without muddying color.
Leaf shapes without outlining
Load a flat or filbert with a mid green and a darker green on opposite corners of the brush. Press and twist slightly to suggest a leaf in one motion. Scatter leaves behind and beside blooms so the bouquet has depth. A few broken stems crossing behind flowers beat a ring of identical leaves around the edge.
Materials
- Medium and small round brushes, liner
- Warm and cool reds/pinks, mixed greens, titanium white, a dark for centers
- Canvas panel or heavy acrylic paper
Step-by-step bouquet
- Tone or block a soft background and dry.
- Place three to five flower centers as dots to plan spacing.
- Paint back petals first with two-value loads.
- Add nearer petals overlapping gaps.
- Drop centers and a few stamens.
- Suggest leaves and stems last, varying pressure.
Color control
Mix petal tints on the palette. If a bloom goes muddy, let it dry and restated it opaquely rather than scrubbing. Keep rinse water clean when switching between pinks and greens — that cross-contamination is a frequent source of dull florals. More on clean layering is in layering petals without muddying color.
Variations
- Single stem on a large negative-space background
- Warm analogous bouquet (coral, orange, yellow)
- Cool bouquet against a warm gray ground
Troubleshooting
- Identical petals → rotate the brush and vary pressure.
- Flat flowers → leave gaps and darker centers.
- Busy background → glaze a unifying wash once dry.
Negative space and stopping points
Leave breathing room around a bouquet. Crowding every inch with petals makes the painting noisy. A soft vignette or simple graded background often supports loose florals better than a busy patterned cloth unless that cloth is the subject.
Decide a stopping point before you begin: for example, five blooms and a handful of leaves. When you hit the plan, put the brush down and photograph the work. Looking at a photo makes overworking more obvious than staring at the wet canvas.
If two flowers merge into a blob, reclaim a gap with background color after the blooms dry, or restated one flower opaquely on top. Gaps are part of the drawing.
For larger statement florals, scale the same one-stroke idea with a bigger round or filbert. The motion stays similar; only the brush footprint changes. Browse the Flowers & Botanicals hub for subject ideas after the motion feels familiar.
Session planning
Work in timed sessions. A thirty-minute block for blocking shapes and a later block for edges keeps decisions clearer than a single exhausted evening. Photograph the painting in daylight at the end of each session so you can judge values without wet-paint optimism.
Keep a paper towel diary swatch of key mixes with a one-line note (“crest turquoise”, “far hill”). Acrylic mix memory fades quickly once piles skin over.
Return to this guide after one practice canvas and note which step failed first: drawing, value, color, or edges. Fix that step on the next canvas instead of changing every variable at once.
Designing a bouquet that reads across the room
Before petals, place three dots for flower centers at different heights. Avoid a straight row. Vary sizes: one dominant bloom, one secondary, one smaller supporting bloom. This hierarchy keeps loose techniques from looking like identical stickers.
Load discipline matters. Fully reload for each major petal if you want clear two-tone strokes. Half-empty brushes make ragged petals that tempt you to poke and destroy freshness. Embrace a slightly imperfect petal over a repaired muddy one.
Centers need contrast, not clutter. A dark accent and a few liner marks usually suffice. Painting twenty stamens with equal attention turns the center into a scribble nest.
Leaves should support, not compete. Use fewer leaves than you think. Change their angles. Let one leaf pass behind a bloom to create depth. A ring of leaves around the bouquet outline is a common beginner pattern that looks artificial.
Background value chooses the drama level. A medium-dark background makes light petals glow; a pale background asks for stronger petal shadows so flowers do not vanish. Test a swatch of petal color on your planned background before committing the whole canvas.
If you paint florals often, keep a dedicated medium round that still holds a point. Once a round permanently hooks, demote it to leaves and buy a new hero brush for petals.
Putting it into a weekly practice
Choose one small canvas size and repeat the same exercise three times in one week rather than inventing a new subject every session. Repetition reveals which mistakes are habits. Keep notes on drying time in your room, which mixes skinned too fast, and which edges looked best in a daytime photo.
Share progress with yourself by lining up the three attempts side by side. The middle attempt is often where understanding appears: not yet polished, but clearer than the first. Use the third attempt to apply only one improvement goal, such as cleaner edges or better value range.
When a painting fails, scrape or gesso over it and reuse the panel for drills. Failure panels are cheaper teachers than unused premium canvases that intimidate you into stillness. Momentum matters more than preciousness while skills are forming.
Finally, connect technique pages to subject hubs so practice has a destination. A blending drill should lead to a finished small landscape; a dry-brush drill should lead to a small animal study. Technique without a next painting becomes abstract advice that evaporates.

Hi, I’m Camille. I write The Everyday Painter, where I share acrylic painting ideas, beginner guides and practical fixes for common painting problems. I love color, simple compositions and projects that fit into an ordinary evening.