
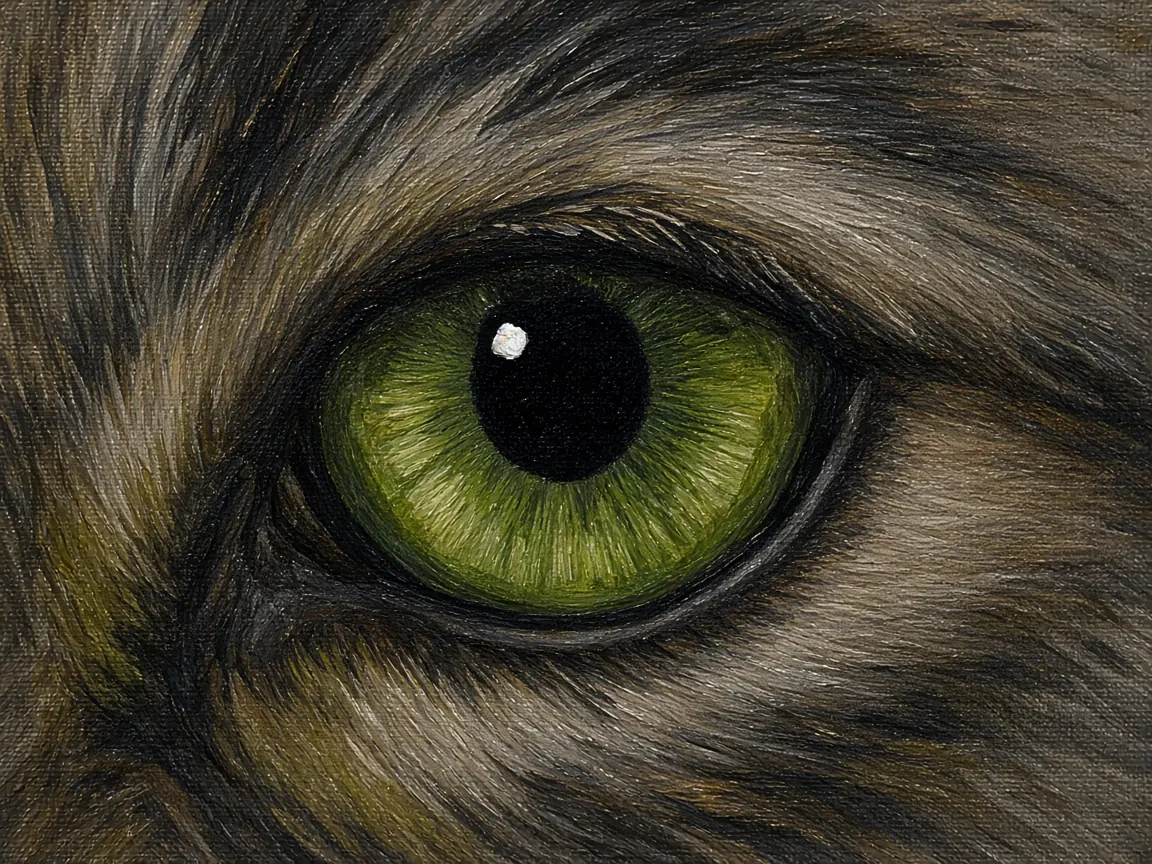
Viewers look at the eyes first. A simple, well-placed eye with a clear catchlight will carry a beginner animal painting even when the fur is still rough. This guide focuses on structure and value rather than species-specific anatomy.
The eye is a ball in a socket
Sketch an oval, then mark the eyelids as curves that wrap around a sphere. The upper lid usually casts a soft shadow on the top of the iris. Leaving a flat oval with no lid shadow is the most common reason eyes look stuck on.
Paint dark to light
- Fill the iris with a mid dark of the eye color.
- Add a darker pupil (rarely pure black; a deep brown or blue-black looks more alive).
- Place a soft lighter crescent on the lower iris opposite the light source.
- Add one small, sharp catchlight in opaque titanium white on the moist surface, usually on the upper half of the eye toward the light.
Keep the catchlight tiny. A large white blob turns the eye into a cartoon.
Wet rim and surrounding fur
A thin, slightly glossy line along the lower lid suggests moisture. Soften fur into the eyelid with short dry-brush strokes rather than outlining the eye in a hard dark ring. Hard rings make animals look stuffed.
Once the eyes work, return to dry-brush fur texture and keep facial fur shorter and denser than body fur.
Two eyes that match
Paint both eye shapes and lid shadows before detailing either iris. Match the catchlight direction on both eyes. If one eye looks larger, check the lid opening rather than redrawing the iris. A tiny adjustment to the upper lid often fixes the stare.
Materials
- Small rounds, tiny liner, steady titanium white for the catchlight
- Iris colors, a deep near-black mix, soft gray for wet rims
Step-by-step eye
- Place both eye ovals and lid curves.
- Fill irises with mid dark.
- Add pupils.
- Add lower-iris light crescent opposite the light source.
- Paint lid shadow on the upper iris.
- Add the catchlight as a small opaque shape.
- Suggest the wet lower rim.
- Weave short fur to the lids without a hard outline ring.
Species notes without overclaiming
Cats often show vertical pupils in bright light; many dogs show rounder pupils. Keep the anatomy simple and rely on value and catchlight first. Detailed species charts are optional after the basics work.
FAQ
Why do my eyes look sticky? Usually a hard dark ring around the entire eye. Soften the outer edge into fur.
Can I use pure black? A mixed dark usually looks more alive, but a small pure black pupil can work if surrounding values are carefully related.
Catchlights and moisture cues
Place catchlights consistently with the scene light. If the sky is bright from the upper left, both eyes should agree. Multiple random catchlights make eyes look feverish. A secondary softer reflection can exist, but keep it quieter than the main speck.
The sclera (visible white of the eye) is rarely pure white in animals; it often reads as a warm or cool gray. Over-whitening the sclera can make animals look human in an uncanny way. Observe your reference.
After the eyes are set, avoid dragging muddy color from the forehead into the iris. Clean the brush. A single dirty stroke can ruin a careful catchlight.
If proportions feel off, measure: compare eye size to the gap between eyes, and check vertical alignment. Fix drawing before polishing fur.
Session planning
Work in timed sessions. A thirty-minute block for blocking shapes and a later block for edges keeps decisions clearer than a single exhausted evening. Photograph the painting in daylight at the end of each session so you can judge values without wet-paint optimism.
Keep a paper towel diary swatch of key mixes with a one-line note (“crest turquoise”, “far hill”). Acrylic mix memory fades quickly once piles skin over.
Return to this guide after one practice canvas and note which step failed first: drawing, value, color, or edges. Fix that step on the next canvas instead of changing every variable at once.
Drawing checks before polish
Mark the center line of the head and the eye line lightly. Check that both eyes sit on the same eye line unless the head is tilted — and if it is tilted, the eye line tilts with it. Vertical placement errors are more common than artists notice while zoomed in on fur.
Iris size relative to eyelids changes expression. Too much iris with tiny lids can look startled; heavy upper lids can look sleepy. Adjust shapes before detailing catchlights.
Paint the darkest dark of the pupil and the lightest light of the catchlight with restraint. If both extremes appear elsewhere on the face at the same intensity, the eye loses primacy. Keep the catchlight as a top-tier highlight unique to moist surfaces.
Avoid mirroring mistakes: copying one eye exactly onto the other without accounting for perspective on a three-quarter head. The far eye usually appears slightly narrower.
Putting it into a weekly practice
Choose one small canvas size and repeat the same exercise three times in one week rather than inventing a new subject every session. Repetition reveals which mistakes are habits. Keep notes on drying time in your room, which mixes skinned too fast, and which edges looked best in a daytime photo.
Share progress with yourself by lining up the three attempts side by side. The middle attempt is often where understanding appears: not yet polished, but clearer than the first. Use the third attempt to apply only one improvement goal, such as cleaner edges or better value range.
When a painting fails, scrape or gesso over it and reuse the panel for drills. Failure panels are cheaper teachers than unused premium canvases that intimidate you into stillness. Momentum matters more than preciousness while skills are forming.
Finally, connect technique pages to subject hubs so practice has a destination. A blending drill should lead to a finished small landscape; a dry-brush drill should lead to a small animal study. Technique without a next painting becomes abstract advice that evaporates.
Finishing the eye without destroying it
Once the catchlight is right, protect it. Paint surrounding fur with a smaller brush and less load near the lid. If you lose the catchlight, wait for dryness and replace a tiny opaque speck rather than scrubbing the whole iris again.
Check symmetry of catchlight placement on both eyes after each session photo. Phone photos reveal misalignment that wet paint glare hides. Adjust before investing hours in cheek fur.
A simple drill: paint eight thumbnail eyes on scrap in one sitting, varying only lid angle. Speed teaches shape language better than one overworked large eye.
\nStudio habits for eye studies
Set a single measurable goal before each session, such as “softer joins,” “stronger darks,” or “fewer corrective scrubs.” Goals that try to fix everything produce scattered attention. Write the goal on painter tape at the easel edge.
Use inexpensive panels for drills and reserve better canvases for attempts that apply a drill successfully. This separation reduces fear and increases reps. Track reps with hash marks on a calendar; skill in acrylic handling is closer to deliberate practice than to inspiration hunting.
When stuck, copy a five-minute passage from a teaching video onto scrap without aiming for a finished painting. The point is motor learning: brush angle, load, and timing. Then return to your own composition and apply only that motion.
End sessions by noting one keep and one change. Keep notes short. Over time the notebook becomes a personal troubleshooting index more useful than generic tips, because it reflects your room, paints and habits.
Revisit this guide after three practice pieces. If the same failure repeats, change only the related step in the workflow rather than abandoning the subject. Persistence with targeted adjustment beats constant subject hopping.
\n
Hi, I’m Camille. I write The Everyday Painter, where I share acrylic painting ideas, beginner guides and practical fixes for common painting problems. I love color, simple compositions and projects that fit into an ordinary evening.