
Key Takeaways
- Microwave Vent Filter Importance: Regular cleaning is essential for maintaining efficiency and preventing unwanted odors or smoke during cooking.
- Signs of a Clogged Filter: Unpleasant odors, poor airflow, visible grease buildup, and smoke while cooking indicate that it’s time to clean the filter.
- Preparation for Cleaning: Gather necessary supplies, including dish soap, warm water, sponges, and gloves, and ensure safety by unplugging the microwave and allowing it to cool.
- Step-by-Step Cleaning Process: Remove the filter, soak it in warm, soapy water, scrub gently, rinse thoroughly, dry completely, and reinstall to ensure optimal performance.
- Maintenance Frequency: Clean the vent filter every one to three months, with more frequent cleanings for heavy cooking of greasy foods.
- Best Practices for Longevity: Use non-abrasive cleaners, dry the filter thoroughly before reinstalling, store it properly, and conduct regular inspections for wear and damage.
Ever noticed that your microwave isn’t performing as well as it used to? A clogged vent filter could be the culprit. If you’ve been whipping up delicious meals but haven’t cleaned your microwave’s vent filter in a while, you might be facing some unwanted odors or smoke.
Understanding Microwave Vent Filters
Microwave vent filters play a crucial role in maintaining efficiency while cooking. They help trap grease, smoke, and odors, ensuring your kitchen stays fresh during meal preparation.
Importance of Cleaning
Cleaning your microwave vent filter prevents buildup that can hinder functionality. A clean filter ensures proper air circulation, reducing unwanted smells and smoke during cooking. Regular cleaning enhances the longevity of your microwave and ensures it operates at peak performance.
Signs Your Filter Needs Cleaning
- Unpleasant Odors: If your microwave emits persistent smells, it’s time to clean the filter.
- Poor Airflow: Noticeable decrease in airflow indicates a clogged filter.
- Visible Grease Buildup: If the filter appears dirty or greasy, clean it promptly.
- Smoke While Cooking: If smoke appears during normal cooking, it often signals the need for filter maintenance.
Preparing for the Cleaning Process
Before starting the cleaning of your microwave vent filter, preparation ensures an efficient and safe experience. Gather the right supplies and follow safety precautions for optimal results.
Recommended Products
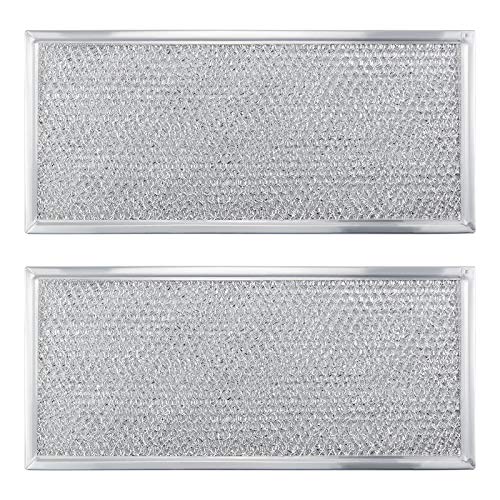
✔✔ 【60 DAYS GUARANTEE】 - The W10208631A whirlpool microwave grease filter support 60 DAYS after-sales service. Our company attaches great importance to the shopping experience of each customer.For any reason you're not completely satisfied , please contact customer service in time, We will try our best to solve the problem. Return or Refund is no problem. Customer satisfaction is our tireless pursuit

FILTER GREASE: Effectively catch and filter grease particles in your microwave oven with the TOMOON 5304464105 Microwave Grease Filter, preventing grease particles from entering the indoor air cycle. 7-5/8 x 5 x 3/32 inches.2.1 ounces

【Usage】This high quality W10208631A microwave filter collects grease particles from the air as you cook and keeps grease out of the microwave exhaust system and prevents odors from recirculating and affecting the taste and smell of your food. This microwave vent filter replacement also known as a range hood filter or hood vent filter. The stove vent filter is resistant to alkali, high temperature and acid
Gather Necessary Supplies
Collect these items before cleaning:
- Dish soap: A mild detergent works best for cutting through grease.
- Warm water: Used for diluting the soap solution.
- Sponge or cloth: Soft materials help scrub without scratching surfaces.
- Old toothbrush: Great for reaching small crevices.
- Bowl or basin: For soaking the filter.
- Paper towels: Useful for drying the filter after cleaning.
Having everything on hand streamlines the process and minimizes delays.
Safety Precautions
Prioritize safety as you clean:
- Unplug the microwave: Disconnect power to avoid any electrical hazards.
- Wait for the microwave to cool: Allow time for any recently used surfaces to cool down.
- Wear gloves: Protect your hands from grease and cleaning agents.
- Use non-abrasive materials: Prevent scratches on the filter and the microwave.
By following these safety measures, you can clean your microwave vent filter confidently and effectively.
Step-by-Step Guide to Clean Microwave Vent Filter
Cleaning your microwave vent filter helps maintain its efficiency. Follow these steps for a thorough cleaning.
Step 1: Remove the Vent Filter
Start by locating the vent filter. Most are found on the bottom or back of the microwave. Gently pull or slide the filter out. Ensure no parts are stuck, and take care not to bend the filter.
Step 2: Soak the Filter
Fill a bowl with warm water and add a few drops of dish soap. Submerge the filter in the soapy water. Soak it for about 10-15 minutes. This helps loosen grease and debris.
Step 3: Scrub and Rinse
After soaking, take an old toothbrush or sponge. Scrub the filter gently, focusing on any greasy spots. Rinse it under warm running water until it’s clean. Ensure no soap residue remains.
Step 4: Dry and Reinstall
Use paper towels to dry the filter thoroughly. Make sure it’s completely dry to prevent moisture damage. Finally, replace the filter in the microwave by sliding or pushing it back into its original position.
Maintenance Tips for Microwave Vent Filters
Regular maintenance of microwave vent filters ensures efficient performance and a fresher kitchen environment. Follow these tips to keep your filters in top shape.
Frequency of Cleaning
Clean the vent filter every one to three months, depending on cooking frequency. If you cook greasy foods often, aim for monthly cleanings. Signs it’s time to clean include:
- Unpleasant odors during cooking
- Poor airflow or diminished suction
- Visible grease buildup
Checking and maintaining a clean filter helps avoid larger issues down the line.
Best Practices for Longevity
Extend the life of your microwave vent filter with these best practices:
- Use Non-Abrasive Cleaners: Stick to mild dish soap and warm water. Avoid harsh chemicals that could damage the filter.
- Dry Thoroughly Before Reinstalling: Ensure the filter is completely dry to prevent moisture buildup inside the microwave. Use paper towels or let it air dry.
- Store the Filter Properly: When not in use, store the filter in a dry area away from direct heat or moisture.
- Conduct Regular Inspections: Periodically inspect filters for wear and tear. Replace them if they show significant damage or clogging.
Adhering to these practices boosts filter efficiency and prolongs the life of your microwave.
Conclusion
Keeping your microwave vent filter clean is essential for maintaining its performance and ensuring a fresh kitchen. By regularly checking and cleaning the filter you can avoid unpleasant odors and smoke while cooking. Remember to follow the simple steps outlined to make the process easy and efficient.
Making a habit of cleaning your filter every one to three months will not only enhance airflow but also extend the life of your microwave. With a little care and attention your kitchen can stay fresh and your microwave will work at its best. So grab those supplies and give your vent filter the attention it deserves. Happy cleaning!
Frequently Asked Questions
What causes a decline in microwave performance?
A decline in microwave performance can be caused by a clogged vent filter. When the filter is not cleaned regularly, it can lead to poor air circulation, resulting in unwanted odors, smoke, and inefficient cooking.
How often should I clean my microwave vent filter?
It’s recommended to clean your microwave vent filter every one to three months. If you frequently cook greasy foods, consider cleaning it monthly to maintain optimal functionality and a fresh kitchen environment.
What supplies do I need to clean my microwave vent filter?
To clean your microwave vent filter, you’ll need dish soap, warm water, a sponge or cloth, an old toothbrush, a bowl for soaking, and paper towels for drying. These tools will help you effectively remove grease and buildup.
What are the signs that my microwave vent filter needs cleaning?
Signs that your microwave vent filter needs cleaning include unpleasant odors while cooking, decreased airflow, visible grease buildup, and smoke coming from the microwave. Addressing these issues promptly can prevent further performance decline.
How do I safely clean my microwave vent filter?
To clean your microwave vent filter safely, first unplug the microwave and allow it to cool. Wear gloves, avoid abrasive materials, and remove the filter. Soak it in soapy water, scrub it gently, rinse, and dry thoroughly before reinstalling it.
