
Key Takeaways
- Understanding Baked-On Grease: Recognize that baked-on grease forms from food spills and heated residues, making it imperative to clean for optimal oven performance.
- Essential Tools: Gather key supplies such as a scraper, non-abrasive sponge, cleaning solution (commercial or DIY), and gloves for effective cleaning.
- Effective Cleaning Process: Follow a step-by-step approach: remove debris, apply cleaner, allow it to sit, scrub gently, and rinse thoroughly for best results.
- Natural vs. Commercial Cleaners: Use natural cleaners like vinegar, baking soda, and lemon juice for eco-friendly options, or opt for commercial products for tougher grease.
- Preventive Measures: Implement habits like using oven liners, cleaning spills immediately, and conducting regular maintenance to minimize the need for deep cleaning.
- Proper Cooking Practices: Monitor cooking closely and choose the right cookware to prevent splatters and buildup, reducing grease accumulation in your oven.
Have you ever opened your oven and been greeted by a layer of baked-on grease that seems impossible to tackle? You’re not alone. Many people face this frustrating challenge after countless meals, and it can feel overwhelming to even think about cleaning it up.
Understanding Baked-On Grease
Baked-on grease occurs when food spills or splatters during cooking and gets heated repeatedly. This process causes it to bond tightly to surfaces like oven walls and trays. Over time, this residue hardens, making it more challenging to remove.
Common Sources of Baked-On Grease
- Roasted Foods: Chicken skin and fatty cuts of meat often leave behind grease.
- Sauces and Oils: Liquid ingredients can splatter and adhere to surfaces when heated.
- Baking: Baking bread or pastries may result in overflow, contributing to baked-on stains.
Characteristics of Baked-On Grease
Baked-on grease can vary in texture, color, and smell. It’s typically black or brown, feels sticky, and can emit unpleasant odors when burnt. This buildup not only affects the appearance but can also impact food flavors during cooking.
Why Cleaning Baked-On Grease Matters
Regularly cleaning your oven improves its efficiency and lifespan. Residue can lead to uneven cooking and unpleasant smells. A clean oven provides safer cooking conditions, reducing the risk of smoke or fire hazards.
Tools and Materials for Removal
You can effectively tackle baked-on grease with the right tools. Gather these items before starting:
- Scraper or razor blade: Great for gently lifting hard residue.
- Non-abrasive sponge: Prevents surface scratches while scrubbing.
- Cleaning solution: Commercial oven cleaner or a DIY solution (like vinegar and baking soda) works well.
- Gloves: Protects your hands from harsh chemicals.
Key Steps to Tackle Baked-On Grease
- Remove loose debris: Start by taking out oven racks and crumbs.
- Apply cleaning solution: Coat heavily soiled areas with your chosen cleaner.
- Let it sit: Allow the solution to penetrate grease for 15-30 minutes.
- Scrub gently: Use your sponge or scraper to loosen the grease.
- Wipe clean: Rinse with water and dry the surfaces thoroughly.
Understanding the causes and characteristics of baked-on grease equips you to approach cleaning effectively. With the right methods and tools, maintaining a clean oven becomes an achievable task.
Essential Cleaning Supplies
Gathering the right supplies makes cleaning baked-on grease easier. You’ll need both natural options and commercial products for effective results.
Natural Cleaners
Natural cleaners are safe, cost-effective, and environmentally-friendly. Common options include:
- Vinegar: Cuts through grease and removes odors. Mix equal parts of vinegar and water in a spray bottle. Spray the mixture directly onto the greasy areas and let it sit for 15-20 minutes.
- Baking Soda: Works as a mild abrasive. Create a paste by mixing baking soda with water. Apply the paste to the greasy spots and allow it to sit for at least 30 minutes before scrubbing.
- Lemon Juice: Acts as a natural degreaser. It’s acidic and helps break down grease. Use it combined with baking soda or on its own for scrubbing tough spots.
Commercial Cleaners
Commercial cleaners offer strong degreasing properties. When selecting a cleaner, consider these:
- Cream Cleaners: Thick formulations cling to surfaces, allowing for deep penetration. Apply the cleaner with a non-abrasive sponge, scrubbing gently to lift grime.
- Spray Degreasers: Ideal for quick clean-ups. Spray the product directly onto the grease, let it sit for a few minutes, and wipe clean with a cloth.
- Oven Cleaner: Specifically made for tough grease. Follow the manufacturer’s instructions carefully, as these can be potent. Use gloves and ensure proper ventilation while cleaning.
Having these supplies on hand sets you up for success in battling baked-on grease.
Step-by-Step Cleaning Process
Cleaning baked-on grease from your oven doesn’t have to be a daunting task. Follow these simple steps for an effective cleaning process.
Recommended Products

Mrs. Meyer’s Baking Soda Cream Cleaner removes soap scum and grease build-up to make your kitchen sparkle
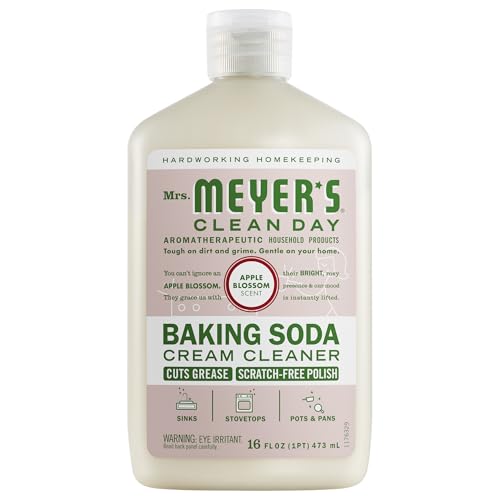
Mrs. Meyer’s Baking Soda Cream Cleaner removes soap scum and grease build-up to make your kitchen sparkle
Preparing Your Oven
- Gather your supplies. You’ll need gloves, a scraper, a non-abrasive sponge, a cleaning solution, and a microfiber cloth.
- Remove oven racks. Take out the racks and set them aside, making it easier to access the oven interior.
- Clear crumbs and debris. Sweep or vacuum any loose debris from the bottom to prevent trapping it under the cleaner.
Applying the Cleaner
- Choose your cleaner. Natural cleaners, like a baking soda and water paste, or commercial oven cleaner work well.
- Coat the surfaces. Apply the cleaner evenly across the greasy areas, using a sponge or cloth.
- Let it sit. Allow the cleaning solution to work its magic for at least 15-30 minutes. For severe buildup, consider an overnight soak.
Scrubbing the Grease Away
- Scrub gently. Use a non-abrasive sponge to scrub the surfaces. Focus on stubborn spots, applying a little extra pressure as needed.
- Use a scraper. For really tough areas, a scraper helps lift baked-on grease without scratching the oven’s surface.
- Rinse the sponge. Keep rinsing your sponge to prevent spreading grease around. Change your water as needed.
Final Rinse and Wipe
- Wipe down the oven. Use a damp microfiber cloth to wipe off the cleaning solution and grease residue.
- Rinse thoroughly. Ensure all cleaner is removed to prevent any lingering odors or chemical residues.
- Dry the interior. Use a dry cloth or let the oven air dry before replacing the racks.
By following these steps, your oven will be clean and ready for your next cooking adventure.
Tips for Preventing Future Baked-On Grease
Keeping your oven clean and minimizing baked-on grease starts with a few straightforward practices. Implement these tips for a cleaner cooking space.
Use Oven Liners
Using reusable or disposable oven liners can protect the bottom of your oven from spills. Choose liners that withstand high heat and cover them with aluminum foil for extra protection.
Clean Spills Immediately
Wipe up spills as they happen while the oven is warm—not hot. A quick wipe with a damp cloth or sponge prevents grease from hardening, making future cleanings easier.
Avoid Overcooking
Overcooking food often results in splatters. Monitor food closely and adjust cooking times or temperatures to reduce the likelihood of spills.
Store the Oven Properly
When not in use, store your oven with its door slightly ajar. This practice keeps it dry and prevents odors from accumulating, which can happen when grease is left to settle.
Regular Maintenance
Conduct regular maintenance by giving your oven a deep clean every few months. Set a reminder on your calendar to check for grease buildup and tackle it promptly.
Utilize Cooking Spray Wisely
When using cooking sprays, keep them at a distance. Spray directly on food rather than inside the oven to reduce residue.
Choose the Right Cookware
Opt for cookware with tight-fitting lids or splatter guards for dishes likely to bubble or splatter. This simple choice can minimize messes significantly.
By incorporating these habits into your cooking routine, you’ll reduce the occurrence of baked-on grease, making oven cleaning less burdensome.
Conclusion
Cleaning baked-on grease doesn’t have to be a daunting task. With the right tools and methods you can restore your oven to its sparkling best. Remember to take your time and follow the steps for the best results.
Incorporating preventive measures into your cooking routine can make a world of difference. By using oven liners and cleaning spills right away you’ll keep that grease from building up.
With a little effort and some handy tips you can enjoy a cleaner oven and a more pleasant cooking experience. Happy cleaning!
Frequently Asked Questions
What causes baked-on grease in ovens?
Baked-on grease occurs when food spills or splatters during cooking, bonding tightly to oven surfaces due to repeated heating. Common sources include roasted foods, sauces, and baking overflow.
How do I clean baked-on grease?
To clean baked-on grease, start by gathering supplies like a scraper, non-abrasive sponge, and cleaning solution. Remove loose debris, apply the solution, let it sit, scrub gently, and wipe clean.
Are there natural ways to clean baked-on grease?
Yes, natural cleaners like vinegar, baking soda, and lemon juice are effective for removing baked-on grease and are eco-friendly options for cleaning your oven.
What commercial products can I use for cleaning?
Commercial options such as cream cleaners, spray degreasers, and specialized oven cleaners are available for strong degreasing properties that effectively tackle baked-on grease.
How can I prevent baked-on grease in the future?
To prevent baked-on grease, use oven liners, clean spills immediately, avoid overcooking, and choose cookware with tight-fitting lids. Regular maintenance also helps reduce mess.
