
Key Takeaways
- Importance of Cleaning: Regular cleaning of condenser coils is essential for maintaining refrigerator efficiency, preventing overheating, and extending appliance life.
- Signs of Dirty Coils: Look for unusual noises or higher temperatures as indicators that your refrigerator’s coils may need cleaning.
- Essential Tools: Use a vacuum with a brush attachment, coil brush, soft cloth, and mild detergent to effectively clean the coils.
- Step-by-Step Guide: Unplug your fridge, clean the coils carefully with the right tools, and ensure everything is dry before plugging it back in.
- Avoid Common Mistakes: Prioritize safety, use appropriate tools, clean tight spaces, check for damage, and maintain a regular cleaning schedule every six months for optimal performance.
Ever wondered why your fridge isn’t cooling as well as it used to? Dirty condenser coils might be the culprit. These coils play a crucial role in keeping your food fresh, and neglecting them can lead to higher energy bills and even costly repairs.
If you’ve noticed your fridge working overtime or making strange noises, it’s time to give those coils some attention. Cleaning them isn’t as daunting as it sounds, and you can do it in just a few simple steps. In this article, you’ll learn how to easily clean your condenser coils and improve your fridge’s efficiency. With just a little effort, you can extend the life of your appliance and keep your food at the perfect temperature.
Importance Of Cleaning Condenser Coils
Cleaning condenser coils plays a crucial role in maintaining your refrigerator’s efficiency. Dirty coils impede airflow, leading to inefficient cooling and increased energy consumption. As a result, you face higher utility bills.
Regular maintenance helps your fridge operate smoothly. Clean coils reduce the risk of overheating, which can prevent costly repairs. Neglecting this task shortens the appliance’s lifespan.
Signs indicating the need for coil cleaning include unusual noises or higher-than-normal temperatures. If your fridge seems to be working harder than usual, dirty coils may be the culprit.
Frequent cleaning, ideally every six months, ensures optimal performance. A simple vacuum or coil brush can do the job effectively. Taking this step helps maintain your refrigerator’s reliability and longevity.
Tools Needed For Cleaning
Cleaning your refrigerator’s condenser coils requires a few essential tools for the job. These tools make the process quick and effective, ensuring you maintain optimal fridge performance.
Recommended Products

Package Includes: 4 packs air conditioner condenser cleaning brush in package, you can use them to clean different items in your home, enough to satisfy your cleaning needs

【Deep Cleaning, Done Right】 Flexible stainless-steel shafts bend effortlessly into dryer vents, fridge coils, AC units, and behind heavy appliances—removing lint, dust, and debris from hard-to-reach areas.
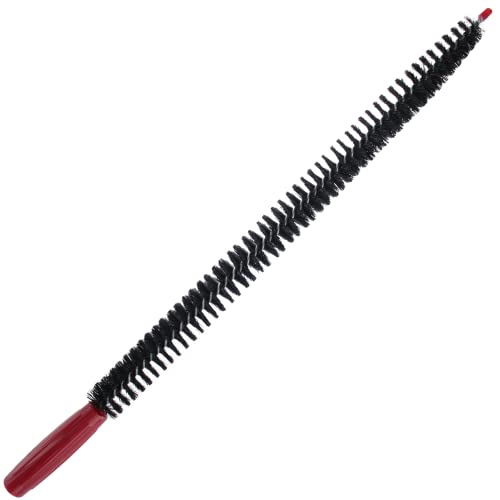
The Vanitek multi-use long flexible dryer lint brush vent cleaner and refrigerator coil cleaning brush features strong bristles for grabbing dust lint & dirt from the highest energy consuming products. The dryer cleaner vent kit will prevent you from fire risks.
Essential Cleaning Supplies
- Vacuum Cleaner: Use a vacuum with a brush attachment to remove dust and debris from the coils. A handheld or regular vacuum works well.
- Coil Brush: A coil brush, specifically designed for cleaning coils, can reach tight spots and remove stubborn dirt.
- Soft Cloth: A soft cloth helps wipe down the area after vacuuming, ensuring no residue is left behind.
- Mild Detergent: For tougher grime, mix a mild detergent with water. This solution can help in scrubbing any remaining dirt.
Safety Equipment
- Gloves: Wear rubber or disposable gloves to protect your hands from dirt and cleaning agents.
- Safety Glasses: Use safety glasses to shield your eyes from dust and debris while cleaning.
- Dust Mask: A dust mask minimizes inhalation of dust particles when working in confined areas.
Gather these tools and safety equipment before starting the cleaning process. With everything in place, you can tackle the task efficiently and effectively.
Step-By-Step Guide To Clean Condenser Coils
Cleaning your fridge’s condenser coils ensures optimal performance and efficiency. Follow these steps for a thorough and effective cleaning process.
Recommended Products

DURABLE MATERIAL: The brush rod is made of high quality stainless steel, flexible and bendable. The spiral bristles are strong and dense for effective multi-functional cleaning in the home, hanging design for easy storage
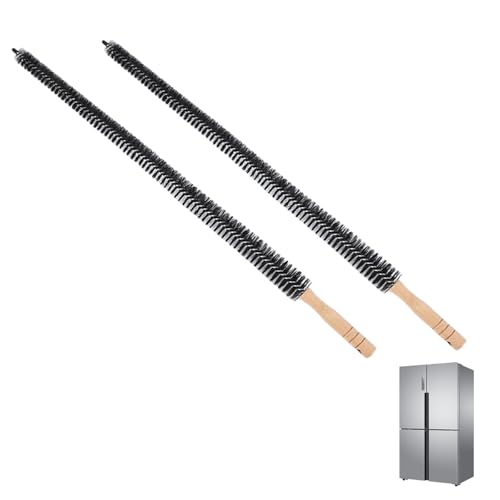
Flexible and Bendable:Fridge coil cleaning brush can bend at any angle for easy cleaning of gaps and corners

✔ Improve Dryer Efficiency & Preventing Fire Risks of Your Beautiful House: Dryer manufacturers recommend regular lint removal to extend dryer life. By using this tool kit, you can remove years of lint build-up deep within dryer gap, exhaust port and dryer vent so your appliance run more safely and efficiently. Using this dryer lint cleaning brush and flexible vacuum attachment for dryer vent regularly to clean your dryer vent and help prevent deadly dryer vent fires from sparking.
Preparing Your Refrigerator
- Unplug the Refrigerator: Safety comes first. Always unplug the appliance to avoid any electrical hazards.
- Empty the Area Around Your Fridge: Move any obstacles, such as furniture or boxes, to create enough space for easy access to the coils.
- Locate the Condenser Coils: Check the back or underneath the fridge, based on your appliance model. Refer to the manufacturer’s manual if needed.
Cleaning Process
- Use a Vacuum with a Brush Attachment: Gently vacuum the coils to remove loose dust and debris. Avoid excessive pressure to prevent damage.
- Utilize a Coil Brush: For stubborn grime in tight spots, use a coil brush. Move it back and forth carefully to dislodge dirt.
- Wipe Down Surfaces: Dampen a soft cloth with mild detergent and wipe areas around the coils to eliminate any residue. Ensure everything is dry afterward.
- Check for Damage: Inspect the coils and surrounding components for any signs of wear or damage, ensuring everything remains in good condition.
Post-Cleaning Maintenance
- Reconnect and Plug In the Refrigerator: Once cleaning is complete, plug your appliance back in and switch it on.
- Arrange a Regular Cleaning Schedule: Aim to clean the coils every six months to maintain efficiency. Set reminders on your calendar.
- Monitor for Issues: Keep an eye out for unusual noises or cooling problems. These can signal that more maintenance is needed sooner.
Cleaning the condenser coils isn’t difficult. With a little effort, you can enhance your refrigerator’s life and efficiency.
Common Mistakes To Avoid
Avoiding common mistakes while cleaning condenser coils helps maintain your fridge’s efficiency. Here are some key errors to watch out for:
- Neglecting Safety Precautions: Always unplug the refrigerator before cleaning. Forgetting this step can lead to electrical hazards. Ensure you’re wearing gloves and safety glasses to protect yourself from debris.
- Using the Wrong Tools: Stick to recommended tools, like a vacuum with a brush attachment and a coil brush. Avoid using abrasive materials that can scratch surfaces or damage the coils.
- Skipping Tight Spaces: Don’t rush the cleaning process. Focus on the tight areas around the condenser coils. Missing these spots can leave dirt to accumulate, diminishing cooling efficiency.
- Not Checking for Damage: Inspect the coils after cleaning. Look for any signs of wear, rust, or other damage. Early detection can prevent more significant issues down the line.
- Failing to Maintain a Regular Schedule: Cleaning once isn’t enough. Set reminders for cleaning your coils every six months. Consistent cleaning keeps your fridge functioning optimally.
By being mindful of these common mistakes, you can ensure your refrigerator stays in top shape and operates efficiently.
Conclusion
Taking the time to clean your fridge’s condenser coils can make a world of difference. Not only does it help your appliance run more efficiently but it also saves you money on energy bills. By following the simple steps outlined and sticking to a regular cleaning schedule you can prevent potential issues down the line.
Remember that this small effort goes a long way in extending the lifespan of your refrigerator. So grab your tools and get started on this easy maintenance task. You’ll be glad you did when your fridge runs smoothly and efficiently for years to come.
Frequently Asked Questions
Why are clean condenser coils important for my refrigerator?
Dirty condenser coils can decrease your fridge’s cooling efficiency, leading to higher energy bills and potential repairs. Regular cleaning improves airflow, prevents overheating, and prolongs your appliance’s lifespan.
How often should I clean my refrigerator’s condenser coils?
It’s recommended to clean the condenser coils every six months. This regular maintenance helps maintain optimal performance and efficiency of your refrigerator.
What tools do I need to clean condenser coils effectively?
Essential tools include a vacuum cleaner with a brush attachment, a coil brush, a soft cloth, and mild detergent. Safety gear like gloves, safety glasses, and a dust mask is also advised.
What are the signs that my fridge needs its coils cleaned?
Signs include excessive noise, the refrigerator running more than usual, or not cooling properly. If you notice these issues, it may be time to clean the condenser coils.
What steps should I follow to clean my refrigerator coils?
Start by unplugging the fridge and clearing the area. Vacuum the coils, use a coil brush for stubborn dirt, wipe down surfaces with a damp cloth, and check for damage before reconnecting the appliance.
What common mistakes should I avoid while cleaning my coils?
Avoid neglecting safety precautions, using incorrect tools, skipping tight spaces, overlooking damage checks, and failing to follow a regular cleaning schedule. Being mindful of these errors can enhance your fridge’s efficiency.
