
Key Takeaways
- Understanding Oily Windows: Kitchen windows accumulate grease and grime primarily from cooking oil, steam, and poor ventilation, affecting their appearance and the amount of natural light they let in.
- Importance of Regular Cleaning: Regular cleaning not only enhances aesthetics and hygiene but also prevents long-term damage from stubborn grease build-up.
- Essential Cleaning Supplies: Utilize microfiber cloths, squeegees, scrub brushes, and effective cleaning solutions like dish soap, vinegar, and commercial glass cleaners for optimal results.
- Step-by-Step Cleaning Process: Systematically clear the area, apply the cleaning solution, scrub, wipe, and squeegee the windows to ensure a streak-free finish.
- Maintenance Tips: Establish a regular cleaning schedule and implement preventive measures, such as adequate ventilation and using lids while cooking, to minimize grease accumulation.
Do you ever look at your kitchen windows and wonder how they got so grimy? If you’ve cooked up a storm, those oily fingerprints and splatters can really build up, making your windows look dull and dirty. You’re not alone—many people struggle with keeping their kitchen windows clean, especially when cooking oil and grease are involved.
Understanding Kitchen Oily Windows
Kitchen windows often attract grease and grime from cooking activities. These oily residues can make your windows look dull and obstruct natural light, creating an uninviting atmosphere in your kitchen.
Common Causes of Oily Windows
- Cooking Oil: When frying or sautéing, oil particles escape and settle on surfaces, including windows.
- Steam and Vapors: Boiling liquids release steam that can carry grease into the air, leading to deposits on window surfaces.
- Lack of Ventilation: Poor air circulation traps grease and smoke, increasing the likelihood of oily buildup on windows.
- Dust and Particulates: Kitchen dust can mix with oil residues, compounding the problem and making windows appear dirtier.
Importance of Regular Cleaning
- Enhances Aesthetics: Clean windows improve the overall appearance of your kitchen, making it feel fresher and more inviting.
- Increases Natural Light: Clear windows allow more sunlight in, brightening your kitchen and reducing the need for artificial lighting.
- Prevents Long-term Damage: Regular cleaning prevents grease buildup, which can be tougher to remove over time and damage window surfaces.
- Promotes Hygiene: Cleaning removes allergens and bacteria, contributing to a healthier kitchen environment.
Best Tools and Materials for Cleaning
Cleaning oily kitchen windows requires specific tools and materials for effective results. Using the right supplies makes the task easier and faster.
Recommended Products


What You'll Get: One 23 oz spray bottles of Windex Original Blue Glass and Window Cleaner
Essential Cleaning Supplies
- Microfiber Cloths: Offers a non-scratch surface. It’s effective at trapping dust and grease without leaving lint behind.
- Squeegee: Provides a streak-free finish. Use it after applying cleaning solutions to wipe away excess liquid.
- Bucket: Holds your cleaning solution. Choose a size that allows easy handling and pouring.
- Scrub Brush: Tackles tough, stuck-on residues. Opt for one with soft bristles to avoid scratching the glass.
- Gloves: Protects your hands from chemicals. Wear durable, rubber gloves for safe cleaning.
Recommended Cleaning Solutions
- Dish Soap Solution: Mix a few drops of dish soap in warm water. This mixture effectively breaks down grease.
- Vinegar Solution: Combine equal parts vinegar and water. This solution cuts through stubborn grime and deodorizes windows.
- Commercial Glass Cleaner: Choose a product designed for greasy surfaces. Follow the manufacturer’s instructions for best results.
- Baking Soda Paste: Make a paste with baking soda and water. It helps remove tough spots when applied with a cloth.
- Alcohol Spray: Mix rubbing alcohol with water in a spray bottle. This solution evaporates quickly, leaving surfaces clear.
Utilizing these tools and solutions simplifies the process of cleaning oily kitchen windows. Each item serves a specific purpose, ensuring your windows shine brightly with minimal effort.
Step-by-Step Guide to Clean Kitchen Oily Windows
Cleaning oily kitchen windows requires a systematic approach. Follow these steps for sparkling results.
Recommended Products

10-inch (25cm) Squeegee & Microfiber Window Washer

Effective Cleaning: This professional window cleaning scrubber efficiently removes stubborn dirt from glass surfaces. The 14" scrubber washer ensures thorough cleaning, leaving surfaces pristine

Package Content: Package includes 4 microfiber replacement sleeves, the quantity can meet your daily use and replacement needs.
Preparing the Area
- Clear the Space: Remove any items near the windows, such as plants, decor, or kitchen tools. This frees up room and prevents damage.
- Protect the Surroundings: Lay down old towels or newspapers to catch drips. This keeps your kitchen floor clean during the process.
- Gather Supplies: Collect all necessary tools within reach. You’ll need microfiber cloths, squeegees, a bucket, scrub brushes, gloves, and your chosen cleaning solutions.
Cleaning Techniques
- Apply Cleaning Solution: Spray a generous amount of your preferred cleaning solution onto the window. Vinegar and water or a mix of dish soap and water work well.
- Scrub the Surface: Use a scrub brush to tackle tough grease spots. Scrub in circular motions to lift the oil and grime.
- Wipe with a Microfiber Cloth: After scrubbing, use a clean microfiber cloth to wipe away the cleaning solution. Start at the top and work your way down to prevent streaks.
- Use a Squeegee: For a streak-free finish, run the squeegee from the top of the window to the bottom. Wipe the squeegee blade with a cloth after each pass to avoid spreading dirt.
Drying and Finishing Touches
- Check for Streaks: After squeegeeing, inspect your window for any streaks or spots. If necessary, repeat the cleaning process on those areas.
- Final Wipe Down: Use a dry microfiber cloth for any remaining moisture. This ensures your window shines and provides clear visibility.
- Clean the Window Frame: Don’t forget to wipe down the window frames with a damp cloth. Remove any buildup of dust or grease to complete the cleaning process.
Following these precise steps will ensure your kitchen windows look clean and welcoming.
Tips for Maintaining Clean Windows
Keeping your kitchen windows clean requires consistent care and proactive steps. Implementing a regular maintenance routine and using preventive measures can significantly reduce the buildup of grease and grime.
Recommended Products

#1 Most effective Heavy-Duty Degreaser – This Heavy Duty formula breaks down stubborn grease and grime for a deep clean in seconds!
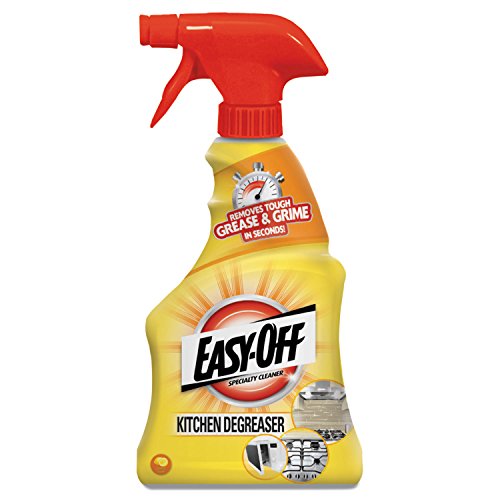
Kitchen Degreaser is a specialty cleaner for the toughest grease in the kitchen.
Heavy Duty Degreasing Performance: Helps break down grease, oil, grime, wax, and tough stains across a wide range of surfaces
Regular Maintenance Schedule
Establish a routine for cleaning your kitchen windows. Aim for a quick wipe down every week and a thorough cleaning monthly. Following this schedule prevents grease from hardening and make cleaning easier.
Consider these specific tips:
- Weekly: Use a damp microfiber cloth to remove dust and light grease.
- Monthly: Complete a deep clean using a vinegar and water solution or a commercial glass cleaner.
Mark your calendar or set reminders, so you don’t forget.
Preventive Measures
Implement preventive strategies to minimize grease on your windows. Consider these actions:
- Upgrade Ventilation: Install a range hood or turn on exhaust fans while cooking. This reduces steam and oil particles in the air.
- Use Lids: Cover pots while boiling to contain steam and prevent splatters.
- Choose Cooking Oils Wisely: Use oils that produce less smoke and splatter.
By incorporating these measures, you reduce the frequency of cleaning while maintaining clear and inviting windows.
Conclusion
Cleaning your oily kitchen windows doesn’t have to be a daunting task. By using the right tools and techniques you can easily restore clarity and brightness to your space. Regular maintenance is key to preventing buildup so make it a habit to wipe down your windows weekly.
Incorporating preventive measures like improving ventilation and using lids while cooking can also make a significant difference. With a little effort you’ll not only enhance the aesthetics of your kitchen but also create a healthier environment. Enjoy the natural light streaming through those sparkling clean windows and take pride in your kitchen’s inviting atmosphere.
Frequently Asked Questions
How do kitchen windows get dirty quickly?
Kitchen windows often become grimy due to cooking oil, steam, and vapors from boiling liquids. When cooking, oil particles can splatter and adhere to the glass, leading to dullness and obstructed light. Dust in the air can also mix with grease, creating a sticky residue that makes cleaning essential.
What materials do I need to clean oily kitchen windows?
To clean oily kitchen windows effectively, you’ll need microfiber cloths, squeegees, scrub brushes, and gloves. For cleaning solutions, consider dish soap, vinegar, commercial glass cleaners, baking soda paste, and alcohol spray. Each tool and solution targets specific types of grime for the best results.
What’s the best way to clean kitchen windows?
Start by clearing the area and protecting surfaces with towels or newspapers. Next, apply your chosen cleaning solution, scrub the window’s surface, and wipe with a microfiber cloth. Finish by using a squeegee to remove excess moisture and check for streaks. Don’t forget to clean the frames!
How often should I clean my kitchen windows?
It’s best to establish a regular cleaning schedule for your kitchen windows. Quick weekly wipe-downs will prevent grime build-up, while thorough monthly cleanings can maintain clarity. This way, your windows will stay inviting and let in more natural light.
How can I prevent greasy kitchen windows?
To prevent greasy kitchen windows, upgrade your ventilation with range hoods, use lids while cooking, and select cooking oils that produce less smoke. Additionally, making it a habit to wipe down surfaces regularly can help keep windows clean longer.
