
Key Takeaways
- Understanding Grease Buildup: Kitchen wall grease results from various cooking methods, including frying, sautéing, and poor ventilation, leading to unsightly stains over time.
- Regular Cleaning Importance: Frequent cleaning helps prevent grease accumulation, maintains hygiene, enhances aesthetic appeal, extends the life of surfaces, and reduces fire hazards.
- Essential Cleaning Tools: Gather necessary supplies like dish soap, vinegar, baking soda, microfiber cloths, non-abrasive sponges, and commercial degreasers for effective cleaning.
- Step-by-Step Cleaning Process: Prepare the area, apply cleaning solutions, scrub gently using appropriate tools, rinse thoroughly, and dry to achieve spotless walls.
- Preventive Measures: Use splatter guards, cook with lids on, ventilate properly, and clean spills immediately to minimize grease buildup in the kitchen.
- Establish a Cleaning Routine: Schedule regular cleanings and utilize quick wipe methods to maintain a clean kitchen and prevent grease from becoming a stubborn problem.
Ever looked at your kitchen walls and thought, “How did it get this greasy?” It’s a common problem, especially if you love cooking. Those splatters and stains can build up over time, making your space feel less inviting.
Understanding Kitchen Wall Grease
Kitchen wall grease comes from cooking activities, especially frying and sautéing. Over time, oils and food particles bond with surfaces, leading to stains and an unclean appearance.
What Causes Grease Buildup?
Grease buildup stems from various cooking methods. Common causes include:
- Frying Foods: Hot oil splatters contribute significantly to grease accumulation.
- Sautéing Vegetables: This method releases steam and oils that cling to walls.
- Steaming or Boiling: While cooking, condensation may carry tiny grease particles onto surfaces.
- Grilling: Smoke and fat can settle on nearby walls during grilling sessions.
- Poor Ventilation: Lack of range hoods or vents increases grease deposits on walls.
Importance of Regular Cleaning
Regular cleaning is essential for maintaining a fresh kitchen environment. Consider these reasons:
- Preventing Accumulation: Frequent cleaning stops grease from building up and becoming harder to remove.
- Maintaining Hygiene: Removing grease helps eliminate bacteria and odors, ensuring a healthier cooking space.
- Aesthetic Appeal: Clean walls enhance the overall look of your kitchen, making it more inviting.
- Extending Surface Life: Regular maintenance keeps paint and materials in good condition, prolonging their lifespan.
- Creating a Safe Environment: Grease can become a fire hazard; cleaning reduces this risk during cooking.
Understanding these factors can help you maintain a clean kitchen and enjoy a pleasant cooking experience.
Tools and Materials Needed
To effectively clean kitchen wall grease, gather essential tools and materials. This preparation ensures an efficient cleaning process.
Recommended Products
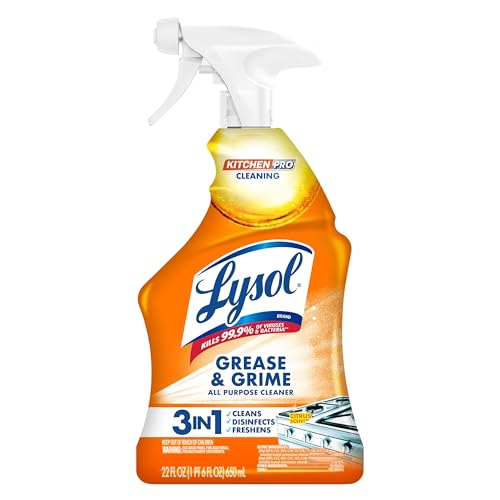
ELIMINATES 99.9% OF KITCHEN VIRUSES AND BACTERIA INCLUDNG SALMONELLA AND E.COLI: Lysol Pro Kitchen Cleaner is tested and proven to eliminate 99.9% of viruses and bacteria* (when used as directed). EPA Reg #777-91.

#1 Most effective Heavy-Duty Degreaser – This Heavy Duty formula breaks down stubborn grease and grime for a deep clean in seconds!
Heavy Duty Degreasing Performance: Helps break down grease, oil, grime, wax, and tough stains across a wide range of surfaces
Cleaning Solutions
- Dish Soap and Water: Mix a few drops of dish soap with warm water in a spray bottle. It effectively cuts through grease.
- Vinegar: Combine equal parts of vinegar and water. This natural solution helps dissolve stubborn grease stains.
- Baking Soda: Create a paste with baking soda and water for a gentle abrasive cleaner. It’s great for tough spots without damaging surfaces.
- Commercial Degreasers: These products are formulated specifically for heavy grease. Follow the instructions on the label for safe use.
Cleaning Tools
- Microfiber Cloths: These cloths trap dust and grease better than regular rags. Use them for both wiping and scrubbing.
- Sponges: Opt for non-abrasive sponges to avoid scratching surfaces. They’re useful for applying cleaning solutions.
- Scrub Brushes: A small scrub brush can help tackle tougher grease. Choose one with soft bristles for delicate surfaces.
- Spray Bottles: Use these for easy application of cleaning solutions. Label them for quick identification.
- Bucket: A bucket holds your cleaning solution and provides a convenient way to rinse tools. Use a sturdy one to avoid spills.
- Gloves: Protect your hands from harsh chemicals by wearing gloves. They’re especially helpful when using commercial cleaners.
Step-by-Step Instructions
Cleaning kitchen wall grease can be straightforward. Follow these steps to achieve a spotless result.
Preparing the Area
- Clear the Space: Remove items like pots, pans, and decorations from the area. This helps prevent any damage and gives you easy access to the walls.
- Protect Surroundings: Lay down old towels or plastic sheets to catch drips. This keeps your floor clean and simplifies the cleanup process.
- Gather Supplies: Collect all necessary tools, including your chosen cleaning solution, microfiber cloths, non-abrasive sponges, scrub brushes, and gloves.
Applying the Cleaning Solution
- Choose Your Solution: Select a cleaning solution that suits your needs. Dish soap mixed with warm water works for light grease, while vinegar mixed with water or a commercial degreaser tackles heavier buildup.
- Mix Solutions: If you’re making a homemade cleaner, combine equal parts of vinegar and water or mix one tablespoon of dish soap with a quart of warm water.
- Apply Generously: Use a spray bottle to apply the solution directly to the grease-stained areas or dip a cloth into the mixture and apply it to the wall. Let the solution sit for about 5-10 minutes to loosen the grease.
Scrubbing Techniques
- Use the Right Tools: Employ a non-abrasive sponge or scrub brush for scrubbing. Avoid steel wool or harsh scrubbers that can damage paint or wall finishes.
- Scrub Gently: Work in small sections, using circular motions to lift the grease. For stubborn spots, apply a bit more cleaning solution and let it soak for a few extra minutes.
- Wipe and Rinse: After scrubbing, use a clean damp cloth to wipe away any residue. This step prevents soap buildup and leaves walls looking fresh. Rinse the cloth often to ensure cleanliness.
- Dry the Area: Finish by drying the walls with a microfiber cloth. This step prevents streaks and helps spot any missed areas.
By following these clear steps, you can easily restore the beauty of your kitchen walls and maintain a welcoming environment.
Tips for Prevention
Preventing kitchen wall grease involves adopting certain practices during cooking and maintaining your kitchen regularly. Implementing these tips can keep your walls clean and appealing.
Recommended Products

Simple Green Heavy-Duty Towels are 2x larger and 4x stronger than typical wipes

➼ MAKES YOUR OVEN/MICROWAVE LOOK LIKE BRAND NEW – Nothing looks better than clean fresh-smelling kitchen appliances. Our wipes clean your oven and microwave quickly and super effective until shiny-new. Be proud of your lovely kitchen!

Wipes out tough grease and grime, leaving no smeary residue
Best Practices for Cooking
- Use a splatter guard – This tool can significantly reduce oil splatters during frying or sautéing. Place it over your pans to catch any flying grease.
- Cook with lids on – Cover pots and pans while cooking. This minimizes steam and oil dispersion into the air, reducing wall grease accumulation.
- Opt for lower heat settings – Cooking at lower temperatures helps reduce sputtering and splattering. This practice prevents excess grease from escaping into the air.
- Ventilate properly – Turn on your kitchen exhaust fan or open windows to allow steam and smoke to escape. Good ventilation decreases the chances of grease settling on walls.
- Wipe spills immediately – Whenever food or oil splashes on the walls, use a microfiber cloth to clean it up right away. Quick action prevents grease from hardening.
Maintaining a Clean Kitchen
- Establish a cleaning routine – Schedule regular cleanings of your kitchen, focusing on walls, stovetops, and backsplashes. Setting a routine can catch grease before it builds up.
- Use degreasing wipes – Keep handy disposable wipes for quick clean-ups after cooking. Use them to easily clean spatters on walls, appliances, and counters.
- Choose oil-free cooking methods – Consider healthier cooking techniques, such as baking or steaming. These methods produce less grease compared to frying.
- Test cleaning solutions periodically – Regularly evaluate the effectiveness of different cleaning solutions. Trying new options can enhance your maintenance routine and keep surfaces fresh.
- Keep cooking utensils clean – Wash spatulas, spoons, and pans after use. Clean utensils help avoid grease transfer back onto walls.
By implementing best practices while cooking and maintaining kitchen cleanliness, you can significantly reduce grease build-up on your kitchen walls.
Conclusion
Cleaning kitchen wall grease doesn’t have to be a daunting task. With the right tools and techniques you can easily restore your kitchen’s charm. Regular maintenance and quick clean-ups will keep grease at bay and make your cooking space more inviting.
Remember to choose a cleaning solution that suits your needs and always use gentle scrubbing methods to protect your walls. By adopting some preventative measures while cooking you’ll not only save time but also enjoy a cleaner and safer kitchen environment.
So roll up your sleeves and get started. A fresh and inviting kitchen is just a few steps away!
Frequently Asked Questions
What causes grease buildup on kitchen walls?
Grease buildup on kitchen walls primarily comes from cooking activities like frying, sautéing, grilling, and boiling. These methods release oils and food particles that bond with wall surfaces, leading to unsightly stains over time.
How can I effectively clean greasy kitchen walls?
To clean greasy kitchen walls, gather necessary supplies like microfiber cloths, non-abrasive sponges, and a suitable cleaning solution (e.g., dish soap and water or vinegar and water). Apply the solution, let it sit, scrub gently, rinse, and dry the area thoroughly.
What tools do I need to clean kitchen wall grease?
Essential tools for cleaning kitchen wall grease include microfiber cloths, non-abrasive sponges, scrub brushes, spray bottles, a bucket for rinsing, and gloves. These items help ensure an effective and safe cleaning process.
How can I prevent grease from accumulating on my kitchen walls?
To prevent grease buildup, use a splatter guard, cook with lids on, maintain proper ventilation, and wipe spills immediately. Establishing a cleaning routine, using degreasing wipes, and choosing oil-free cooking methods can also help.
How often should I clean my kitchen walls?
It’s best to clean your kitchen walls at least once a month to prevent grease buildup. However, you may want to clean more frequently if you cook regularly or notice stains developing. Regular upkeep keeps your kitchen looking inviting.
