
Key Takeaways
- Regular Cleaning is Crucial: Maintaining a clean kitchen faucet head enhances water flow, hygiene, and the overall appearance of your kitchen.
- Effective Cleaning Solutions: Utilize white vinegar, baking soda, and mild dish soap to effectively remove grime and mineral deposits.
- Step-by-Step Process: Carefully remove the faucet head, soak it in a cleaning solution, scrub, rinse, and reattach to ensure thorough cleaning.
- Routine Maintenance Tips: Clean monthly, check the aerator regularly, and use vinegar to combat stubborn buildup for lasting cleanliness.
- Avoid Harsh Chemicals: Stick to mild cleaners to prevent scratching and damage to the faucet head.
- Inspect for Issues: Regularly check for leaks and replace worn parts to maintain optimal faucet performance.
Ever noticed how your kitchen faucet head can get a bit grimy? If you’ve seen unsightly buildup or reduced water flow, you’re not alone. Many people overlook this small but essential part of their kitchen, but keeping it clean can make a big difference.
Importance Of Cleaning A Kitchen Faucet Head
Cleaning a kitchen faucet head ensures optimal water flow and maintains overall kitchen hygiene. Grime buildup affects performance, leading to reduced water pressure and uneven spray patterns. Regular maintenance prevents these issues, keeping your faucet functional.
Cleaning helps eliminate harmful bacteria. When food residue lingers, it creates a breeding ground for germs. Poor hygiene can lead to contaminated water, posing health risks.
Cleaning also prolongs the lifespan of your faucet. Mineral deposits can corrode internal components, leading to costly repairs or replacements. A simple routine of cleaning keeps your faucet in good shape.
A clean faucet head enhances the kitchen’s appearance. Grimy fixtures make a kitchen look unkempt. Keeping it spotless adds to your kitchen’s overall aesthetics.
Cleaning your kitchen faucet head boosts water flow, improves hygiene, extends your faucet’s lifespan, and enhances your kitchen’s appearance.
Tools Needed For The Cleaning Process
Cleaning your kitchen faucet head requires a few essential tools. Gathering these tools in advance simplifies the process and ensures efficiency.
Recommended Products
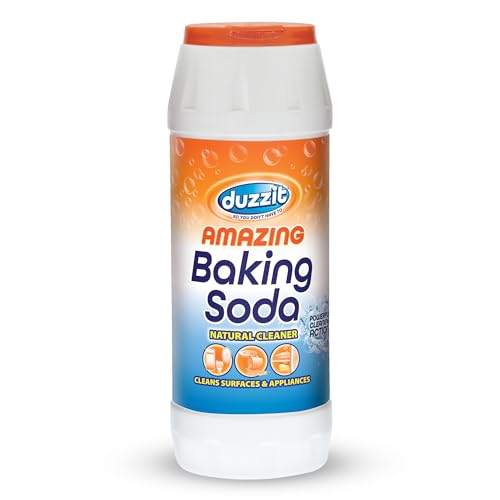
duzzit - amazing baking soda multi purpose household cleaner - 500g Item display volume: 1.0 centiliters Item display weight: 500.0 grams Number of items: 1 Unit count:...
Cleaning Solutions
- Vinegar: Use white vinegar for its acidity. It dissolves mineral deposits and grime effectively.
- Baking Soda: Combine baking soda with vinegar to create a powerful cleaning solution. This mixture helps tackle tough stains.
- Dish Soap: Opt for a mild dish soap. It removes grease and residual food particles easily.
- Water: Use warm water to dilute cleaning solutions and enhance their effectiveness.
Safety Equipment
- Gloves: Wear rubber gloves to protect your hands from harsh cleaning agents and grime.
- Safety Glasses: Use safety glasses if you’re working with strong cleaners to prevent irritation from splashes.
- Non-Slip Shoes: Choose non-slip shoes to avoid accidents, especially when handling water during the cleaning process.
Step-By-Step Guide On How To Clean A Kitchen Faucet Head
Cleaning your kitchen faucet head requires a few straightforward steps. Follow the guide below for effective results.
Recommended Products

Unclogging Showerhead Holes: This shower head cleaner tool provides an efficient and easy unclogging solution to help easily clear clogged shower holes and ensures uninterrupted waterflow

Shower Head Cleaner Tool : The small holes in shower heads are easily clogged and difficult to clean. Lumkew shower head cleaning brush is specially designed for this purpose, and it quickly unclogs the deposits that accumulate in the showerhead, restoring the strong waterflow

Deep Cleaning Made Easy: This Faucet Descaling Cap for Limescale Removal lets you fill it with descaler and attach it to your tap outlet for a thorough deep cleaning experience. Effectively dissolves stubborn buildup and keeps faucets clear
Removing The Faucet Head
- Turn Off Water Supply: Locate the shut-off valves under the sink and turn them clockwise to stop water flow.
- Detach the Faucet Head: Use pliers or a wrench to carefully unscrew the faucet head from the neck. Wrap a cloth around the neck to prevent scratching.
- Inspect for O-Rings: Check for O-rings or rubber gaskets. Remove any that come off easily.
Soaking The Faucet Head
- Prepare a Cleaning Solution: Mix equal parts of white vinegar and warm water in a bowl.
- Submerge the Faucet Head: Place the removed faucet head in the bowl. Allow it to soak for 30 minutes. This step loosens mineral deposits and grime.
- Optional Ingredients: For stubborn buildup, sprinkle baking soda on the faucet head before soaking.
Scrubbing And Rinsing
- Scrub with a Brush: After soaking, use an old toothbrush or a soft-bristled brush to scrub the faucet head. Focus on any crevices where debris collects.
- Rinse Thoroughly: Rinse the faucet head under warm running water to remove all debris and cleaning solutions. Ensure no residue remains.
- Check for Blockages: Inspect the aerator screen. If it’s clogged, you can remove and clean it separately.
Reattaching The Faucet Head
- Align the Faucet Head: Position the faucet head back onto the neck and screw it in place by hand.
- Tighten Gently: Use pliers to tighten the faucet head, applying minimal pressure to avoid damage.
- Turn On Water Supply: Open the shut-off valves under the sink and test the faucet for leaks and proper water flow.
Following these steps ensures a clean kitchen faucet head, improving function and appearance.
Tips For Maintaining A Clean Faucet Head
- Regular Cleaning: Clean the faucet head every month. This prevents buildup and keeps water flowing smoothly.
- Use Vinegar Solution: Soak a cloth in a mix of equal parts water and white vinegar. Wrap it around the faucet head. Let it sit for 15-20 minutes, then wipe it clean. Vinegar effectively removes mineral deposits.
- Check Aerator: Inspect the aerator every few months. Unscrew it and rinse off any debris. Soaking it in vinegar can help remove stubborn buildup.
- Avoid Harsh Chemicals: Steer clear of abrasive cleaners. They can scratch the finish and damage the faucet head. Stick to mild cleaners for best results.
- Dry After Use: Wipe down the faucet head after use. This prevents water spots and minimizes the chance of grime accumulation.
- Inspect for Leaks: Regularly check for leaks around the faucet head. Addressing leaks quickly can prevent water damage and maintains overall function.
- Maintain Water Quality: Use a water filter if your tap water contains high mineral content. This reduces deposits on the faucet head and keeps your water clean.
- Replace Worn Parts: Keep an eye on rubber washers and seals. Replace them when worn to maintain optimal performance and prevent leaks.
Following these tips keeps your kitchen faucet head clean and functional while contributing to a healthier kitchen environment.
Recommended Products

【NOTE: Measure Dimension before Buying】 Aerator Dimensions: 21x21x12.2mm 0.83x0.83x0.47 Inch, please measure your original aerator dimension before purchasing.

Package Contents: This package comes with 12 male faucet aerators in four sizes—16.5 mm, 18.5 mm, 21.5 mm, and 24 mm—to fit a variety of faucet diameters. Additionally, it includes 6 aerator keys in different sizes for easy installation and removal. Please note: To ensure a proper fit, kindly confirm your faucet's size before purchasing

【Upgraded 304 Stainless Steel】 Made from food-grade 304 stainless steel, this faucet aerator removal tool is rust-proof, corrosion-resistant, and built for long-lasting durability.
Conclusion
Keeping your kitchen faucet head clean is a simple yet impactful task that can make a world of difference. By regularly cleaning it you ensure better water flow and maintain a healthier kitchen environment. Plus it helps your faucet last longer and look great.
Don’t forget to incorporate those easy maintenance tips into your routine. A little effort goes a long way in preventing buildup and keeping your faucet in top shape. So grab those cleaning supplies and give your faucet head the care it deserves. You’ll be glad you did!
Frequently Asked Questions
Why is it important to clean the kitchen faucet head?
Cleaning the kitchen faucet head is essential for optimal water flow and hygiene. Grime buildup can lead to reduced water pressure and uneven spray patterns. Regular cleaning helps eliminate harmful bacteria and prolongs the faucet’s lifespan by preventing corrosion from mineral deposits.
How often should I clean my kitchen faucet head?
It’s recommended to clean your kitchen faucet head at least once a month. Regular cleaning prevents buildup of grime and mineral deposits, ensuring consistent water flow and maintaining overall hygiene in your kitchen.
What tools do I need to clean a kitchen faucet head?
To clean a kitchen faucet head, you’ll need white vinegar, baking soda, mild dish soap, warm water, a soft brush, and safety equipment like rubber gloves, safety glasses, and non-slip shoes to ensure a safe cleaning process.
How can I remove mineral deposits from the faucet head?
Soak the faucet head in a mixture of white vinegar and warm water to loosen mineral deposits. After soaking, scrub the faucet head with a soft brush, rinse thoroughly, and check the aerator screen for blockages.
What should I do if I notice a leak in my faucet head?
If you notice a leak, inspect the fittings and connections first. Ensure everything is tightened properly. If the leak persists, replace worn parts like rubber washers or consult a plumber to assess potential issues with the faucet.
