
Key Takeaways
- Understanding Grout: Grout enhances the appearance and hygiene of kitchen tiles, making regular cleaning crucial for aesthetics and health.
- Cleaning Importance: Regular grout cleaning prevents moisture accumulation, mold growth, and extends the lifespan of both grout and tiles.
- Essential Tools: Gather tools such as white vinegar, baking soda, a soft-bristled brush, and microfiber cloth for effective cleaning.
- Cleaning Process: Follow a systematic approach: prepare the area, apply a cleaning solution, scrub grout lines, and rinse and dry thoroughly.
- Preventive Measures: Implement regular maintenance like sweeping, immediate spill cleanup, and weekly mopping to minimize grime buildup.
- Sealants for Protection: Use protective sealants to guard against stains and moisture, reapplying them as recommended for optimal grout health.
Ever look down at your kitchen tiles and notice the grimy gaps between them? You’re not alone. Those little spaces can collect dirt and stains, making your kitchen less inviting.
Understanding Tile Grout
Grout fills the spaces between tiles, giving a finished look to your kitchen. Clean grout not only enhances aesthetics but also helps maintain hygiene.
Importance of Cleaning Grout
Cleaning grout is essential for several reasons. Grout absorbs moisture, which can lead to mold growth if not maintained. Regular cleaning prevents discoloration and extends the life of both the grout and tiles. Properly maintained grout keeps your kitchen looking fresh and appealing, enhancing your overall home environment.
Common Issues with Dirty Grout
Dirty grout can lead to various problems. Stains from spills, food particles, and dirt build up over time, creating an unhygienic surface. Mold and mildew growth occurs in damp areas, contributing to health risks. Cracked or crumbling grout can allow water to seep underneath tiles, causing damage to the subfloor. Pay attention to these issues to maintain your kitchen’s functionality and appearance.
Tools and Materials Needed
To effectively clean between kitchen tiles, gather the following tools and materials.
Recommended Products

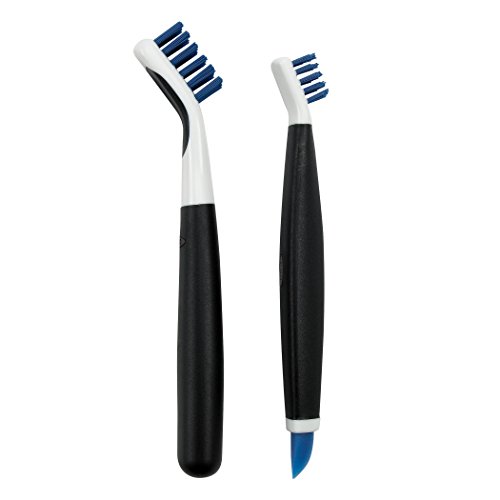
Set includes: Large Brush and Small Brush with Wiper Blade

MR.SIGA grout cleaner brush set contains: 1 "V" shape grout edge brush, 1 deep cleaning brush, 1 detail cleaning brush with silicone scraper, it's a must-have grout scrub brush set for your household cleaning.

【Save Time And Effort】 Upgraded Electric Spin Scrubber Cordless gets rid of the troubles caused by traditional cleaning tools. it can be used anywhere you want. This spin scrubber is super lightweight and very easy to pick up and use to clean surfaces without getting tired and drastically reduce your work time from 1 hour to 30 minutes.
Cleaning Solutions
- Vinegar: Use white vinegar for its natural acidity. It helps dissolve grime and stains. Mix equal parts vinegar and water in a spray bottle.
- Baking Soda: Utilize baking soda as a gentle abrasive. Make a paste with water for tough stains.
- Commercial Grout Cleaner: Look for a commercial product designed specifically for grout. Ensure it’s safe for your tile type before use.
Scrubbing Tools
- Soft-Bristled Brush: Choose a soft-bristled brush to avoid scratching tiles. A toothbrush works well for tight spaces.
- Scrubbing Pad: Opt for a non-abrasive scrubbing pad for tougher spots. This helps lift dirt without damaging the grout.
- Microfiber Cloth: Use a microfiber cloth for drying and polishing after cleaning. It captures dust and moisture effectively.
- Grout Removal Tool: Consider a grout removal tool if you need to tackle deep-set dirt. It allows for precise cleaning in narrow gaps.
Step-by-Step Cleaning Process
Cleaning between kitchen tiles requires a straightforward process. Follow these steps for optimal results.
Recommended Products

V Shape Design: V grout cleaner brush fits precisely into each groove, and reaches deeply into narrow joints. The three-row design also cleaning the area next to the grout

Ideal for cleaning grout, shower door tracks, sink fixtures and more
Set includes: large brush and small brush with wiper blade
Preparing the Area
Clear the area of any items. Move appliances, such as toasters or blenders, away from the tiles. Sweep or vacuum the floor to remove loose dirt and debris. This preparation reduces the risk of spreading dirt during the cleaning process.
Applying the Cleaning Solution
Choose your cleaning solution based on tile type. For ceramic tiles, mix equal parts of white vinegar and water in a spray bottle. For tougher stains, use commercial grout cleaner. Spray the solution generously onto the grout lines, ensuring the area is thoroughly saturated. Let it sit for about 10-15 minutes. This dwell time allows the solution to break down stains and dirt effectively.
Scrubbing the Grout
Grab a soft-bristled brush or a non-abrasive scrubbing pad. With gentle pressure, scrub the grout lines in circular motions. Focus on stained areas, applying extra pressure as needed. For deep-set grime, consider using a grout removal tool. This tool can help reach areas that a brush might miss. Ensure you scrub every line to revitalize the grout’s appearance.
Rinsing and Drying
After scrubbing, rinse the area with clean water. Use a damp microfiber cloth to wipe away any remaining cleaning solution. Ensure the grout lines don’t retain soap residue. Finally, dry the surface with another clean cloth or towel. This step prevents water accumulation, reducing the risk of mold growth.
By following these steps, you’ll effectively clean the spaces between your kitchen tiles, enhancing both the appearance and hygiene of your kitchen.
Preventive Measures
Preventive measures ensure your kitchen tiles remain clean and attractive. By adopting regular maintenance practices and using protective products, you minimize dirt buildup and enhance the longevity of your tiles and grout.
Recommended Products

Keep a clean, NATURAL APPEARANCE and improve the DURABILITY of your grout in your shower, kitchen, bathroom, and tile flooring

NATURAL APPEARANCE WITH DURABILITY: Revolutionary Breathe Easy Stain Block Technology. Tile grout sealer maintains the natural look of your grout while enhancing its durability in your shower, kitchen, bathroom, and tile flooring.

SEAL SMARTER. Breathe Easy Stain Block Technology. Powerful Professional Formula Without Toxic Fumes. Protect Grout, Marble, Ceramic, Mosaic, Stone, Granite & More
Regular Maintenance
Regular maintenance helps keep grout lines clean and free from grime. Follow these practices:
- Sweep or Vacuum: Use a broom or vacuum to remove debris at least once a week. This action prevents dirt from settling into the grout.
- Spot Clean Spills Immediately: Wipe up spills right away. This quick action prevents stains from setting, reducing the need for deep cleaning later.
- Mop with Mild Solution: Mop your tiles weekly with a mild cleaning solution, diluted vinegar, or a specialized floor cleaner. This routine cleans surface grime and keeps grout lines fresh.
Protective Sealants
Using protective sealants can guard your grout against stains and moisture. Consider these steps:
- Choose the Right Sealant: Look for sealants designed specifically for grout. Ensure compatibility with your tile type.
- Apply After Cleaning: Clean the grout thoroughly before applying sealant. This ensures maximum adhesion and effectiveness.
- Reapply as Needed: Depending on the manufacturer’s instructions, reapply sealant every 6 to 12 months. This proactive measure maintains the integrity of your grout.
By implementing regular maintenance and using protective sealants, you can keep the gaps between your kitchen tiles clean and prevent future buildup.
Conclusion
Keeping the spaces between your kitchen tiles clean is more than just a chore; it’s a way to enhance your kitchen’s overall look and hygiene. By regularly maintaining your grout and using the right cleaning techniques, you can prevent stains and mold from taking hold.
Don’t forget to incorporate those simple preventive measures into your routine. A little effort goes a long way in preserving the beauty and functionality of your tiles. With these tips in hand, you’re well on your way to enjoying a sparkling clean kitchen that you can be proud of. Happy cleaning!
Frequently Asked Questions
How can I clean the grout between my kitchen tiles?
To clean grout, start by removing loose dirt with a broom or vacuum. Apply a cleaning solution such as white vinegar or baking soda, letting it sit for 10-15 minutes. Scrub the grout lines gently with a soft-bristled brush or non-abrasive scrub pad, focusing on stained areas. Rinse with clean water and dry the area to prevent mold.
What tools do I need for cleaning dirty grout?
Essential tools include a soft-bristled brush, non-abrasive scrubbing pad, microfiber cloth, and a grout removal tool for tough stains. You may also need cleaning solutions like white vinegar, baking soda, or commercial grout cleaners, depending on your tile type.
Why is it important to clean grout regularly?
Regular cleaning of grout prevents mold, mildew, and stains, preserving the kitchen’s appearance and hygiene. Clean grout also extends the lifespan of both grout and tiles, preventing potential damage and costly repairs.
How can I prevent stains from accumulating on my kitchen tiles?
To prevent stains, sweep or vacuum weekly, clean spills immediately, and mop with a mild cleaning solution. Additionally, consider applying a protective sealant to your grout every 6 to 12 months to guard against moisture and stains.
What are the common issues associated with dirty grout?
Common issues include unsightly stains from food and spills, mold and mildew growth, and potential water damage due to cracked or crumbling grout. Dirty grout can diminish the overall look of your kitchen while creating hygiene concerns.
