
Key Takeaways
- Regular Cleaning Essential: Clean your KitchenAid ice maker regularly to prevent mineral buildup and ensure safe, high-quality ice production.
- Use Appropriate Supplies: Gather necessary cleaning supplies such as soft cloths, vinegar, and brushes to effectively clean the ice maker’s interior.
- Follow Step-by-Step Guide: Adhere to a systematic cleaning process: turn off the appliance, remove old ice, clean components, rinse, and dry before reassembly.
- Troubleshoot Common Issues: If your ice maker isn’t functioning post-cleaning, check the power supply, water connections, and temperature settings for optimal performance.
- Prevent Odors: Address unpleasant odors by cleaning old ice, checking water filters, and ensuring proper sealing of the ice maker door. Regular maintenance is key to a fresh experience.
Is your KitchenAid ice maker not performing as it should? You’re not alone. Many people face the same issue, often due to a buildup of mineral deposits and grime. If you’ve noticed cloudy ice or a funky smell, it’s time for a good cleaning.
Overview of KitchenAid Ice Maker
KitchenAid ice makers offer reliable performance for producing high-quality ice. They typically feature models that fit under counters, providing convenience and efficiency. Ice makers create clear, fresh-tasting ice, essential for beverages and events.
Common problems arise due to mineral deposits and grime buildup. These issues lead to signs like cloudy ice, unpleasant odors, and reduced ice production. Regular cleaning prevents such problems and extends the lifespan of your ice maker.
Many KitchenAid ice makers come with a self-cleaning function. This feature simplifies the cleaning process, but periodic manual cleaning is still necessary. Using the right cleaning products ensures optimal performance and prevents damage.
Familiarize yourself with the specific model’s manual. Each model may have unique requirements and features. Understanding your ice maker’s settings makes cleaning more efficient.
When cleaning, gather your supplies beforehand. Use a soft cloth, a mixture of vinegar and water, and a soft-bristle brush for thorough cleaning. Regular maintenance creates a better ice experience and keeps your appliance running smoothly.
Importance of Regular Cleaning
Regular cleaning of your KitchenAid ice maker enhances both safety and efficiency. Neglecting this task can lead to health risks and performance issues.
Recommended Products

8 Uses Values-Size Bottle: Compare to a 4 pack from other brands! With recommended 4oz per cleaning, you're set for a year or more

OPAL ICE MAKER CEANING KIT - These ice maker cleaning kit supplies were specially made for the Opal nugget ice maker, giving you everything you need to keep it clean

Works with all Ice Makers and Machines: Designed for Countertop, Portable, and Commercial Icemaker. Compatible with top brands including Ice-o-matic, Frigidaire, Kitchenaid, Scottsman, Manitowac, Hoshizaki, Silonn, Euhomy, GE Profile 2.0, Whirlpool 4396808, Jenn Air, Uline, Gevi, and more. (Not for Built in Refigerator Ice Makers)
Health Benefits
Cleaning prevents bacteria and mold buildup in the ice maker. Contaminated ice poses direct health risks when consumed. Regular maintenance ensures the ice you use in drinks, smoothies, and food remains clean and safe. Performing routine cleaning keeps your family healthy and your ice tasting fresh.
Performance Improvement
Regular cleaning optimizes the ice maker’s performance. mineral deposits and grime can hinder functionality, leading to cloudy ice or slower production times. Consistent maintenance keeps the ice maker operating efficiently, ensuring clear, high-quality ice in your beverages. It also extends the lifespan of your appliance, saving you money on repairs or replacements. You can enjoy your ice maker’s convenience without unexpected interruptions.
Step-by-Step Guide on How to Clean KitchenAid Ice Maker
Cleaning your KitchenAid ice maker is essential for maintaining its performance and ensuring clean, quality ice. Follow these clear steps to get your ice maker back in working order.
Recommended Products

Ice Machine Descaler: Use our 2 pack ice machine cleaner and descaler in your ice maker of choice. Our universal ice maker cleaning fluid restores ice machines like new. Manufactured in the USA.
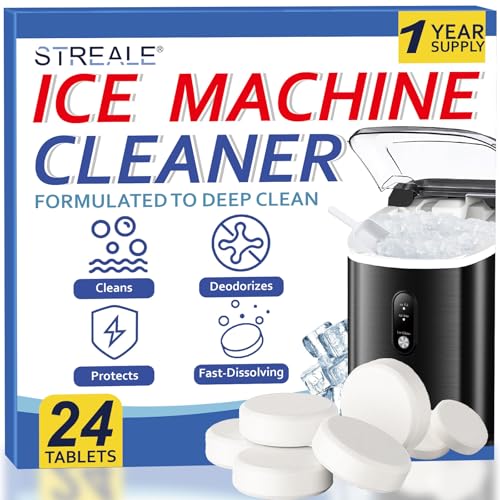
【Works with all Ice Makers and Machines】Designed for countertop, portable, and commercial icemaker. compatible with major brands.(not for built in refigerator ice makers)

Metal and nickel safe. Our countertop ice machine cleaner tablets descale buildup while remaining non-corrosive to nickel-plated, stainless steel, and aluminum components in portable, home, or commercial machines, with or without a clean cycle.
Gather Necessary Supplies
Collect the following items before starting the cleaning process:
- Soft cloth or sponge
- Vinegar or a designated ice maker cleaner
- Warm water
- A bucket or towel to catch water
- A small brush for hard-to-reach areas
Turn Off and Unplug the Ice Maker
Start by turning off your ice maker. Locate the power switch or unplug it from the electrical outlet. Ensuring that the appliance is off prevents any accidental starts during cleaning.
Remove Any Remaining Ice
Open the ice maker’s bin and take out any remaining ice. Dispose of it properly. This allows you to clean the interior thoroughly without obstruction and removes any old ice that may have absorbed odors.
Clean the Interior Components
Use a mixture of vinegar and warm water to clean the interior surfaces. Dampen your cloth or sponge in the solution and wipe down all accessible areas, including the bin and the ice tray. For tougher spots, use a small brush to scrub away mineral buildup or grime.
Rinse and Dry
After cleaning, rinse all components with warm water. Use a clean cloth to dry the interior thoroughly. This step prevents water from mixing with new ice and maintains a clean environment for ice production.
Reassemble and Plug In
Once everything is dry, reassemble all parts of the ice maker. Plug the appliance back into the outlet or turn it on. Allow it to complete a full ice cycle before using the first batch of ice. This ensures optimal performance and quality.
Troubleshooting Common Issues
You may encounter a few common issues with your KitchenAid ice maker, even after cleaning. Addressing these problems promptly ensures optimal performance and quality ice production.
Recommended Products
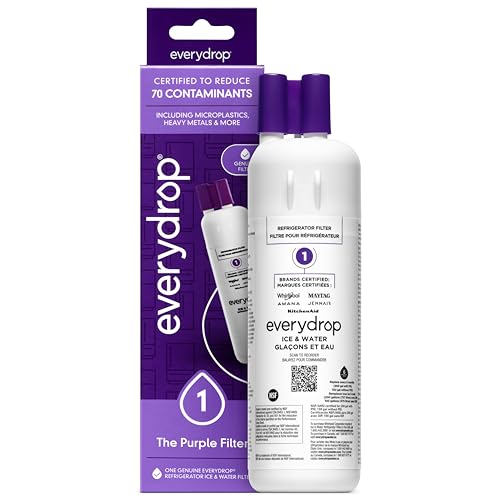
"Certified* to reduce 70 potentially harmful contaminants such as microplastics, heavy metals, pesticides, and pharmaceuticals, everydrop water filters raise the standards for crisp, clean, and refreshing water and ice. *Filters certified by NSF International under NSF/ANSI Standards 42, 53, and 401 to reduce specific contaminants. See everydropwater.com for details."

"Certified* to reduce 70 potentially harmful contaminants such as microplastics, heavy metals, pesticides, and pharmaceuticals, everydrop water filters raise the standards for crisp, clean, and refreshing water and ice. *Filters certified by NSF International under NSF/ANSI Standards 42, 53, and 401 to reduce specific contaminants. See everydropwater.com for details."

Compatible with KitchenAid refrigerators
Ice Maker Not Working After Cleaning
If your ice maker isn’t working after cleaning, check the following:
- Power Supply: Ensure the ice maker is plugged in and that the outlet is functioning. Try resetting the circuit breaker if necessary.
- Water Supply: Confirm that your water supply line is connected and turned on. Inspect for kinks or blockages that might restrict water flow.
- Temperature Settings: Verify that the freezer temperature is set between 0°F and 5°F. Higher temperatures can affect ice production.
- Reset Function: Look for a reset button or function on your specific model. This can often resolve operational issues.
- Sensor Blockage: Check for any ice buildup or debris around the sensors, which might interfere with the ice-making process.
By following these steps, you can troubleshoot issues effectively.
Unpleasant Odors
Unpleasant odors from your ice maker may stem from several factors. Here’s how to tackle this problem:
- Previous Ice Buildup: If you didn’t clean the ice maker regularly, old ice may harbor bacteria or mold. Dispose of all old ice and perform a thorough cleaning with a vinegar-water solution.
- Water Source: Sometimes odors come from the water supply. Ensure that your water filter is clean and replace it if it hasn’t been changed in six months.
- Food Residue: Spills or food particles in or near the ice maker can cause odors. Check the surrounding area and clean any spills or debris.
- Improper Seal: Inspect the ice maker door for proper sealing. Gaps can allow warm air inside, leading to odors. Replace any worn or damaged seals.
- Regular Maintenance: Perform regular cleanings to keep your ice maker fresh. Clean at least once every six months for optimal results.
Addressing these common issues can help maintain a functional and pleasant ice maker experience.
Conclusion
Keeping your KitchenAid ice maker clean is essential for enjoying fresh and clear ice. By regularly maintaining it you not only enhance its performance but also ensure the safety of the ice you serve to your family and friends.
Remember to follow the cleaning steps and use the right supplies to tackle any grime or mineral buildup. A little effort goes a long way in extending the lifespan of your appliance and preventing unexpected issues.
With just a bit of routine care you can keep your ice maker running smoothly and enjoy the convenience it brings to your kitchen. So go ahead and make cleaning a part of your regular home maintenance routine, and you’ll always have the best ice at your fingertips.
Frequently Asked Questions
What are the common problems with KitchenAid ice makers?
Many users face issues like cloudy ice, unpleasant odors, and slow production. These problems often stem from mineral deposits and grime buildup. Regular cleaning is essential to avoid these issues and ensure optimal performance.
How can I tell if my KitchenAid ice maker needs cleaning?
Signs that your ice maker needs cleaning include cloudy ice, bad smells, and slower ice production. Regular maintenance ensures that the ice produced is clear, fresh-tasting, and safe to use.
How often should I clean my KitchenAid ice maker?
It’s advisable to clean your KitchenAid ice maker at least every six months or more frequently if you notice signs of dirt or buildup. Regular cleaning helps maintain performance and prevents health risks.
What supplies do I need to clean my KitchenAid ice maker?
To clean your ice maker, gather a soft cloth, a vinegar-water mixture or a designated cleaner, warm water, and a small brush. These supplies will help you effectively clean the unit and maintain its performance.
Does my KitchenAid ice maker have a self-cleaning function?
Many KitchenAid ice makers feature a self-cleaning function, but periodic manual cleaning is still necessary. Always refer to your specific model’s manual for instructions and cleaning requirements.
What steps should I follow to clean my KitchenAid ice maker?
Turn off and unplug the ice maker, remove any leftover ice, clean interior parts with a vinegar-water solution, rinse and dry all components, then reassemble the unit and allow it to complete a full ice cycle.
How can I troubleshoot if my ice maker isn’t working?
If your ice maker isn’t producing ice, check the power supply, water supply, and temperature settings. Also, inspect for any sensor blockage and try resetting the unit if necessary.
How can I eliminate unpleasant odors from my KitchenAid ice maker?
To remove unpleasant odors, dispose of old ice, ensure you have a clean water supply, check for food residue, inspect seals, and perform regular maintenance to keep the ice maker clean and fresh.
