
Ever wondered how to keep your CPAP water container clean and safe for use? Picture this: you wake up feeling groggy, only to realize that your CPAP machine’s water container needs a good cleaning. How do you ensure it’s free from germs and ready for another night of restful sleep?
In this article, we’ll show you the simple steps to effectively clean your CPAP water container. By following these easy-to-implement tips, you’ll not only maintain the hygiene of your equipment but also promote better respiratory health. Say goodbye to concerns about bacteria buildup and hello to a fresh, sanitized CPAP experience every time.
Key Takeaways
- Understanding the role of the CPAP water container in maintaining optimal therapy conditions is crucial for promoting better respiratory health.
- Consistency is key when it comes to cleaning your CPAP water container; aim to clean it at least once a week to ensure hygienic conditions.
- Daily cleaning habits such as emptying, rinsing, and air drying the water container are essential for maintaining optimal hygiene levels.
- Weekly deep cleaning processes involving disassembling, washing with mild soap, rinsing thoroughly, and sanitizing if necessary are critical for thorough sanitation.
- Best practices for daily maintenance include regular emptying, rinsing with warm water and mild soap, thorough drying before refilling, and checking for signs of contamination.
- Signs that indicate your CPAP water container may need replacement include visible wear and tear, persistent odors, discoloration indicating mold or bacterial growth, and reduced effectiveness of the CPAP machine despite proper maintenance.
Understanding CPAP Machines and Water Containers
What Is a CPAP Machine?
A CPAP (Continuous Positive Airway Pressure) machine is a medical device commonly used to treat sleep apnea. It delivers a constant flow of air pressure through a mask worn over the nose or mouth while you sleep. This airflow helps keep your airways open, preventing pauses in breathing that characterize sleep apnea. By ensuring a steady stream of air, the CPAP machine promotes uninterrupted breathing patterns throughout the night.
Importance of the Water Container
The water container in your CPAP machine serves a crucial role in maintaining optimal therapy conditions. It is responsible for adding moisture to the pressurized air delivered by the device, preventing dryness and irritation in your airways during use. Proper hydration of the air can reduce discomfort, such as nasal congestion or sore throat, improving overall comfort and compliance with CPAP therapy.
By understanding how your CPAP machine functions and recognizing the significance of its water container, you can better appreciate the impact these components have on your sleep quality and respiratory health. Regular cleaning of the water container is essential to ensure hygienic conditions and effective therapy outcomes.
Preparing to Clean Your CPAP Water Container
Recommended Products

CPAP Tube Cleaning kit: Keep your CPAP machine clean and in optimal working condition with our Brush Diameter 15mm 19mm designed specifically for CPAP tube cleaning. This brush is an essential tool for maintaining a healthy and CPAP therapy experience.

EFFORTLESS CPAP CLEANER IN MINUTES – Mars Wellness CPAP cleaning tablets make maintaining your CPAP equipment simple and fast. Drop one tablet into warm water, submerge your CPAP mask cushion, tubing, or humidifier chamber, and rinse – no scrubbing, no harsh chemicals, no complicated routines. The perfect cpap cleaning kit for daily use at home or on the go.
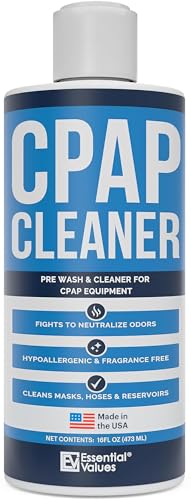
Effectively Clean: Our 16 fl oz CPAP Cleaner is a perfectly safe solution to neutralize and eliminate stinky odors from CPAP/PAP equipment. Works excellent for all models and equipment, including masks, tubes, reservoirs, and more!
Gather Necessary Materials
To begin cleaning your CPAP water container, you’ll need a few essential items. Make sure you have mild dish soap or specific CPAP mask cleaning solution, warm water, a soft cloth or sponge, and a clean towel. These materials are crucial for effectively removing any residue and bacteria buildup in your water container.
Timing Your Cleaning Routine
When it comes to cleaning your CPAP water container, consistency is key. Aim to clean the container at least once a week to maintain optimal hygiene levels. By establishing a regular cleaning routine, you ensure that your CPAP therapy remains effective and free from contaminants that could affect your respiratory health. Set a specific day each week as your designated cleaning day to create a habit that becomes second nature.
Step-by-Step Guide to Cleaning Your CPAP Water Container
Recommended Products

Created by a Respiratory Therapist: Extra-thick 6.9-foot CPAP hose cleaning brush with soft bristles reaches deep inside standard 19 mm and SlimLine 15 mm CPAP tubing for thorough cleaning while helping protect your equipment.

Created by a Respiratory Therapist: Extra-thick 6.9-foot CPAP hose cleaning brush with soft bristles reaches deep inside standard 19 mm and SlimLine 15 mm CPAP tubing for thorough cleaning while helping protect your equipment.

Bottle cleaning brushes with multiple usage includes 7.9-12.5 inches straw tube cleaning lab brushes, 16 inches long handle beer bottle brush, 14 inches sports water bottle brush, 10 inches multifunction sponge brush and 4.3 inches spout cleaning brush; You can hang them on hook for drying and storage.
Daily Cleaning Tips
To maintain optimal hygiene levels, it’s important to incorporate daily cleaning habits for your CPAP water container. Here’s how you can efficiently clean it on a daily basis:
- Empty and Rinse: Start by emptying any remaining water from the container every morning. Rinse it thoroughly with warm water to remove any residue or impurities.
- Air Dry: After rinsing, allow the water container to air dry completely before refilling it. This helps prevent the growth of mold or bacteria.
- Inspect Regularly: Take a quick look at the water container each day for any signs of buildup or discoloration. Promptly addressing these issues can prevent contamination.
Weekly Deep Cleaning Process
In addition to daily maintenance, a weekly deep cleaning process is essential to ensure thorough sanitation of your CPAP water container. Follow these steps once a week for a more intensive clean:
- Disassemble Components: Disassemble the water container according to the manufacturer’s instructions. Separate the different parts for a comprehensive cleaning process.
- Wash with Mild Soap: Use mild dish soap and warm water to wash all components of the CPAP water container thoroughly. Pay close attention to crevices where dirt and grime may accumulate.
- Rinse and Dry: After washing, rinse each part meticulously with clean water to remove any soap residue. Allow all components to air dry completely before reassembling them.
- Sanitize if Necessary: If recommended by your CPAP machine manual or healthcare provider, consider sanitizing the water container using appropriate methods like white vinegar solutions or specialized CPAP equipment cleaners.
By incorporating these daily cleaning tips and weekly deep cleaning processes into your routine, you can ensure that your CPAP water container remains free of contaminants, promoting better sleep quality and overall respiratory health.
Maintaining CPAP Water Container Hygiene
Recommended Products


Official 3B Medical OEM Replacement (Model LG34510) Engineered for a precise, leak‑free fit with all Luna G3 CPAP, APAP, and BiPAP devices. Direct replacement for the original chamber included with the machine.

【Perfect Fit for AirSense 10】Engineered to seamlessly replace the original chamber, this humidifier tub installs in seconds with a simple horizontal slide—no pressing needed. Enjoy perfect compatibility and reliable performance all night long.
Best Practices for Daily Maintenance
To keep your CPAP water container in optimal condition, it’s crucial to follow a daily maintenance routine. Here are some best practices to ensure the cleanliness of your CPAP water container:
- Emptying: Each morning, empty any remaining water from the container. Stagnant water can promote bacterial growth, so starting with a fresh fill each night is essential.
- Rinsing: After emptying the container, rinse it with warm water and mild soap. This helps remove any residue or buildup that may have accumulated during use.
- Drying: Allow the container to air dry completely before refilling it for the night. Ensuring it’s thoroughly dry helps prevent mold growth and keeps your equipment hygienic.
- Checking for Contamination: Regularly inspect your water container for any signs of contamination, such as discoloration or unusual odors. If you notice anything suspicious, consider deep cleaning or replacing the container.
By incorporating these simple steps into your daily routine, you can maintain a clean CPAP water container and promote better sleep quality.
Signs Your Water Container Needs Replacement
While proper maintenance can prolong the life of your CPAP water container, there are certain signs that indicate it may be time for a replacement:
- Visible Wear and Tear: Check for cracks, scratches, or other physical damage on the container itself. These issues can compromise its integrity and lead to leaks.
- Persistent Smells: If despite regular cleaning you notice persistent odors coming from the water container even after drying thoroughly, it may be harboring bacteria that cleaning alone cannot eliminate.
- Discoloration: Discoloration inside the water container could indicate mold or bacterial growth that is difficult to remove entirely through standard cleaning methods.
- Reduced Effectiveness: If you find that despite following proper maintenance procedures, your CPAP machine is not functioning as effectively as before, consider replacing the water container as part of troubleshooting potential issues.
Being aware of these signs allows you to proactively address any concerns related to your CPAP water container and ensure continued effectiveness in managing sleep apnea symptoms.
Conclusion
You’ve learned the essential steps to keep your CPAP water container clean for better sleep and respiratory health. By following a daily routine of emptying, rinsing, and air-drying, you can prevent mold and bacteria buildup. Remember to deep clean weekly with mild soap to maintain hygiene. Keep an eye out for signs like wear, odors, or discoloration that signal it’s time for a replacement. With these practices, you’ll ensure your CPAP water container remains effective in managing sleep apnea symptoms. Happy cleaning!
Frequently Asked Questions
Why is it important to clean my CPAP water container regularly?
Regular cleaning of your CPAP water container is crucial to prevent mold and bacteria growth, ensuring optimal sleep and respiratory health.
What is the daily cleaning routine for a CPAP water container?
Daily cleaning involves emptying the container, rinsing it with warm water, and allowing it to air dry completely to prevent bacterial contamination.
How often should I deep clean my CPAP water container?
It is recommended to deep clean your CPAP water container on a weekly basis. This involves disassembling the components, washing with mild soap, rinsing thoroughly, and sanitizing if necessary.
What are the signs that indicate I need to replace my CPAP water container?
Signs that you need a replacement include wear and tear, persistent odors, discoloration of the container, and reduced effectiveness in managing sleep apnea symptoms.
