
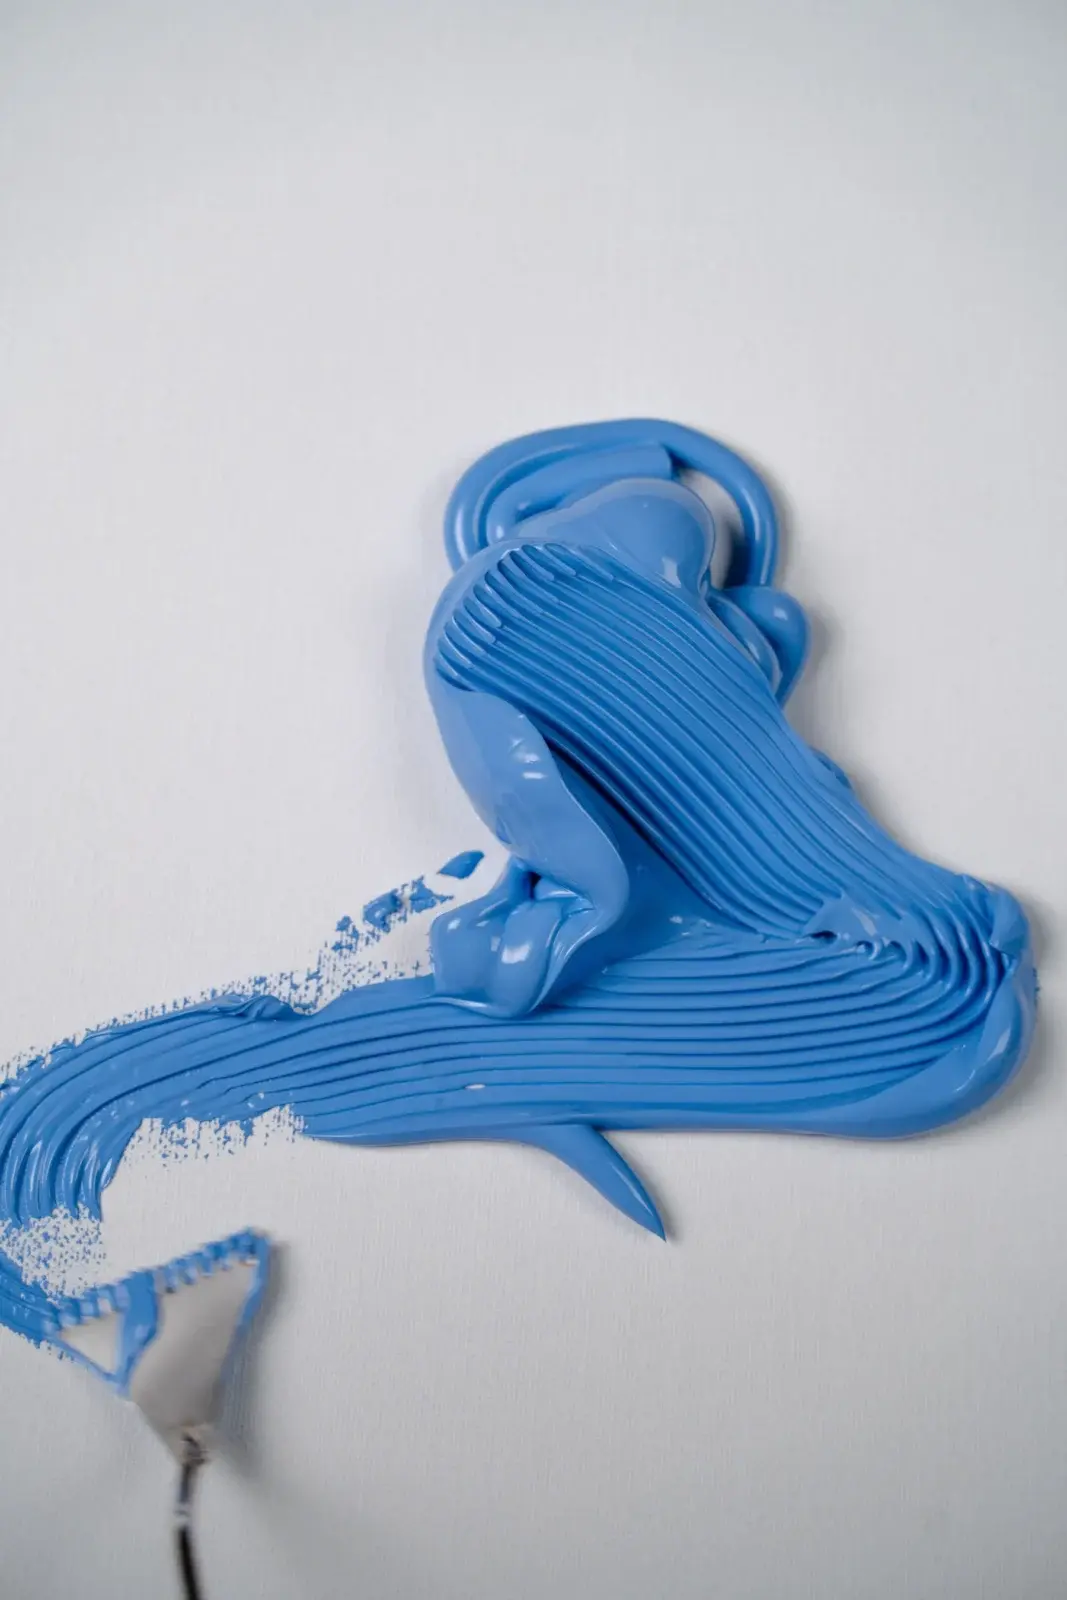
Acrylic texture mediums thicken paint so it holds peaks and knife marks. You do not need a shelf full of them. A heavy gel or modeling paste and a simple metal palette knife cover most beginner texture work.
Mediums in plain language
- Heavy gel (gloss or matte): thickens paint, keeps brush or knife peaks, dries clear or translucent depending on brand.
- Modeling / molding paste: opaque, white, good for building relief you will paint over once dry.
- Light molding paste: similar but lighter weight; useful on larger areas.
Mix medium into paint on the palette, or apply paste to the canvas first, let it dry, then paint over it. Follow the jar label for maximum thickness; very thick paste can crack if applied in deep unsupported mounds.
Palette knife basics
Use the flat of the knife to spread, the edge to cut lines, and the tip for small accents. Wipe the knife between colors. Soft color mixes happen on the canvas when two loaded edges meet; muddy mixes happen when you scrub.
Knives shine for geometric blocks, scraped skies, and raised floral petals. They are less ideal for tiny details; keep a small brush nearby.
Practical tips
- Texture catches light; place thicker marks near your focal area.
- Let thick passages cure fully before varnishing (often days, not hours).
- Do not put unknown household fillers into paint if you care about longevity.
Combine texture with a clear abstract plan from our composition basics guide. Metallic accents are covered carefully in gold leaf with acrylic basics.
Scraping and carving
While a gel-rich passage is still soft, drag the knife edge to carve linear marks into the paint. Those carved lines catch light differently than piled peaks. Wipe the knife clean between pulls so you are cutting, not smearing mud across the surface.
Materials
- Heavy gel and/or modeling paste
- Metal palette knife (offset knife is comfortable for many beginners)
- Acrylic colors; expect thicker passages to dry slower
Safe thickness habits
Follow product labels. Very deep unsupported mounds can crack. Build relief in stages if you want dramatic height. Let thick areas cure before aggressive handling or varnish.
Knife vocabulary
- Spread with the flat
- Cut lines with the edge
- Spot accents with the tip
- Scrape back to reveal undercolors
Wipe between colors. Soft meetings of two loaded edges can be beautiful; scrubbing makes mud.
Project ideas
- Geometric blocks with scraped skies
- Raised floral petals over a flat acrylic ground
- Abstract focal ridges paired with quiet stained fields
Metallic leaf accents on textured grounds are covered carefully in gold leaf basics.
Combining knives with brushes
Many paintings benefit from both. Use knives for large structural slabs, then switch to brushes for smaller adjustments. Trying to letter-detail with a knife frustrates beginners; trying to cover a large abstract field with a tiny round wastes time.
Texture catches raking light. If you photograph your work, try a side light to see whether texture is helping the focal area or creating accidental hotspots in the corners. Sanding cured paste lightly can tame overly sharp ridges before final color.
Clean knives as carefully as brushes. Dried acrylic on the blade changes how paint releases and can scratch lower layers when you scrape.
Session planning
Work in timed sessions. A thirty-minute block for blocking shapes and a later block for edges keeps decisions clearer than a single exhausted evening. Photograph the painting in daylight at the end of each session so you can judge values without wet-paint optimism.
Keep a paper towel diary swatch of key mixes with a one-line note (“crest turquoise”, “far hill”). Acrylic mix memory fades quickly once piles skin over.
Return to this guide after one practice canvas and note which step failed first: drawing, value, color, or edges. Fix that step on the next canvas instead of changing every variable at once.
Medium choices beyond the first jar
Gloss heavy gel keeps colors looking juicy and deep; matte gel reduces shine for a flatter contemporary surface. Modeling paste is opaque and ideal when you plan to paint over relief. Light molding paste builds texture with less weight on large canvases.
Do not mix random household thickeners into acrylics if you care about longevity. Stick to products designed for acrylic painting. Experimental house materials can discolor, crack or remain water-sensitive.
Texture should have a job: lead the eye, echo a shape family, or create focal light catch. Texture applied uniformly like frosting rarely helps. Vary scale — larger ridges near the focal area, quieter tooth elsewhere.
Dry time discipline matters. Stacking color over uncured paste can wrinkle or drag. When in doubt, wait overnight on thick passages.
Putting it into a weekly practice
Choose one small canvas size and repeat the same exercise three times in one week rather than inventing a new subject every session. Repetition reveals which mistakes are habits. Keep notes on drying time in your room, which mixes skinned too fast, and which edges looked best in a daytime photo.
Share progress with yourself by lining up the three attempts side by side. The middle attempt is often where understanding appears: not yet polished, but clearer than the first. Use the third attempt to apply only one improvement goal, such as cleaner edges or better value range.
When a painting fails, scrape or gesso over it and reuse the panel for drills. Failure panels are cheaper teachers than unused premium canvases that intimidate you into stillness. Momentum matters more than preciousness while skills are forming.
Finally, connect technique pages to subject hubs so practice has a destination. A blending drill should lead to a finished small landscape; a dry-brush drill should lead to a small animal study. Technique without a next painting becomes abstract advice that evaporates.
Troubleshooting texture passages
If paste cracks, it was likely applied too thickly for the formula or flexed before cure. Sand carefully after full cure and re-layer thinner. If knife marks look greasy or refuse to hold peaks, the mixture may be too fluid — add gel rather than more water. If undercolors muddy when you scrape, wait longer or scrape with a lighter hand.
For beginners, limit yourself to one texture medium for the first month. Learning heavy gel thoroughly beats owning five jars you mix by guesswork. Pair gel with a simple geometric composition so you can see how light hits ridges without also fighting complex drawing.
Clean tools immediately. Dried acrylic on a knife edge changes release and can gouge. Keep a wipe jar and a final soap wash in your closing ritual alongside brush care.
\nStudio habits that protect texture work
Set a single measurable goal before each session, such as “softer joins,” “stronger darks,” or “fewer corrective scrubs.” Goals that try to fix everything produce scattered attention. Write the goal on painter tape at the easel edge.
Use inexpensive panels for drills and reserve better canvases for attempts that apply a drill successfully. This separation reduces fear and increases reps. Track reps with hash marks on a calendar; skill in acrylic handling is closer to deliberate practice than to inspiration hunting.
When stuck, copy a five-minute passage from a teaching video onto scrap without aiming for a finished painting. The point is motor learning: brush angle, load, and timing. Then return to your own composition and apply only that motion.
End sessions by noting one keep and one change. Keep notes short. Over time the notebook becomes a personal troubleshooting index more useful than generic tips, because it reflects your room, paints and habits.
Revisit this guide after three practice pieces. If the same failure repeats, change only the related step in the workflow rather than abandoning the subject. Persistence with targeted adjustment beats constant subject hopping.
\n
Hi, I’m Camille. I write The Everyday Painter, where I share acrylic painting ideas, beginner guides and practical fixes for common painting problems. I love color, simple compositions and projects that fit into an ordinary evening.