
Key Takeaways
- Importance of Cleaning: Regular cleaning of your NutriBullet blender is essential to prevent bacteria growth and maintain optimal performance, ensuring safe and tasty drinks.
- Essential Supplies: For effective cleaning, gather mild dish soap, warm water, a soft sponge, and optional items like baking soda and white vinegar for tough stains.
- Cleaning Process: Start by unplugging the blender, disassembling the parts, and washing the blending cup and blade assembly with warm, soapy water.
- Daily Maintenance: Rinse the blender immediately after use, perform a soapy water blend, and wipe down the base to prevent residue buildup and odors.
- Deep Cleaning Techniques: Use a mixture of baking soda and vinegar for tough stains and utilize the dishwasher for safe, detachable parts if applicable.
- Frequent Checks: Regularly inspect rubber seals and all components to ensure cleanliness and prolong the lifespan of your NutriBullet blender.
Got a NutriBullet blender that’s seen better days? You’re not alone. Many of us love whipping up smoothies and soups but dread the cleanup afterward. If you’ve ever struggled with stubborn stains or lingering odors, you know how frustrating it can be.
Why Cleaning Your Nutribullet Blender Is Important
Cleaning your NutriBullet blender is crucial for health and performance. Proper maintenance keeps your blender in top shape and ensures your drinks stay safe and tasty.
Preventing Bacteria Growth
Cleaning prevents bacteria from growing in your blender. After making smoothies or soups, food particles can linger in the blades or cups, creating a breeding ground for germs. Regular cleaning eliminates these residues, reducing the risk of foodborne illnesses. Use warm, soapy water or a mixture of vinegar and water to thoroughly disinfect all components.
Maintaining Performance and Longevity
Maintaining your NutriBullet’s performance relies on regular cleaning. Residue buildup can affect blending efficiency, causing your blender to work harder. This strain may lead to premature wear. Wipe down the base and blades after each use. Regularly check and clean rubber seals to prevent damage. Reinforcing this habit enhances the lifespan of your appliance and keeps it blending like new.
What You’ll Need to Clean Your Nutribullet Blender
Keeping your NutriBullet blender clean requires a few essential items. Gather these supplies for an effective cleaning experience.
Recommended Products

Bottle cleaning brushes with multiple usage includes 7.9-12.5 inches straw tube cleaning lab brushes, 16 inches long handle beer bottle brush, 14 inches sports water bottle brush, 10 inches multifunction sponge brush and 4.3 inches spout cleaning brush; You can hang them on hook for drying and storage.

PORTABLE & HANGING DESIGN: Totally include 4 brushes to meet your various needs, all designed with a portable handle and end hole to grip comfortably and hang easily. Stainless steel brush provides greater cleaning power to clean the blades without hurting your hands. Double-ended brush allows to clean gaps, edges and other narrow places conveniently. Bent brush helps remove stains of bottom and dead corners with confidence. Nylon long handle brush makes clean all kinds of bottles effortlessly

Perfect Juicer Compatibility - Specially designed for Omega 8003, 8004, 8005, 8006, VRT330, VRT350, and more horizontal & vertical masticating juicers. Keep your machine fresh and performing like new with every clean.
Basic Cleaning Supplies
- Dish soap: Use a mild dish soap to prevent any strong chemical residue.
- Warm water: Warm water helps to dissolve food residue more easily.
- Soft sponge or cloth: A non-abrasive sponge or cloth protects the blender’s surfaces during cleaning.
- Bottle brush: Ideal for reaching inside the cups and removing stubborn particles.
Optional Deep Cleaning Tools
- Baking soda: Baking soda acts as a gentle abrasive for tough stains and odors.
- White vinegar: White vinegar helps to disinfect and remove lingering smells.
- Toothbrush: An old toothbrush works well for cleaning between the blades and rubber seals.
- Dishwasher: If safe to do so, use your dishwasher for deeper cleaning of detachable parts.
By using these supplies, you maintain your NutriBullet blender’s performance and prolong its life.
Step-By-Step Guide on How to Clean Nutribullet Blender
Cleaning your NutriBullet blender is fast and straightforward. Follow these steps to keep your blender in top condition.
Recommended Products

✅【Deep Clean for Every Personal & Portable Blender】From protein shake blenders to travel-size smoothie machines, this 7-piece kit deep cleans cups, blades, lids, and gaskets with precision. Compatible with Ninja, Magic Bullet, and more.

【20-Piece Comprehensive Crevice Cleaning Solution】Including 3 precision crevice brushes, 2 keyboard detail brushes, 10 showerhead nozzles cleaners, 3 stove grime removers, 1 glass scrubber & 1 cleaning scraper, this set tackles every tight gap from kitchen sink drains to car seat crevices and window track grooves.

Perfect set for giving your kitchen and appliances a Deep, detailed cleaning
Disassembling the Blender
- Unplug the Blender
Always disconnect the power before starting. This ensures safety during cleaning.
- Remove the Cup
Twist the blending cup counterclockwise to detach it from the base. Ensure you hold the base securely to avoid spills.
- Take Off the Blade Assembly
Carefully unscrew the blade assembly from the cup. Be cautious, as the blades are sharp.
- Check the Rubber Seal
Inspect the rubber seal for any damage or food debris. If it’s dirty, it will require cleaning.
Cleaning the Parts
- Wash the Blender Cup
Use warm water and mild dish soap. A soft sponge removes any residue. Rinse thoroughly to avoid soap taste.
- Clean the Blade Assembly
Rinse the blade under warm water. Use an old toothbrush to scrub stubborn stains. Don’t submerge the blade assembly directly in water.
- Wipe Down the Base and Touchpoints
Use a damp cloth to clean the base. Ensure no liquid enters the motor or electrical parts.
- Deep Cleaning (Optional)
For tough stains and odors, create a mix of baking soda and white vinegar. Let it sit for 15 minutes, then rinse. This method can effectively remove built-up residue.
Reassembling the Blender
- Reattach the Blade Assembly
Screw the blade assembly back onto the cup. Ensure it’s secure to avoid leaks during blending.
- Reconnect the Cup to the Base
Align the cup with the base and twist it clockwise until it locks in place.
- Inspect the Rubber Seal Again
Before use, check that the rubber seal sits properly. This prevents leaks during blending.
- Plug in the Blender
After reassembly, plug the blender back in, ready for your next smoothie or soup.
By following these steps, you maintain your NutriBullet’s efficiency and prolong its lifespan.
Tips for Keeping Your Nutribullet Blender Clean
Maintaining a clean NutriBullet blender enhances performance and extends its lifespan. Regular upkeep prevents stubborn stains and odors from developing.
Recommended Products
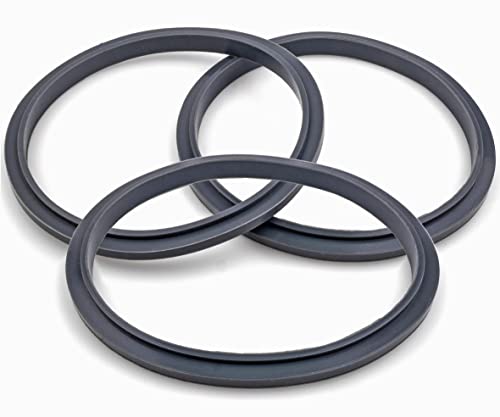
Package Include: Blender Replacement Parts and Accessories - Seal Ring Gasket Replacement with Lip - 3 Pcs

Package Include: Blender Replacement Parts and Accessories - Seal Ring Gasket Replacement with Lip - 2 Pcs

Compatibility: Fits 600W and Pro 900W high-speed blender/mixer systems; does not fit Lean, RX, Magic Bullet, or Ninja blenders
Daily Maintenance Hacks
- Rinse Immediately: Rinse the blending cup with warm water right after use. This removes most food particles and minimizes build-up.
- Soapy Water Blend: Fill the blending cup halfway with warm water and a drop of mild dish soap. Blend for 30 seconds to clean the blades easily. Rinse well afterward.
- Wipe the Base: Use a damp cloth to wipe down the base of the blender after each use. This prevents dirt accumulation and keeps it looking fresh.
- Check Seals: Inspect the rubber seals regularly for any food residue or damage. Clean them gently with a soft sponge to ensure a good fit and proper sealing.
Deep Cleaning Recommendations
- Baking Soda and Vinegar: For tough stains and odors, mix equal parts baking soda and white vinegar. Apply this mixture to the cups and let it sit for 15-20 minutes before rinsing thoroughly.
- Dishwasher Safe Parts: If your NutriBullet has detachable parts, check if they are dishwasher safe. Place them on the top rack for a thorough clean.
- Old Toothbrush: Use an old toothbrush to scrub hard-to-reach areas of the blades and seals. This helps remove any stuck food bits effectively.
- Monthly Deep Clean: Set a reminder to perform a deep clean once a month. Disassemble the blender, scrub all parts, and dry completely before reassembling.
By following these tips, you can keep your NutriBullet in prime condition for years to come.
Conclusion
Keeping your NutriBullet clean doesn’t have to be a hassle. By making a habit of rinsing and wiping down your blender after each use you can avoid stubborn stains and lingering odors. Regular maintenance not only ensures your smoothies and soups taste their best but also helps your blender last longer.
With just a few simple supplies and a quick cleaning routine you’ll keep your NutriBullet in top shape. Remember to check those rubber seals and give it a deep clean every now and then. A little effort goes a long way in maintaining your blender’s performance and enjoying your favorite recipes for years to come. Happy blending!
Frequently Asked Questions
How often should I clean my NutriBullet blender?
It’s best to clean your NutriBullet blender after each use. This regular maintenance prevents food particles from lingering, reducing the risk of bacteria growth and keeping odors at bay.
What supplies do I need to clean my NutriBullet?
For basic cleaning, you need mild dish soap, warm water, a soft sponge or cloth, and a bottle brush. For deeper cleaning, consider baking soda, white vinegar, an old toothbrush, and a dishwasher for detachable parts.
How do I deep clean my NutriBullet?
To deep clean, mix baking soda and white vinegar to tackle tough stains and odors. Disassemble the blender, wash the cup, rinse the blades, and use this mixture on any stubborn areas before rinsing everything thoroughly.
Are there any tips for daily maintenance of my NutriBullet?
Yes! Rinse the blending cup immediately after use, blend warm soapy water for a quick clean, and wipe down the base to prevent dirt buildup. Regularly check the rubber seals for cleanliness as well.
What should I check during the cleaning process?
Always check the rubber seals for any damage and ensure all parts are properly cleaned. Regular inspection helps maintain the blender’s performance and longevity.

