
Key Takeaways
- Understanding Brass: Recognize the difference between unlacquered and lacquered brass to choose appropriate cleaning methods.
- Regular Maintenance: Cleaning brass cabinet hardware regularly enhances appearance, extends lifespan, and preserves its value.
- Cleaning Signs: Look out for dullness, visible tarnish, sticky surfaces, discoloration, or corrosion as indicators that your brass needs cleaning.
- Necessary Tools: Gather mild dish soap, warm water, soft cloths, non-abrasive sponges, and optional products like brass cleaner or vinegar for effective cleaning.
- Effective Techniques: Use varied cleaning methods like soap and water, vinegar and salt paste, or lemon juice and baking soda to effectively remove tarnish and grime.
- Rinsing and Drying: Rinse thoroughly and dry immediately to prevent moisture from causing further tarnishing of the brass hardware.
Have you noticed your brass kitchen cabinet hardware looking dull and tarnished? It happens to the best of us. Over time, grease, dust, and moisture can take a toll on those beautiful fixtures, making them lose their shine.
Understanding Brass Kitchen Cabinet Hardware
Brass kitchen cabinet hardware adds charm and elegance to your space. Knowing the characteristics of brass helps in maintaining its beauty. Brass, an alloy of copper and zinc, offers durability and aesthetic appeal.
Brass can tarnish over time due to exposure to elements like grease, moisture, and air. This tarnishing leads to a dull appearance. Regular cleaning prevents buildup and keeps your hardware looking its best.
It’s essential to differentiate between unlacquered brass and lacquered brass. Unlacquered brass develops a natural patina, which some people appreciate for its vintage look. Lacquered brass retains its shine but requires different cleaning techniques.
When selecting cleaning methods, consider the type of brass you have. Use appropriate tools and solutions to avoid damaging the finish. For instance, abrasive cleaners can scratch the surface of lacquered brass.
Understanding these aspects enables better care for your brass hardware, ensuring it remains a stunning feature in your kitchen.
Recommended Products

Fast, safe and easy to use

RESTORE THE SPARKLE: Bring back the shine to your jewelry with just one product! Weiman Gold & Diamond 3-in-1 Wipes clean, shine, and protect your premium jewelry, leaving them looking brand new.
Polish and Cleaner: With a fast-acting formula, this brass cleaner effortlessly removes tarnish to give a streak-free, mirror-like shine to your household decor, furnishings, musical instruments, and costume jewelry
Why Clean Brass Hardware Regularly?
Regular cleaning of brass hardware maintains its elegance and durability. Without attention, brass can tarnish, losing its charm and aesthetic appeal in your kitchen.
Benefits of Maintaining Brass
- Enhances Appearance: Clean brass shines brightly, adding warmth to your kitchen.
- Extends Lifespan: Proper maintenance prevents corrosion and damage, prolonging the lifespan of your hardware.
- Preserves Value: Well-maintained brass retains its value, making it a worthwhile investment.
- Prevents Buildup: Regular cleaning reduces grime and tarnish, keeping fixtures looking new.
- Simplifies Future Cleaning: A consistent cleaning routine makes it easier to remove dirt and stains over time.
Signs That Your Brass Needs Cleaning
- Dullness: If your brass looks lackluster, it likely needs attention.
- Visible Tarnish: A green or black discoloration indicates tarnishing or corrosion.
- Sticky Surface: Grease or dirt buildup may cause a sticky feel.
- Discoloration: If your brass appears uneven in color or has dark spots, it requires cleaning.
- Corrosion: Signs of pitting or flaking mean immediate cleaning is essential to prevent further damage.
Tools and Materials Needed
For effective cleaning of brass kitchen cabinet hardware, gather the right tools and materials. Using proper supplies prevents damage and ensures a thorough clean.
Recommended Products

LONG LASTING CLEAN: Tired of your copper and brass kitchenware looking all grimey? Trust Twinkle Brass & Copper Cleaning Kit, a gentle, easy to apply anti-tarnish cream formula. It is specially formulated to clean, protect and polish your copper and brass pots, pans, kitchenware, and dishware so they’re shiny and beautiful for the long haul.
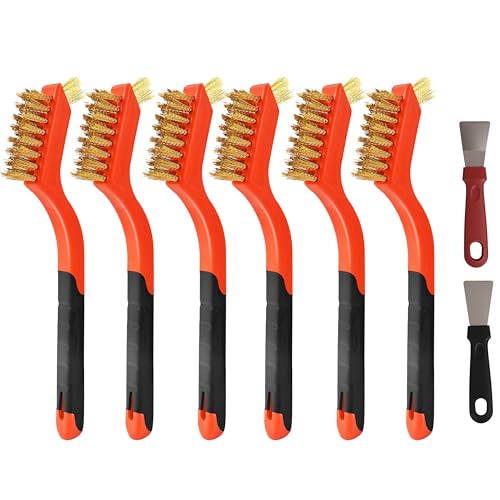
【What do you get】: The Brass brush set includes 2 brass brushes and 2 cleaning scrapers, brass brush Set will help you cope with all kinds of daily cleaning efficiently

Dimensions: Hole centers: 10 inch(256mm); Overall length: 10.27 inch(263mm);Diameter: 0.45 inch(11.31mm);Projection: 1.22 inch(31mm)
Essential Cleaning Supplies
- Mild Dish Soap: Use a gentle dish soap that cuts grease without harsh chemicals.
- Warm Water: Warm water helps dissolve grime and tarnish more effectively.
- Soft Cloths: Use lint-free cloths or microfiber towels to avoid scratches.
- Non-Abrasive Sponge: Choose a soft sponge for scrubbing without damaging the brass.
- Small Bowl or Bucket: Use this for mixing cleaning solutions.
Optional Products for Enhanced Cleaning
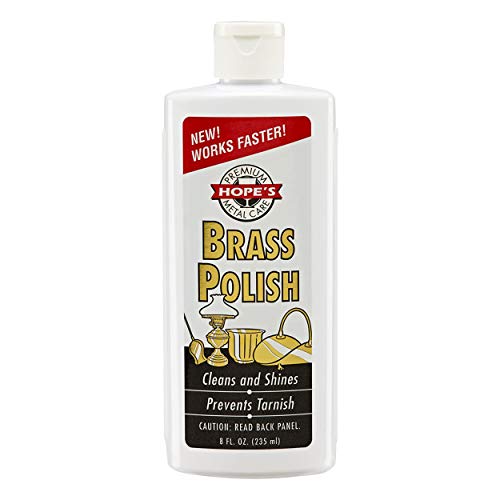
- Brass Cleaner: Apply a commercial brass cleaner for stubborn tarnish; ensure it’s suitable for your hardware type.
- White Vinegar: Use this natural acid to remove stubborn stains and tarnish when diluted with water.
- Olive Oil or Mineral Oil: Apply oil afterwards for a protective layer and enhanced shine.
- Toothbrush: Opt for a soft-bristled toothbrush for intricate areas that require detailed cleaning.
- Lemon Juice: Combine with baking soda to create a paste for deeper tarnish removal.
Before starting, ensure you know whether your brass is lacquered or unlacquered. This knowledge dictates the appropriate cleaning method and products to use.
Step-by-Step Guide on How to Clean Brass Kitchen Cabinet Hardware
Cleaning brass kitchen cabinet hardware restores its shine and enhances its appeal. Follow these clear steps for effective results.
Recommended Products

Premium Quality Material - Made of solid brass with a brushed gold finish, these cabinet pulls are heavy-duty, durable, and resistant to fingerprint stains.
Natural Look - Unlacquered brass ages naturally, developing a warm and rich patina over time. This creates a classic and timeless look that many find appealing, especially for vintage or traditional aesthetics.

Dimensions - Each Rectangle Plate in this set measures 7-1/2"(190mm) in total length and 0.07" (2mm) in thickness, with hole centers of 5" (128mm). Precise sizing ensures a seamless fit for various applications. Please note that pulls and other brass accessories are not included in this package.
Preparing the Hardware for Cleaning
- Gather Supplies: Collect mild dish soap, warm water, soft cloths, and non-abrasive sponges. If needed, include optional items like brass cleaner or vinegar.
- Remove Hardware: Unscrew or detach the brass hardware from the cabinets. This prevents damage to the cabinets during cleaning and allows for thorough access to the hardware.
- Examine Condition: Check your hardware for signs of severe tarnish or corrosion. If needed, assess whether a specialized brass cleaner is necessary.
Cleaning Methods Explained
- Soap and Water Method:
- Mix a few drops of mild dish soap with warm water.
- Dip a soft cloth into the solution and gently scrub the brass.
- For stubborn spots, use a non-abrasive sponge.
- Vinegar and Salt Paste:
- Blend equal parts vinegar and salt to form a paste.
- Apply the paste to tarnished areas and let it sit for about 10 minutes.
- Gently scrub using a soft cloth, then rinse thoroughly.
- Lemon Juice and Baking Soda:
- Mix lemon juice with baking soda to create a paste.
- Apply the mixture to the brass and let it sit for 5-10 minutes.
- Gently buff using a soft cloth, then rinse off.
Rinsing and Drying Techniques
- Rinse Thoroughly: After cleaning, rinse the brass hardware under running warm water. Ensure all cleaning agents are removed to prevent residue.
- Dry Immediately: Use a soft, dry cloth to wipe down the hardware. Avoid air drying, as moisture can lead to further tarnishing.
- Polish if Desired: Optionally, apply a brass polish to enhance shine. Follow product instructions carefully for the best results.
Following these steps maintains the beauty of your brass cabinet hardware while ensuring they’re a stunning feature in your kitchen.
Conclusion
Keeping your brass kitchen cabinet hardware looking its best is easier than you might think. With a little regular care and the right cleaning methods, you can maintain that beautiful shine and prevent tarnishing.
Remember to pay attention to whether your brass is lacquered or unlacquered so you can choose the best cleaning approach. By recognizing the signs that it’s time for a clean and acting on them promptly, you’ll not only enhance the appearance of your kitchen but also extend the life of your hardware.
So grab your cleaning supplies and give your brass a little love. You’ll be amazed at the difference it makes in your space. Happy cleaning!
Frequently Asked Questions
What causes brass kitchen cabinet hardware to tarnish?
Brass kitchen cabinet hardware tarnishes due to exposure to elements like grease, dust, moisture, and air. These factors lead to a buildup that dulls its shine over time.
How can I tell if my brass hardware needs cleaning?
Signs that brass needs cleaning include dullness, visible tarnish, a sticky surface, discoloration, and corrosion. Regular checks can help maintain its appearance.
What’s the difference between unlacquered and lacquered brass?
Unlacquered brass develops a natural patina over time, enhancing its character. In contrast, lacquered brass maintains its shine and requires specific cleaning methods to avoid damaging the finish.
What tools do I need to clean brass cabinet hardware?
To clean brass, you’ll need mild dish soap, warm water, soft cloths, and non-abrasive sponges. Optional items include brass cleaner, white vinegar, and lemon juice for better results.
How do I clean brass cabinet hardware effectively?
Start by gathering your supplies, removing the hardware from cabinets, and examining its condition. Clean using soap and water, a vinegar-salt paste, or a lemon-baking soda mixture, making sure to rinse and dry thoroughly.
What are the benefits of regularly cleaning brass hardware?
Regular cleaning enhances the appearance of brass, extends its lifespan, preserves its value, prevents grime buildup, and makes future cleaning easier. Consistent maintenance keeps your fixtures looking vibrant.
Can I restore dull brass to its original shine?
Yes, dull brass can be restored using appropriate cleaning techniques and products. Following a thorough cleaning regimen will help revive its original luster and beauty.
What should I avoid when cleaning brass?
Avoid using abrasive materials or harsh chemicals, as these can scratch and damage the brass finish. Always use gentle cleaning solutions tailored to your specific type of brass.
