
Have you ever found yourself frustrated with a clogged Dyson vacuum head? You’re not alone. Many people face this issue, and it can be a hassle to keep your vacuum running smoothly. Knowing how to disassemble the vacuum head can save you time and money, allowing you to clean it effectively and get back to your chores.
Key Takeaways
- Understanding Types: Familiarize yourself with different Dyson vacuum heads—Direct Drive, Soft Roller, and Tangle-Free Turbine Tool—to optimize cleaning for various surfaces.
- Regular Maintenance: Monthly cleaning of the vacuum head and washability of filters enhance suction power and prevent clogs.
- Tools for Disassembly: Gather necessary tools like screwdrivers and tweezers to facilitate safe and effective disassembly of the vacuum head.
- Step-by-Step Disassembly: Follow a clear procedure for disassembling the vacuum head, ensuring safety by unplugging the vacuum and working in a well-lit area.
- Inspect Components: Regularly check for blockages, wear on brushes, and integrity of seals to maintain optimal performance and prevent air leaks.
- Proper Storage and Use: Store the vacuum correctly and follow manufacturer guidelines to prolong its lifespan and ensure effective cleaning.
Overview of Dyson Vacuum Heads
Dyson vacuum heads serve as the primary cleaning components, designed to tackle various surfaces efficiently. Understanding their types and features enhances your ability to maintain your vacuum.
Types of Dyson Vacuum Heads
- Direct Drive Head: Utilizes a motor to drive the brush bar directly against the floor. It excels on carpets, removing dirt effectively.
- Soft Roller Head: Features a combination of soft and stiff bristles. It’s ideal for hard floors, picking up large debris and fine dust.
- Tangle-Free Turbine Tool: Equipped with rotating bristles. This head works well on upholstery and stairs, minimizing hair tangles.
Key Features
- Self-Adjusting Design: Some heads automatically adjust to the surface height, ensuring optimal performance on both carpets and hardwood.
- Washable Filters: Many Dyson heads include filters that are washable, making maintenance easier and improving suction power.
- Easy Connectivity: Each head connects easily to the main body, allowing for swift changes depending on your cleaning needs.
Common Issues
- Clogs: Hair or debris may block airflow, affecting performance. Regular checks and disassembly allow for easy access to clean.
- Worn Brushes: Brush bar bristles may wear out over time. Inspect and replace them when necessary to maintain effective cleaning.
- Regular Cleaning: Detach the head and clean it monthly to prevent build-up. Use warm, soapy water and let it dry completely before reattaching.
- Inspect for Damage: Frequently check for cracks or brittleness in plastic components. Replace heads if any damage occurs for optimal vacuum function.
Understanding the variety and maintenance of Dyson vacuum heads enhances your cleaning routine, allowing for a more thorough and efficient experience.
Tools Required for Disassembly
Disassembling your Dyson vacuum head requires specific tools to make the process smooth and efficient. Gathering the right equipment ahead of time saves you time and frustration.
Recommended Products

Application - This item is a customized tool kit made for Dyson V6, V7, V8, V10, V11 and V15 vacuum cleaners. You can easily disassemble all the vacuum cleaner models above with this kit.
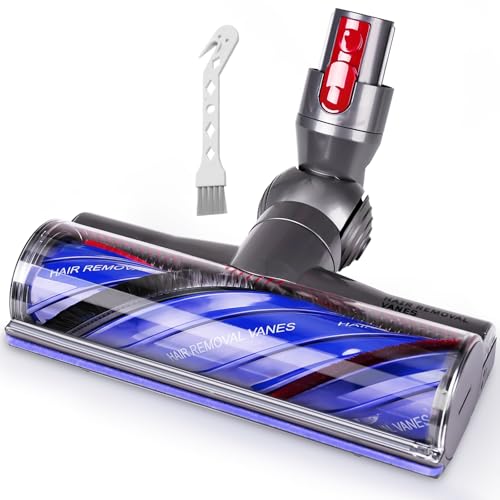
Wide Compatibility ---- Our upgraded vacuum head replacement for Dy-son V7 V8 V10 V11 V15 SV10 SV11 SV12 SV14 SV15 SV22 SV25 SV27 SV28 SV37 Cordless Vacuum Cleaner. Compare to Part # 968266-02, 968266-04, 967483-01, 967483-03, 967483-04. Doesn't fit V6 V12 DC Series.
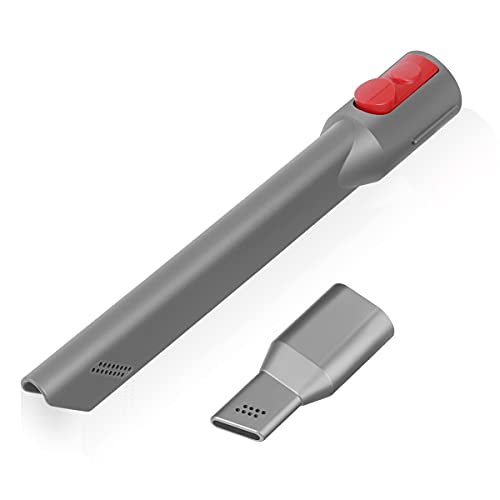
Wide Compatibility: This crevice tool attachment is compatible with V15 V12 V11 V10 V9 V8 V7 Gen5 G5 SV10 SV11 SV12 SV13 SV14 SV15 SV16 SV17 SV18 SV20 SV22 SV23 SV24 SV25 SV26 SV27 SV28 SV29 SV30 SV37 and Outsize model Cordless Vacuum (Notice: Not fit V6, DC series, and ball/canister/animal models)
Common Tools You’ll Need
- Phillips Screwdriver: Essential for removing screws. Ensure it fits snugly in the screw heads.
- Flathead Screwdriver: Useful for prying open components without damaging plastic.
- Pliers: Helps with gripping and turning fasteners that are hard to reach.
- Tweezer or Needle-Nose Pliers: Ideal for handling small screws and components.
- Soft Cloth: Keeps surfaces clean and prevents scratches during disassembly.
- Unplug the Vacuum: Always disconnect the vacuum from the power source before starting.
- Wear Gloves: Protect your hands from sharp edges and debris.
- Work in a Well-Lit Area: Good visibility helps prevent accidents and mistakes.
- Avoid Excess Force: Apply steady pressure; avoid yanking on parts to prevent breaking.
- Keep Small Parts Organized: Use a container for screws and small pieces to prevent loss.
By preparing these tools and following safety precautions, you enhance your ability to disassemble the Dyson vacuum head safely and effectively.
Step-by-Step Guide
Follow these steps to disassemble your Dyson vacuum head effectively. Each section provides detailed instructions to ensure a smooth process.
Recommended Products
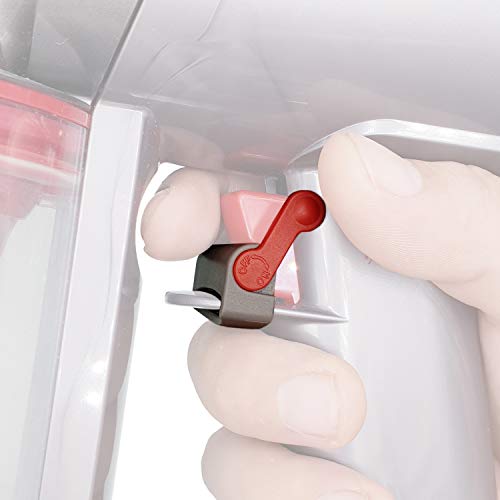
Free your Finger: REEYEAR PATENT design trigger lock,No assemble work requested,Just Inserted into the button ,Control the power button on/off lock and release, maintain the on and off status by sliding the switch .resolve the pain of keep pressing the on button when using the Dyson Cordless vacuum cleaner. Free your hand and fingers ,No more finger cramps,make your housework more easier.

This is a specially customized disassembly screwdriver set compatible with Dyson V6 V7 V8 V10 V11 V12 V15 vacuum cleaner. Using this screwdriver set, you can easily disassemble the vacuum cleaner host for cleaning or maintenance
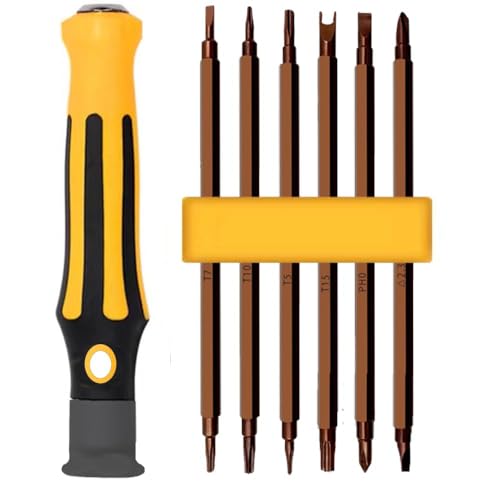
There are 12 different sizes of screwdriver heads in this tool set as follow: Torx T5 T6 T7 T8 T10 T15, Triangle 2.3, Triwing Y3, Spanner U2.3, Slotted 2.0 and 3.0, Phillips Ph0.
Preparing the Vacuum
- Unplug the vacuum. Always work with the vacuum disconnected from the power source.
- Gather tools. You’ll need Phillips and Flathead screwdrivers, pliers, tweezers, and a soft cloth.
- Choose a workspace. Select a well-lit area to improve visibility.
- Wear gloves. Protect your hands from sharp edges and debris.
Removing the Head
- Locate the release button. This button is often found at the connection point of the vacuum head and body.
- Press the button. While holding the button, pull the head away from the main body.
- Set the head aside. Keep it in a designated area to avoid misplacing parts.
Inspecting Components
- Check for clogs. Inspect the brush bar and the intake for any blockages.
- Examine brushes. Look for damage or wear on the bristles. This wear can affect suction power.
- Analyze seals. Ensure that rubber seals around the head remain intact. Damaged seals can lead to air leaks.
- Align components. Position the brush bar and any other parts back into their original positions.
- Secure screws. Reinsert any screws removed during disassembly, tightening them with precision.
- Reattach the head. Line it up with the vacuum body and push until you hear a click, confirming it’s secured.
- Test the vacuum. After reassembly, plug in and run the vacuum to ensure everything’s functioning properly.
By following these steps, you can disassemble your Dyson vacuum head, maintain its components, and enhance its overall performance.
Tips for Maintenance and Care
Maintaining your Dyson vacuum head enhances its performance and longevity. Use these tips to keep your vacuum in top shape.
Regular Inspection
Inspect the vacuum head for blockages or damage every month. Check the brushes for hair or debris build-up. Clean them to prevent clogging.
Clean Filters
Wash the filters every 1-3 months, depending on usage. Rinse them under cold water until the water runs clear. Let them dry completely before reinstalling.
Replace Worn Parts
Replace worn parts promptly. Look for signs of wear on brushes, seals, and filters. Using replacement parts specific to your model is crucial.
Store Properly
Store the vacuum in a dry, cool place. Avoid direct sunlight and damp areas. This practice prevents damage and maintains its quality.
Use Correctly
Use the vacuum according to its design. Follow the manufacturer’s guidelines for surfaces and types of debris. Using it incorrectly can cause long-term damage.
Check for Updates
Stay informed about model-specific updates or recalls. Visit the Dyson website or sign up for notifications. Keeping your vacuum up-to-date ensures optimum efficiency.
Keep these maintenance tips in mind to enjoy a cleaner home and a higher-performing vacuum. Regular care prevents issues and extends the life of your Dyson vacuum head.
Conclusion
Taking the time to disassemble your Dyson vacuum head can make a world of difference in its performance. By following the steps outlined and keeping up with regular maintenance you’ll ensure your vacuum runs smoothly and efficiently.
Remember that a clean vacuum head not only helps in maintaining suction power but also keeps your home cleaner. Don’t hesitate to dive into the process whenever you notice a drop in performance.
With a little care and attention your Dyson will continue to serve you well for years to come. Happy cleaning!
Frequently Asked Questions
What are the common types of Dyson vacuum heads?
Dyson vacuum heads include various types such as the Direct Drive, Soft Roller, and Motorized brush heads. Each type is designed for specific cleaning tasks, ranging from hard floors to carpets. Understanding your vacuum’s head type can help you use it effectively for different surfaces.
How often should I clean my Dyson vacuum head?
It’s recommended to clean your Dyson vacuum head every month to prevent clogs and maintain optimal performance. Regular inspections for blockages and dirt build-up will keep your vacuum running efficiently.
What maintenance should I perform on my Dyson vacuum head?
Key maintenance tasks include regular inspections for blockages, cleaning the filters, promptly replacing worn parts, and ensuring proper storage. Following these tips can enhance your vacuum’s performance and lifespan.
How do I know if my Dyson vacuum head needs replacement?
Signs that your vacuum head may need replacement include decreased suction, unusual noises, or visible wear and tear. If cleaning doesn’t resolve the issue, it may be time to replace the vacuum head.
Are there any recalls for Dyson vacuum heads?
To stay informed about recalls, regularly check Dyson’s official website for updates. They provide information about any faulty products and necessary actions for customers. It’s essential to stay updated for safety and performance reasons.
