
Have you ever found yourself struggling with a clogged Hoover WindTunnel vacuum? It’s frustrating when your trusty cleaner stops performing at its best. Sometimes, all it takes is a little maintenance to get it back in shape, but that means you’ll need to disassemble it first.
Key Takeaways
- Essential Tools Needed: To disassemble a Hoover WindTunnel vacuum, equip yourself with a Phillips screwdriver, flathead screwdriver, pliers, scissors or utility knife, soft cloth, and a trash bin for debris disposal.
- Safety Precautions: Always unplug the vacuum before disassembly, wear protective gear, work in a clean environment, and keep children and pets away to ensure a safe process.
- Step-by-Step Disassembly: Follow clear steps for disassembly, including removing the dust canister, filters, hose, and brush roll to maintain and clean the vacuum effectively.
- Common Troubleshooting Tips: Address potential issues like difficulty in reassembly or misaligned parts by ensuring components are clean, correctly oriented, and properly seated.
- Regular Maintenance Importance: Regular disassembly and cleaning can significantly enhance the performance of your Hoover WindTunnel vacuum, ensuring efficient operation during use.
Tools Needed for Disassembly
To disassemble your Hoover WindTunnel vacuum, gather the following tools:
- Phillips Screwdriver
Use this to remove screws securing various components. A magnetic tip helps avoid losing screws. - Flathead Screwdriver
This tool assists in prying open clips and covers without causing damage. - Pliers
Pliers enable you to grip and pull parts, particularly when dealing with tight areas. - Scissors or Utility Knife
Use scissors or a utility knife for cutting any zip ties and securing straps in your vacuum. - Soft Cloth or Towels
Keep these handy to wipe surfaces and prevent scratches during disassembly. - Trash Bin
Dispose of any debris or old vacuum parts as you work. This keeps your workspace tidy.
Having the right tools ensures a smoother disassembly process. Each tool plays a role in safely and efficiently breaking down the vacuum, making repairs or maintenance easier to achieve.
Recommended Products

Application - This item is a customized tool kit made for Dyson V6, V7, V8, V10, V11 and V15 vacuum cleaners. You can easily disassemble all the vacuum cleaner models above with this kit.

【Applicable Models】The Vacuum Cleaner Special Maintenance and Cleaning Disassembly Tool Screwdriver Set Compatible with Dyson V6/V7/V8/V10/V11/V15/V8 Slim/Ditital V10 Slim/Omni-glide Vacuum Cleaner.With this set of tools, you can easily disassemble all models of vacuum cleaners.
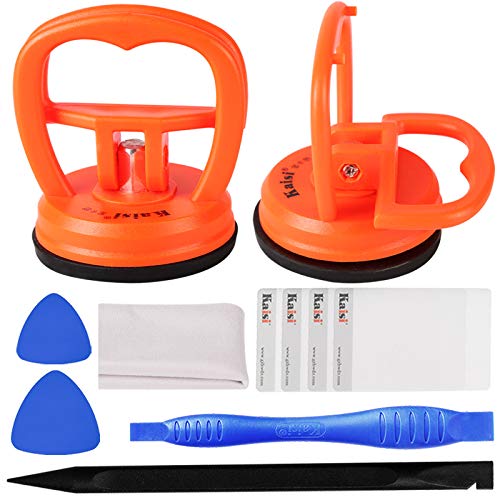
High Quality & Super Suction-- Screen suction cup is made of durable ABS and natural rubber materials, and has a long service life. The suction cup has a lifting capacity of 12 kg (26 lb), which can help you open the phone screen
Preparing Your Hoover WindTunnel Vacuum
Preparing your Hoover WindTunnel vacuum for disassembly ensures a smooth process. Start by unplugging the vacuum and removing any attachments.
Safety Precautions
Follow these safety measures to prevent injuries during disassembly:
- Unplug the Vacuum: Always disconnect the power before starting.
- Wear Protective Gear: Use gloves and safety goggles to protect yourself from sharp edges and debris.
- Work in a Clean Area: Choose a well-lit, clutter-free space. This minimizes distractions and hazards.
- Keep Children and Pets Away: Ensure they’re not in the vicinity to avoid accidents.
Gathering Necessary Tools
Gather these essential tools to disassemble your vacuum effectively:
- Phillips Screwdriver: Use this for most screws on the vacuum.
- Flathead Screwdriver: Ideal for prying open stubborn components.
- Pliers: Helpful for gripping and removing small parts.
- Scissors or Utility Knife: Cut through tape or cords as needed.
- Soft Cloth or Towels: Maintain cleanliness while working on your vacuum.
- Trash Bin: Dispose of any debris or worn parts properly.
Gathering these tools beforehand simplifies the disassembly process and reduces frustration.
Step-by-Step Disassembly Guide
Follow this guide to effectively disassemble your Hoover WindTunnel vacuum. Each step outlines key actions for removing components and preparing for maintenance.
Removing the Dust Canister
- Locate the dust canister release button on the main body of the vacuum.
- Press the release button firmly to detach the canister.
- Lift the canister straight up and away from the vacuum.
- Empty the contents into a trash bin.
- Clean the canister with warm, soapy water and a soft cloth. Allow it to dry before reassembly.
Taking Off the Filters
- Find the filter cover on the top of the vacuum, usually near the dust canister area.
- Use a Phillips screwdriver to unscrew the filter cover.
- Remove the cover and gently lift out the pre-motor filter.
- If applicable, remove the HEPA filter by pulling it straight out of its compartment.
- Clean or replace the filters as necessary. Always refer to the user manual for specific recommendations.
Detaching the Hose
- Locate the hose connection point at the rear or back of the vacuum.
- Carefully wiggle the hose until it detaches from the vacuum body.
- Check for any clogs or blockages within the hose.
- Use a soft cloth or a utility knife to remove any debris or blockages found inside.
- Store the hose in a safe place to prevent damage during the maintenance process.
- Flip the vacuum onto its back for easier access to the brush roll.
- Remove the screws securing the brush roll cover, using a Phillips screwdriver.
- Lift the cover off to expose the brush roll.
- Gently pull the brush roll out from its compartment.
- Clean the brush roll with a soft cloth and remove any tangled hair or debris.
Follow these steps carefully to disassemble your Hoover WindTunnel vacuum for effective maintenance. Make sure to keep track of removed screws and components for smooth reassembly.
Troubleshooting Common Issues
When disassembling and reassembling your Hoover WindTunnel vacuum, challenges may arise. Below are common issues and tips for resolving them effectively.
Recommended Products

KEEP YOUR STREAMLINE CLEANER AT ITS BEST: The Hoover Streamline Refresh Kit includes a replacement filter and brushroll designed to maintain peak performance in your Hoover Streamline Hard Floor Cleaner.

This is an O.E.M. authorized part

Hoover Elite Rewind Bagless Vacuum Roller Brush Assembly For Models;
Difficulty in Reassembly
Reassembling parts can pose challenges, especially if they seem to fit incorrectly. To avoid this:
- Ensure all components are clean before reassembly. Dust can affect fit.
- Double-check each part’s orientation. Parts may fit only one way.
- Consult the user manual for specific reassembly instructions, as it contains diagrams.
- If a part feels forced, remove it and retry. Forcing can cause damage.
Misaligned Parts
Misaligned parts can lead to vacuum inefficiency or unusual noises. To fix alignment issues:
- Inspect each piece for proper placement. Each part should snap into place easily.
- Check that the brush roll is seated correctly. An improperly installed brush roll can stop the vacuum from functioning properly.
- Verify the connection between the canister and base; both should lock securely.
- Listen for any unusual sounds after reassembly. If you hear grinding or scraping, take the vacuum apart and realign the misaligned parts.
Addressing these common issues can enhance the performance of your Hoover WindTunnel vacuum, making your cleaning tasks much more efficient.
Conclusion
Taking the time to disassemble your Hoover WindTunnel vacuum can really make a difference in its performance. With the right tools and a bit of patience you can tackle clogs and maintenance issues like a pro. Remember to follow safety precautions and take care when reassembling to avoid any misalignments.
By addressing these common problems you’ll not only extend the life of your vacuum but also enjoy a cleaner home. So roll up your sleeves and get ready to give your vacuum the care it deserves. Happy cleaning!
Frequently Asked Questions
What should I do if my Hoover WindTunnel vacuum is clogged?
If your Hoover WindTunnel vacuum is clogged, start by checking the hose, filters, and brush roll for blockages. Perform a maintenance routine to disassemble the vacuum for a thorough cleaning.
What tools do I need for disassembling my Hoover WindTunnel vacuum?
You will typically need a screwdriver set, a brush, and possibly pliers for disassembly. Make sure to have a clean workspace and gather all necessary tools beforehand.
How do I ensure safety while disassembling my vacuum?
Always unplug the vacuum before starting any disassembly. Use caution when handling sharp tools and parts, and wear safety goggles to protect your eyes from debris.
What common issues might I face during reassembly?
Common issues include misaligned parts and difficulty fitting components together. Ensure all parts are properly aligned and fit snugly to avoid efficiency problems.
How can I improve the vacuum’s performance after reassembly?
After reassembling, double-check that all parts are secure and aligned. Regularly clean filters and brushes, and check for any remaining blockages to ensure optimal performance.
