
Key Takeaways
- Importance of Cleaning: Regular cleaning of kitchen faucet heads prevents grime buildup, ensuring hygiene, enhancing appearance, and maintaining functionality.
- Common Issues: Key problems include mineral buildup and clogged spray holes, which can impair water flow and affect cleaning efficiency.
- Step-by-Step Cleaning Process: Use white vinegar to soak and clean the faucet head, scrub with a soft toothbrush, and rinse thoroughly for best results.
- Maintenance Tips: Establish a regular cleaning schedule and implement preventative measures like using a water softener and wiping down the faucet after use to minimize buildup.
- Hygiene and Longevity: Regular upkeep reduces the risk of bacteria growth and extends the life of faucet components, saving money on repairs.
Have you ever noticed a buildup of grime on your kitchen faucet head? It’s a common issue that can make your kitchen look less than sparkling. Over time, mineral deposits and soap scum can accumulate, affecting both the appearance and functionality of your faucet.
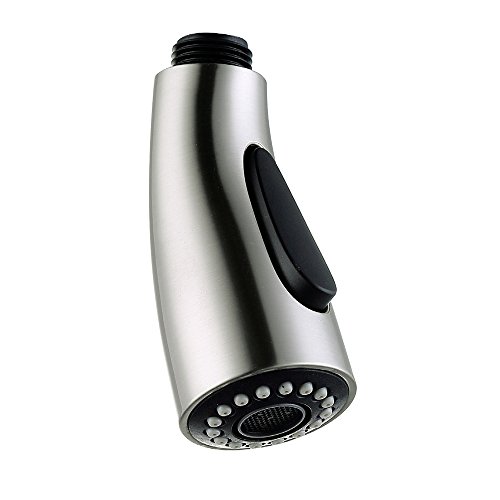
Importance Of Cleaning Kitchen Faucet Heads
Cleaning kitchen faucet heads prevents grime buildup, ensuring your kitchen remains hygienic and inviting. Regular maintenance eliminates mineral deposits that clog nozzles, enhancing water flow.
Neglecting to clean the faucet head can lead to noticeable stains and a less polished appearance. An attractive faucet contributes to an overall appealing kitchen space.
Cleaning also helps maintain the functionality of your faucet. A clear, unclogged spray provides more efficient cleaning and food preparation. This functionality impacts everyday tasks, making your kitchen experience smoother and more enjoyable.
A clean faucet head can significantly reduce the risk of bacteria growth. Maintaining hygiene in your kitchen is essential, considering it’s a hub for food preparation.
By putting time into cleaning, you prolong the life of your faucet components. This can save money on repairs or replacements in the long run.
Common Issues With Faucet Heads
Faucet heads experience several common issues that affect both appearance and functionality. Recognizing these problems helps you maintain a clean and efficient kitchen faucet.
Recommended Products

Unclogging Showerhead Holes: This shower head cleaner tool provides an efficient and easy unclogging solution to help easily clear clogged shower holes and ensures uninterrupted waterflow

Shower Head Cleaner Tool : The small holes in shower heads are easily clogged and difficult to clean. Lumkew shower head cleaning brush is specially designed for this purpose, and it quickly unclogs the deposits that accumulate in the showerhead, restoring the strong waterflow

Dual-Function Sprayer: Hibbent kitchen faucet aerator with anti-leak design. Rotate the bottom to switch between soft bubble stream and strong spray. 360° swivel supported. Compatibility Note: Fits only faucets with detachable aerators. Incompatible with pull-down faucets, filter-equipped models/devices, RV faucets
Mineral Buildup
Mineral buildup occurs when hard water causes deposits to accumulate on the faucet head. These deposits reduce water flow and can create unsightly stains. Regular cleaning prevents this buildup. To remove mineral deposits, soak a cloth in white vinegar and wrap it around the faucet head for about 30 minutes. Rinse with warm water for optimal results.
Clogged Spray Holes
Clogged spray holes happen when dirt or mineral deposits block individual openings in the faucet head. This problem can create uneven water flow or low pressure. To clear clogged holes, use a toothbrush with soft bristles to scrub the affected areas gently. Alternatively, soak the faucet head in a vinegar solution to dissolve blockages. After soaking, rinse well to ensure all debris is removed.
Step-By-Step Guide To Clean Your Kitchen Faucet Head
Cleaning your kitchen faucet head is a straightforward process that enhances both appearance and functionality. Follow these steps for effective results.
Tools And Materials Needed
- White vinegar
- Soft cloth or old t-shirt
- Soft-bristled toothbrush
- Small bowl or container
- Rubber bands or string
- Water for rinsing
Cleaning Process
- Prepare the Vinegar Solution
Pour white vinegar into a small bowl or container. This solution helps dissolve mineral buildup effectively.
- Soak the Faucet Head
Soak a soft cloth or old t-shirt in the vinegar. Wrap it around the faucet head, ensuring full coverage. Secure it using rubber bands or string to hold it in place.
- Let It Sit
Allow the vinegar-soaked cloth to rest on the faucet head for at least 15 minutes. If buildup is severe, consider extending the soaking time.
- Scrub the Faucet Head
Remove the cloth, and discard any accumulated debris. Use a soft-bristled toothbrush to scrub any remaining stains or mineral deposits, especially around spray holes.
- Rinse Thoroughly
Rinse the faucet head under running water to wash away any vinegar residue and loosened grime. Ensure no debris is left.
- Wipe Dry
Finally, use a dry cloth to wipe the faucet head, giving it a polished look. This step helps prevent water spots from forming.
Repeat this cleaning process every few months to maintain a sparkling and fully functional kitchen faucet head.
Maintenance Tips For Your Faucet Head
Maintaining your faucet head ensures cleanliness and prevents potential issues. Follow these tips to keep yours in top shape.
Recommended Products

Deep Cleaning Made Easy: This Faucet Descaling Cap for Limescale Removal lets you fill it with descaler and attach it to your tap outlet for a thorough deep cleaning experience. Effectively dissolves stubborn buildup and keeps faucets clear

Almost Universal with 15 Adapters: This kitchen spray head comes with 15 adapters compatible with most types of faucets from American Standard Faucets, compatible with Kohler, Hansgrohe, Grohe, Moen, Delta and more; Not compatible with all faucets, please check the faucet size before ordering
CONNECTION SIZE & TYPE: outer diameter of the male connection of this pull down faucet head is 0.8" (13/16" or 20.5mm), NOT 1/2", the inside diameter is 0.55" (9/16" or 14mm), fits with most applications, but doesn't fit some models from specific brands. Note that it's ONLY designed for a STANDARD TYPE of pull out hose, please check the size and thread type before ordering.
Regular Cleaning Schedule
Establish a regular cleaning routine for your faucet head. Clean it every one to three months, depending on your water quality. Hard water areas require more frequent attention. Use white vinegar to soak the faucet head for at least 30 minutes. After soaking, scrub with a soft-bristled toothbrush to dislodge any remaining deposits. Rinse thoroughly to remove vinegar and debris. This proactive approach helps maintain optimal water flow and appearance.
Preventative Measures
Implement preventative measures to reduce grime buildup. Use a water softener if hard water is an issue. Regularly wipe down the faucet head after use to prevent residue accumulation. Consider installing a faucet aerator with a filter to minimize mineral deposits. Moreover, check the faucet for leaks or drips; addressing these issues promptly reduces water exposure, which contributes to buildup. These simple actions greatly extend the time between deep cleans.
Conclusion
Keeping your kitchen faucet head clean is a simple yet effective way to enhance your kitchen’s appearance and functionality. By making it a habit to clean regularly you can prevent grime buildup and ensure a steady flow of water.
Using everyday items like white vinegar can make the process easy and efficient. Plus with just a little effort you can extend the life of your faucet and maintain a hygienic space for food preparation.
So grab your supplies and tackle that faucet head. You’ll be amazed at the difference a clean faucet can make in your kitchen!
Frequently Asked Questions
What causes grime buildup on kitchen faucet heads?
Grime buildup on kitchen faucet heads is primarily caused by mineral deposits from hard water and soap scum over time. This accumulation can affect both the appearance and functionality of the faucet.
How often should I clean my kitchen faucet head?
It is advisable to clean your kitchen faucet head every one to three months, depending on your water quality and usage. Frequent cleaning may be necessary in areas with hard water.
How can I clean my kitchen faucet head effectively?
To clean your kitchen faucet head, soak a cloth in white vinegar and wrap it around the head. Let it sit for 15-20 minutes, then scrub with a soft-bristled toothbrush, rinse thoroughly, and wipe dry.
What tools do I need to clean my kitchen faucet head?
Essential tools for cleaning your kitchen faucet head include white vinegar, a soft cloth, a soft-bristled toothbrush, and rubber bands to secure the cloth in place.
How can I prevent mineral buildup on my faucet?
Prevent mineral buildup by using a water softener, wiping down the faucet head after each use, and installing a faucet aerator with a filter to minimize deposits.
What are the signs of clogged spray holes on a faucet head?
Signs of clogged spray holes include uneven water flow, low water pressure, or water spraying in unintended directions. Cleaning the faucet head can resolve these issues.
Why is cleaning the faucet head important for hygiene?
Regularly cleaning the faucet head helps prevent bacteria growth, reducing the risk of contamination in your kitchen, particularly in areas where food is prepared.
Can neglecting to clean my faucet head lead to damage?
Yes, neglecting to clean your faucet head can lead to mineral deposits that clog nozzles, reduce functionality, and cause stains, potentially leading to costly repairs or replacements over time.
