
Key Takeaways
- Regular Cleaning is Essential: Clean your Moen kitchen faucet aerator every 3 to 6 months to maintain optimal water flow and prevent clogs.
- Tools for Efficiency: Utilize common household items like an adjustable wrench, vinegar, and a small brush, along with specialized tools like an aerator key and plumber’s tape for ease of cleaning and reinstallation.
- Cleaning Process: Remove the aerator, soak it in white vinegar to dissolve mineral buildup, scrub gently, and rinse thoroughly before reassembling.
- Inspect Components: Check the aerator for wear and tear. Replace damaged parts to ensure effective performance and prevent leaks.
- Monitor Water Quality: Be vigilant for changes in water pressure and quality, which could signal the need for immediate cleaning or maintenance.
- Maintain Faucet Hygiene: Regularly wipe down the faucet surfaces with a soft cloth and avoid harsh chemicals to keep it looking new and functioning well.
Have you ever noticed a sudden drop in water pressure from your Moen kitchen faucet? It’s a common issue that can often be traced back to a clogged aerator. This small but essential part mixes air with water, ensuring a steady flow and saving you water in the process. If it’s dirty, you might end up with a frustrating trickle instead of a smooth stream.
Importance Of Cleaning A Moen Kitchen Faucet Aerator
Cleaning the aerator on your Moen kitchen faucet maintains optimal water flow. A clean aerator ensures a consistent stream, preventing frustrations linked to low water pressure.
A clogged aerator not only affects performance but also impacts water conservation. When dirt and mineral buildup accumulate, your faucet wastes water. Regular cleaning promotes efficiency and helps you save on water bills.
Additionally, a clean aerator reduces the chances of unpleasant odors and water discoloration. Contaminants can lead to an unsightly water flow, which detracts from your kitchen’s hygiene.
You can prevent these issues with simple maintenance. Schedule a cleaning every few months, especially if you notice reduced water pressure. Following this practice keeps your faucet functioning correctly and enhances your overall kitchen experience.
Tools Needed For Cleaning
Cleaning your Moen kitchen faucet aerator requires a few essential tools that are often found around your home. Gather the following items to streamline the process.
Common Household Items
- Adjustable Wrench: Use this to grip and unscrew the aerator from the faucet if it’s tightly secured.
- Bowl or Bucket: Place this under the faucet to catch any water dripping during the cleaning process.
- White Vinegar: This common household item effectively dissolves mineral buildup. Soak the aerator in it for a more thorough cleaning.
- Soft Cloth or Sponge: Rely on this to wipe down the aerator and faucet surfaces, ensuring they’re free of dirt and debris.
- Small Brush: Utilize an old toothbrush or a similar small brush to scrub away trapped particles from the aerator.
Specialized Cleaning Tools
- AERATOR KEY: Invest in an aerator key, specifically designed for easily removing and installing different types of aerators, if you clean it frequently.
- Plumber’s Tape: Use plumber’s tape to wrap the threads of the aerator before reinstallation, securing a tight seal to prevent leaks.
- Fine Mesh Strainer: Employ a fine mesh strainer to catch any debris that may fall when you’re removing the aerator, keeping your workspace clean.
- Protective Gloves: Wear protective gloves if you prefer not to get your hands dirty, especially if you’re dealing with unpleasant buildup.
Gathering these tools simplifies the cleaning process, making it efficient and effective.
Step-By-Step Guide On How To Clean A Moen Kitchen Faucet Aerator
Cleaning the aerator on your Moen kitchen faucet keeps water flowing smoothly. Follow these steps for a hassle-free cleaning process.
Removing The Aerator
- Turn off water supply. Head to the under-sink shut-off valves and turn them clockwise to stop the water flow.
- Position a bowl. Place a bowl or bucket under the faucet to catch any dripping water during the process.
- Unscrew the aerator. Use an adjustable wrench to gently unscrew the aerator from the faucet. If it’s stuck, wrap a cloth around it to avoid scratching the finish.
Cleaning Process
- Inspect the aerator. Check for visible dirt or debris. A clean aerator maintains optimal water flow.
- Soak in vinegar. Fill a bowl with white vinegar and immerse the aerator. Let it soak for at least 30 minutes to dissolve mineral buildup.
- Scrub gently. After soaking, use a small brush to remove any remaining particles. Rinse the aerator thoroughly with water to ensure no vinegar residue remains.
Reassembling The Aerator
- Dry the components. Ensure the aerator and any seals are fully dry before reassembly. Moisture can cause leaks.
- Wrap with plumber’s tape. Apply plumber’s tape to the threads of the aerator for a tighter seal.
- Screw back the aerator. Hand-tighten the aerator onto the faucet, then use the wrench to secure it gently without over-tightening.
- Turn on the water supply. Slowly turn the under-sink valves counterclockwise to restore water flow. Check for leaks around the aerator.
Following these steps will ensure your Moen kitchen faucet aerator stays clean and functions efficiently.
Tips For Maintaining Your Moen Kitchen Faucet Aerator
Regularly maintaining your Moen kitchen faucet aerator keeps it functioning well and prevents clogs. Here are some practical tips:
Recommended Products
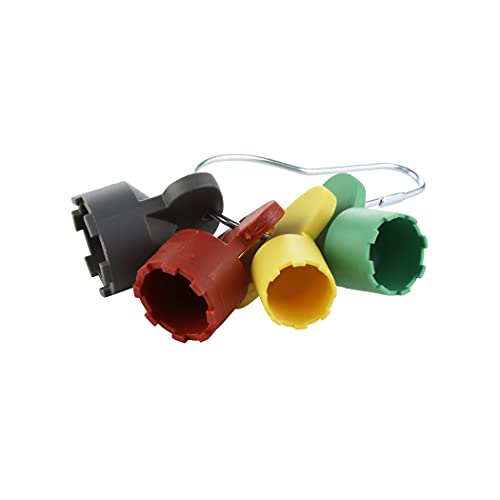
FAUCET AERATOR REMOVAL TOOL: Includes 4 different color coded keys to remove hidden faucet aerators

REPLACEMENT PART: Ideal for repairing problematic plumbing fixtures without the need to replace them

Chrome finish is highly reflective for a mirror-like look that works with any decorating style
Schedule Periodic Cleaning
- Frequency: Clean the aerator every 3 to 6 months.
- Signs of Clogs: Address cleaning sooner if you notice reduced water pressure or inconsistent flow.
Use the Right Tools
- Gather Essentials: Keep an adjustable wrench, bowl, white vinegar, soft cloth, and a small brush ready.
- Consider Specialized Tools: An aerator key simplifies removal, while plumber’s tape secures reinstallation.
Soak in Vinegar
- Dissolve Buildup: Soak the aerator in white vinegar for at least 30 minutes.
- Scrub if Needed: Use a small brush to gently scrub away stubborn deposits after soaking.
Check for Wear and Tear
- Inspect Components: Look for cracks or damage on the aerator screen and housing.
- Replace Parts: Order new parts if you find significant wear to maintain performance.
Ensure Proper Reinstallation
- Use Plumber’s Tape: Wrap plumber’s tape around the threads before reattaching the aerator.
- Tighten Carefully: Hand-tighten the aerator first, then use the wrench for a snug fit without overtightening.
Monitor Water Quality
- Watch for Changes: Use filtered water if you experience discoloration or odors, as these can indicate larger plumbing issues.
- Test Regularly: Run the faucet to ensure a consistent water flow after reinstallation.
Maintain Faucet Hygiene
- Wipe Surfaces: Clean the faucet body and handle with a soft cloth regularly to prevent mineral buildup.
- Avoid Harsh Chemicals: Use mild soap or vinegar solutions on your faucet’s finish to keep it looking new.
By following these tips, you’ll ensure that your Moen kitchen faucet aerator stays clean and functions efficiently. Proper maintenance reduces the likelihood of clogs and enhances your overall kitchen experience.
Conclusion
Keeping your Moen kitchen faucet aerator clean is a simple yet effective way to ensure a steady water flow and maintain a hygienic kitchen. By incorporating regular cleanings into your routine you can avoid frustrating clogs and enhance your faucet’s performance.
Don’t forget to check for any signs of wear and tear during your cleaning sessions. With just a little effort and the right tools you can keep your faucet in top shape and enjoy a smooth stream of water whenever you need it. Happy cleaning!
Frequently Asked Questions
What causes sudden drops in water pressure from Moen kitchen faucets?
Sudden drops in water pressure are often caused by a clogged aerator. The aerator mixes air with water for a steady flow. When it becomes dirty, it can restrict water flow, resulting in a frustrating trickle instead of a smooth stream.
How often should I clean my Moen faucet aerator?
It’s recommended to clean your Moen faucet aerator every 3 to 6 months. More frequent cleaning may be necessary if you notice a reduction in water pressure or flow. Regular maintenance will help ensure optimal performance.
What tools do I need to clean the aerator?
You’ll typically need an adjustable wrench, a bowl or bucket, white vinegar, a soft cloth, and a small brush. Optional tools include an aerator key and plumber’s tape, which can make removal and reinstallation easier.
How do I clean the Moen kitchen faucet aerator?
To clean the aerator, first, turn off the water supply. Remove the aerator using a wrench, soak it in vinegar to dissolve buildup, clean it with a brush, then reassemble using plumber’s tape to prevent leaks.
What should I do if I notice water quality issues?
If you experience water quality issues like discoloration or unpleasant odors, it’s essential to inspect and clean your aerator. Also, consider monitoring your water supply and maintain general faucet hygiene for better results.
Can a dirty aerator affect water conservation?
Yes, a dirty aerator can impact water conservation by reducing water flow. Keeping the aerator clean ensures a consistent stream while saving water, contributing to better conservation efforts in your kitchen.
