
Key Takeaways
- Importance of Clean Air Vents: Cleaning refrigerator air vents is essential for maintaining cooling efficiency, preventing food spoilage, and reducing energy costs.
- Tools Required: Essential tools for cleaning include a screwdriver, vacuum with a brush attachment, soft brush, lint-free cloths, and cleaning solutions like warm soapy water, white vinegar, and baking soda.
- Step-by-Step Cleaning: Follow a systematic approach to clean air vents, including emptying the fridge, unplugging it, removing vent covers, vacuuming, scrubbing, disinfecting, and reassembling.
- Scheduled Maintenance: Schedule regular cleanings every 3 to 6 months to prevent dust buildup and ensure optimal airflow, contributing to better appliance performance.
- Prevent Blockages: Keep objects away from vents, check door seals, monitor temperature settings, and inspect for obstructions to maintain proper airflow.
- Promote Energy Efficiency: By adhering to these cleaning tips, you enhance refrigerator efficiency, promote better food preservation, and achieve energy savings in your kitchen.
Ever noticed how your fridge isn’t cooling as well as it used to? It might not just be the temperature settings. Dirty air vents can block airflow and lead to inefficiency. If you’ve been struggling with this issue, you’re not alone. Many people overlook these vents until it’s too late.
Importance Of Clean Air Vents In Refrigerators
Clean air vents in refrigerators play a crucial role in maintaining proper cooling efficiency. When vents are blocked by dust or debris, airflow is restricted. This restriction can lead to uneven temperatures inside your refrigerator, causing some areas to become too warm while others may be excessively cold.
Efficient airflow ensures that your refrigerator operates smoothly. When every part of the fridge gets the right amount of cool air, food stays fresh longer. You reduce the risk of spoilage and waste, ultimately saving money on groceries. Moreover, a clean system encourages energy efficiency. A refrigerator that works harder due to clogged vents uses more electricity, increasing your energy bills.
Regular cleaning of air vents contributes to better appliance longevity. Neglecting these areas can cause strain on the compressor, leading to potential repairs or early appliance replacement. In addition to efficiency and cost savings, clean vents promote better hygiene. Dust and food particles can breed bacteria, impacting food safety.
Taking time to inspect and clean your refrigerator’s air vents enhances performance, lowers costs, and ensures better food preservation. You protect your investment and maintain a healthier kitchen environment by prioritizing this simple maintenance task.
Tools And Materials Needed
Gathering the right tools and materials makes cleaning your refrigerator’s air vents easier and more effective. Here’s what you’ll need:
Recommended Products

【Deep Cleaning, Done Right】 Flexible stainless-steel shafts bend effortlessly into dryer vents, fridge coils, AC units, and behind heavy appliances—removing lint, dust, and debris from hard-to-reach areas.
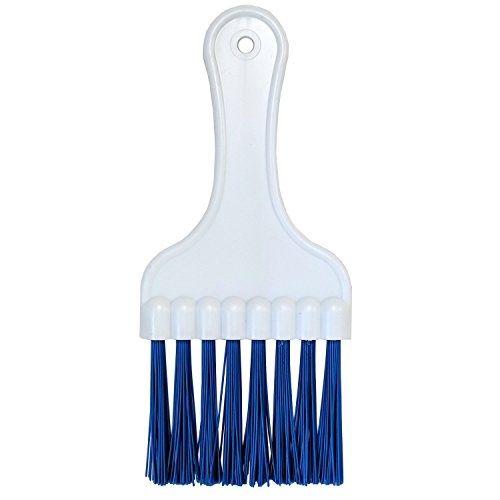
Professional-Style Hvac Coil Cleaning Brush – Designed for use by HVAC technicians, plumbers, and heating contractors, this long-bristle fin cleaner reaches deep into condenser and evaporator fins to dislodge caked-on dirt and dust quickly and effectively.

Ac Coil Brushes: 4 packs hvac brushes in package, you can take these hvac tools to clean different items in your home, the hvac coil brushes enough to satisfy your cleaning needs
Essential Tools
- Screwdriver: You’ll need a screwdriver to remove the vent cover if applicable.
- Vacuum with Brush Attachment: This helps to remove dust and debris from tight spaces.
- Soft Brush or Toothbrush: Use a soft brush to dislodge dirt from the vents without damaging them.
- Lint-Free Cloths: These are useful for wiping down surfaces and removing any remaining dust.
- Flashlight: A flashlight lets you see dark corners of the refrigerator quickly.
Cleaning Solutions
- Warm Soapy Water: Use a mix of warm water and dish soap for a gentle cleaning solution. This works well for any stubborn stains.
- White Vinegar: This natural disinfectant can help cut through grime and eliminate odors.
- Baking Soda: Mix some baking soda with water for an effective abrasive cleaner that freshens and removes residue.
Having these tools and materials on hand ensures you can clean your refrigerator’s air vents thoroughly and maintain its efficiency.
Step-By-Step Guide To Cleaning Air Vents
Cleaning the air vents in your refrigerator helps maintain its efficiency and ensures your food stays fresh. Follow these steps to clean your refrigerator vents effectively.
Recommended Products

Home Essentials: Fireplace chimney brushes includes two high quality synthetic brush head and flexible rods that extend up to 30 feet

Multi-functional Dryer Vent Cleaner Kit and Drain Brush AC Fan Refrigerator Appliance Brush - A versatile cleaning tool that can clean refrigerator coils, dryer vents, dust collectors, condenser units, and air conditioning systems. dryer lint Cleaner, home essentials.

No Need to Disassemble to Clean: this cleaning brush allows you to directly clean the gaps of the air conditioner and fridge coils without disassembling the air conditioner; If you feel that the air conditioner and fridge coils are dirty and need simple cleaning, then this product is suitable for you; It can keep your air conditioner and fridge clean at all times without the trouble of disassembly
Preparing The Refrigerator
- Empty the fridge: Remove food items from your refrigerator to make the cleaning process easier and to prevent potential spoilage.
- Unplug the refrigerator: For safety, unplug the appliance before starting any cleaning to avoid electric shock or accidents.
- Gather tools: Collect the necessary tools, including a screwdriver, vacuum with a brush attachment, soft brush or toothbrush, lint-free cloths, warm soapy water, white vinegar, and a baking soda mixture.
Cleaning Process
- Remove vent covers: Use a screwdriver to carefully take off the vent covers. Keep screws in a safe place for easy reassembly.
- Dust off debris: Use your vacuum’s brush attachment to remove loose dirt and dust from the vents. This step improves airflow immediately.
- Scrub with a soft brush: For stubborn stains or dirt, take your soft brush or toothbrush, dip it in warm soapy water, and scrub the vent surfaces gently.
- Disinfect with vinegar: Wipe the cleaned surfaces with a cloth soaked in white vinegar. This step disinfects the area and eliminates odors.
- Use baking soda for tough spots: If any residue remains, create a paste with baking soda and water. Apply it to the spots and let it sit for a few minutes before wiping it off.
Reassembling The Vents
- Dry the vents: After cleaning, ensure that all vent surfaces are dry. Excess moisture can attract mold or bacteria.
- Reattach vent covers: Position the vent covers back onto the vents and securely fasten them with the screws you saved earlier.
- Plug the refrigerator back in: Once everything is reassembled, plug your refrigerator back into the outlet and organize the food items back inside.
By following these clear steps, you can keep your refrigerator’s air vents clean, allowing for improved airflow and energy efficiency.
Tips For Maintaining Clean Air Vents
- Schedule Regular Cleanings: Set a reminder to clean your air vents every 3 to 6 months. Regular maintenance keeps dust and debris from building up.
- Use the Right Tools: A vacuum with a brush attachment works great for sucking up dust. A soft brush, like a toothbrush, can help dislodge particles stuck in corners.
- Keep Objects Away: Ensure nothing blocks the airflow around the refrigerator. Move items like jars and containers away from the vents to promote proper circulation.
- Check Door Seals: Inspect door seals for wear and tear. Poor seals let warm air in, causing clutter in the vents. Replace seals if they don’t form a tight seal.
- Monitor Temperature Settings: Maintain correct temperature settings. A fridge should stay between 32°F and 40°F. Incorrect settings can lead to condensation and clog vents.
- Inspect for Blockages: Regularly check vents for any visible obstructions. Clear away any food items or dust buildup that might restrict airflow.
- Utilize Filters: If your fridge has accessible filters, replace or clean them as recommended. Clean filters improve airflow and efficiency.
- Wipe Down Surfaces: Use a damp, lint-free cloth to wipe down the exterior ventilation areas. This helps remove any dust that may accumulate over time.
- Promote Good Airflow: Ensure the refrigerator isn’t overcrowded. Allowing space for airflow improves cooling and minimizes strain on the compressor.
Regularly following these tips creates a more efficient appliance, enhances food preservation, and supports energy savings in your kitchen.
Conclusion
Taking the time to clean your refrigerator’s air vents can make a world of difference in its performance. You’ll not only keep your food fresher for longer but also save on energy bills. Regular maintenance is key to ensuring your appliance runs smoothly and efficiently.
By incorporating simple cleaning steps into your routine every few months, you’re investing in the longevity of your fridge. Plus, a cleaner refrigerator helps create a healthier kitchen environment. So grab those tools and get started—your fridge will thank you!
Frequently Asked Questions
Why is my refrigerator not cooling effectively?
The cause may not just be incorrect temperature settings. Often, dirty air vents obstruct airflow, reducing cooling efficiency. Regular maintenance can prevent these issues.
How do dirty air vents affect my refrigerator?
Blocked vents restrict airflow, leading to uneven temperatures and potential food spoilage. They also make the refrigerator work harder, increasing energy consumption and costs.
How often should I clean my refrigerator’s air vents?
It’s recommended to clean your refrigerator’s air vents every 3 to 6 months to maintain optimal performance and energy efficiency.
What tools do I need to clean refrigerator air vents?
Essential tools include a screwdriver, vacuum with a brush attachment, soft brush or toothbrush, lint-free cloths, and various cleaning solutions like vinegar and baking soda.
What is the step-by-step process for cleaning air vents?
- Empty and unplug the refrigerator.
- Remove vent covers.
- Dust off debris and scrub with a soft brush.
- Disinfect with vinegar and tackle tough spots with baking soda.
- Reassemble the vents once dry and reorganize food items.
How can I maintain clean air vents?
Schedule regular cleanings, keep the area around the fridge clear, check door seals, monitor temperature settings, and ensure the fridge isn’t overcrowded to promote good airflow.
