
Key Takeaways
- Understanding Burnt Milk Residue: Burnt milk leaves behind a sticky residue that can vary in thickness, depending on cooking temperature and milk fat content.
- Safety First: Always turn off the stove and allow it to cool before cleaning to prevent burns. Wear protective gear and ensure good ventilation during the cleaning process.
- Effective Cleaning Techniques: Use baking soda and water, vinegar solution, or commercial cleaners tailored for stovetops to tackle burnt milk efficiently.
- Step-by-Step Approach: Assess the extent of the damage, apply the chosen cleaning method, scrub gently, and thoroughly rinse and dry the stove for optimal results.
- Prevent Future Accidents: Implement preventive measures like using a timer, monitoring heat settings, and cleaning spills immediately to reduce the risk of burnt milk in the future.
Have you ever left milk on the stove for just a moment too long? The burnt mess can feel like a nightmare. It’s frustrating to look at and even worse to clean up. But don’t worry, you’re not alone in this kitchen disaster.
Understanding The Problem
Burnt milk can create a sticky, charred substance on your stove. When milk heats up too quickly, it can scorch, leaving behind a stubborn residue. This mess can be frustrating to clean, especially when it hardens and sticks to the surface.
Several factors contribute to the difficulty of cleaning burnt milk. The temperature at which milk burns ranges from 200°F to 250°F, depending on its fat content. Higher fat milks, like whole milk, often burn more easily than lower fat alternatives. The longer milk sits on the heat, the more likely it is to form that tough crust.
You may notice different types of burnt milk residues. A thin layer might simply wipe off, while a thicker layer may require more effort. The type of stove you have—gas, electric, or induction—also affects the cleaning process and the tools needed.
Understanding these aspects helps you prepare for the cleaning process. Knowing the characteristics of burnt milk provides insight into suitable cleaning methods. This foresight allows you to tackle the problem effectively, making the cleanup less daunting.
Safety Precautions
Cleaning burnt milk requires careful attention to safety. Follow these precautions to ensure a safe cleaning process.
- Turn Off the Stove: Ensure the stove is completely off before starting the cleaning process. This prevents accidental burns and further hazards.
- Allow the Surface to Cool: Wait for the stove to cool down before touching it. A hot surface increases the risk of burns.
- Use Protective Gear: Wear gloves and a mask if you’re sensitive to harsh cleaners or dust. This protects your skin and respiratory system from irritation.
- Ventilate the Area: Open windows or turn on fans to improve air circulation. This helps disperse fumes from burnt milk or cleaning agents.
- Choose Safe Cleaners: Opt for non-toxic, gentle cleaners whenever possible. Avoid abrasive materials that can damage your stove’s surface.
- Test Cleaning Solutions: If using commercial cleaners, test them in a small, inconspicuous area first. This ensures they won’t harm your stove.
- Dispose of Residue Safely: Collect burnt milk residue with a damp cloth and dispose of it in a plastic bag. Avoid pouring it down the sink, as it can clog pipes.
- Stay within Reach: Keep all cleaning supplies within easy reach to avoid stepping away from the stove while dealing with hot surfaces.
- Monitor Electrical Cords: Ensure electrical cords from adjacent appliances are out of the way. This minimizes risks of tripping or contact with hot surfaces.
By following these safety precautions, you can tackle the task of cleaning burnt milk with confidence while keeping yourself safe.
Effective Cleaning Methods
Cleaning burnt milk off your stove can be straightforward with the right techniques. Here are some effective cleaning methods to restore your stove’s surface.
Baking Soda and Water Paste
- Combine equal parts of baking soda and water in a bowl.
- Apply the paste directly onto the burnt areas. Spread it evenly across the mess.
- Let it sit for about 15-30 minutes. This allows the baking soda to penetrate the burnt residue.
- Scrub gently with a soft cloth or sponge. Use circular motions to lift the burnt milk.
- Rinse the area with clean water. Wipe away any remaining paste.
Vinegar Solution
- Mix one part vinegar with two parts water in a spray bottle.
- Spray the solution liberally onto the burnt milk stains.
- Let it sit for approximately 10-15 minutes. This helps dissolve the charred bits.
- Wipe with a non-abrasive cloth or sponge. Ensure you cover all affected areas.
- Rinse with clean water and dry the surface thoroughly.
Commercial Cleaners
- Choose a commercial cleaner designed for stovetops or tough stains. Check labels for burn-friendly formulations.
- Follow the instructions on the cleaner for application. Most recommend spraying or applying directly to the stained area.
- Allow the cleaner to work for the suggested time. This often ranges from 5 to 15 minutes.
- Scrub the residue with a soft sponge or cloth. Rinse with water afterward.
- Dry the surface with a clean cloth, ensuring no cleaner residue is left behind.
Utilizing these effective cleaning methods guarantees that you tackle the burnt milk residue efficiently, restoring your stove to its original condition.
Step-by-Step Cleaning Process
Cleaning burnt milk off your stove requires a systematic approach. Follow these steps to effectively tackle the mess.
Recommended Products

Removes burnt-on food & grease without scratching: This non-abrasive cooktop & stove top cleaner cream with micro-bead technology breaks down tough, baked-on spills, grease and grime — even old stains — without damaging glass or ceramic surfaces.
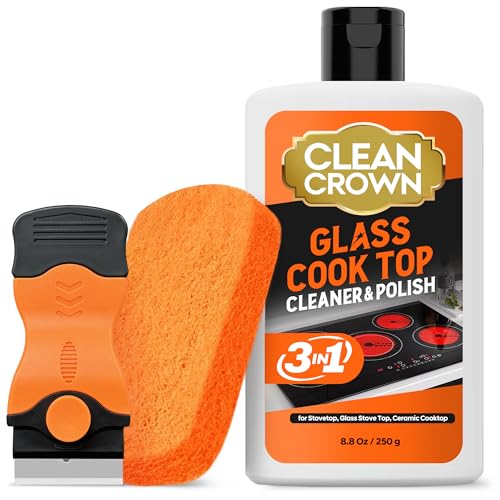
Effortless Stain Removal: Easily tackle tough, baked-on stains with our highly effective CleanCrown Cooktop Cleaner. Its powerful formula is specially designed to cut through grease, grime, and stubborn residues, making your stovetop gleam like new without scratching the surface.

CLEAN EVERYDAY KITCHEN MESSES: Easily get rid of grease, grime and stubborn burned-on food. The Weiman Cook Top Daily Cleaner Spray is a simple solution to protect your stovetop and keep your kitchen sparkling.
Initial Assessment
Assess the extent of the burnt milk stain. Check if the residue is still soft or has hardened. Different conditions may require varied cleaning strategies. If the stain is fresh, it’s easier to manage than hardened residue.
Application of Cleaning Method
Choose a cleaning method based on the severity of the stain. For light stains, use a mixture of baking soda and water. For tougher burns, apply a vinegar solution or a commercial cleaner. Spread the cleaning agent over the affected area, ensuring it covers the burnt residue entirely. Let it sit for at least 15-30 minutes to allow penetration.
Scrubbing Techniques
Select a suitable scrubbing tool, like a non-abrasive sponge or cloth. Scrub gently in circular motions to lift the burnt milk without damaging your stove’s surface. Apply more cleaning solution as needed. For stubborn spots, consider using a plastic scraper to avoid scratching the finish.
Final Rinse and Wipe Down
After scrubbing, rinse the area with clean water and wipe down with a microfiber cloth. Ensure no cleaning residue remains; this prevents streaks and buildup. Dry the surface thoroughly to keep it shining. Regular maintenance will help prevent future burns.
Preventive Measures
Taking preventative steps can significantly reduce the likelihood of burnt milk accidents. Here are some essential tips to keep your stove clean and avoid milk mishaps:
Use a Timer
Set a timer when heating milk. This simple reminder alerts you when it’s time to check on the milk, preventing it from boiling over or burning.
Adjust Heat Settings
Heat milk on low to medium settings. High heat accelerates burning, so maintaining a lower temperature keeps milk from scorching and ensures even heating.
Monitor Consistently
Stay nearby and watch over the milk while it heats. Use this time to prepare your meals or tidy your kitchen, keeping an eye on the pot helps catch any early signs of bubbling or burning.
Choose the Right Pot
Select a heavy-bottomed pot for heating milk. Thicker materials distribute heat more evenly, reducing the risk of burning compared to thinner pots.
Clean Spills Immediately
Wipe up any milk spills right away. Leftover residue can burn during future cooking sessions, making cleaning harder and more time-consuming.
Use a Double Boiler
Consider using a double boiler to heat milk. This method allows indirect heat, minimizing the chance of burning by creating a gentle cooking environment.
Experiment with Alternatives
Explore alternatives like evaporated milk or milk substitutes that are less likely to scorch. These options can provide similar flavors with different cooking behaviors.
Implementing these measures helps avoid burnt milk situations. By being proactive in the kitchen, you can keep your stove and cooking process hassle-free.
Conclusion
Cleaning burnt milk off your stove doesn’t have to be a daunting task. With the right techniques and a little patience, you can restore your cooking surface to its former glory. Remember to prioritize safety by allowing the stove to cool down and using protective gear as needed.
By choosing the cleaning method that suits your situation best and following the step-by-step process, you’ll be well on your way to a clean stove. Plus, incorporating preventive measures can help you avoid this mishap in the future. So next time you find yourself in a sticky situation, just remember you’ve got the tools to tackle it head-on. Happy cooking!
Frequently Asked Questions
What should I do if I accidentally burn milk on the stove?
If you burn milk on the stove, first turn off the heat and allow the surface to cool. Then, assess the severity of the burnt residue and choose a cleaning method—baking soda paste for light burns or a vinegar solution for tougher stains. Scrub gently, rinse thoroughly, and dry the area to prevent streaks.
How can I prevent milk from burning on the stove?
To prevent milk from burning, set a timer when heating it, use low to medium heat, and monitor it closely. Consider using a heavy-bottomed pot or a double boiler. Cleaning spills immediately can also help avoid future burns.
Are there specific cleaners for burnt milk?
Yes, there are effective cleaners for burnt milk, such as a baking soda and water paste, vinegar solutions, or commercial cleaners formulated for tough stains. Ensure you follow the instructions and rinse thoroughly afterward to avoid residue.
What safety precautions should I take when cleaning burnt milk?
Always turn off the stove and allow the surface to cool before cleaning. Wear protective gear, like gloves and masks, to avoid irritation from cleaners. Ensure good ventilation and test cleaning solutions on inconspicuous areas before use.
Can I use milk substitutes to avoid burning?
Using milk substitutes like evaporated milk, almond milk, or oat milk can help reduce the chances of burning. These alternatives may have different cooking properties, so monitor them as you would regular milk.
