
Key Takeaways
- Importance of Cleaning: Regularly cleaning kitchen cabinet grooves prevents pest infestations, mold growth, and helps maintain the longevity and appearance of your cabinets.
- Essential Tools: Utilize an all-purpose cleaner, soft cloths, toothbrushes, and optional tools like steam cleaners and vacuums for effective cleaning.
- Step-by-Step Process: Prepare the area, dust the grooves, apply a homemade cleaner, and rinse thoroughly to ensure all dirt is removed.
- Maintenance Tips: Implement weekly dusting, quick wipe-downs after cooking, and monthly deep cleaning to maintain cleanliness and prevent buildup.
- Avoid Common Mistakes: Steer clear of using harsh chemicals, overusing water, and neglecting to dry surfaces to protect your cabinets from damage.
- Encourage Team Effort: Educate all household members on proper cleaning habits to create a consistently clean and inviting kitchen environment.
Ever noticed how dirt and grime love to hide in the grooves of your kitchen cabinets? You’re not alone. Many people struggle with keeping those tricky spots clean, and it can feel like a never-ending battle against buildup.
Importance Of Cleaning Kitchen Cabinet Grooves
Cleaning kitchen cabinet grooves maintains a fresh and tidy appearance. Dirty grooves attract pests, leading to infestations. Accumulated crumbs and spills can promote mold growth, jeopardizing your health. Regular cleaning helps prevent these issues.
Cleaning grooves also enhances the longevity of your cabinets. Grime can damage the finish, causing wear and discoloration. By regularly cleaning these areas, you protect your investment.
A clean kitchen reflects your care for your home. It creates a welcoming environment for you and your guests. Maintaining cleanliness in hard-to-reach spaces demonstrates attention to detail.
Cleaning grooves can improve your cooking experience. A cleaner kitchen encourages a more enjoyable atmosphere. You’ll feel more inspired to cook and entertain when everything looks pristine.
Tools And Materials Needed
Cleaning grooves in kitchen cabinets requires specific tools and materials. Having the right items makes the task easier and more effective.
Essential Cleaning Supplies
- All-Purpose Cleaner: Use a non-toxic all-purpose cleaner to remove dirt and grime.
- Soft Cloths: Microfiber cloths work well for wiping surfaces without scratching.
- Toothbrush: A soft-bristled toothbrush can reach tight grooves effectively.
- Bowl of Warm Water: Use warm water to dampen your cloth and loosen stubborn dirt.
- Baking Soda: Mix baking soda with water to create a gentle abrasive cleaner for tough spots.
- White Vinegar: Vinegar cuts through grease and deodorizes surfaces quickly.
Optional Tools For Deep Cleaning
- Cotton Swabs: Ideal for precision cleaning in tiny crevices that are difficult to reach.
- Steam Cleaner: A steam cleaner can sanitize and lift dirt in one step.
- Vacuum with Attachments: Use a vacuum with a brush attachment to remove loose debris.
- Old Toothbrushes or Paintbrushes: These can help reach corners and detailed areas effectively.
- Sponge Scrubbers: Use a sponge with a scrubbing side for spots that need extra attention.
Gather these tools and materials before starting. They’ll simplify the cleaning process and ensure your kitchen cabinets stay looking fresh and inviting.
Step-By-Step Guide To Clean Grooves In Kitchen Cabinets
Cleaning grooves in kitchen cabinets requires a structured approach. Follow these steps for effective results.
Recommended Products
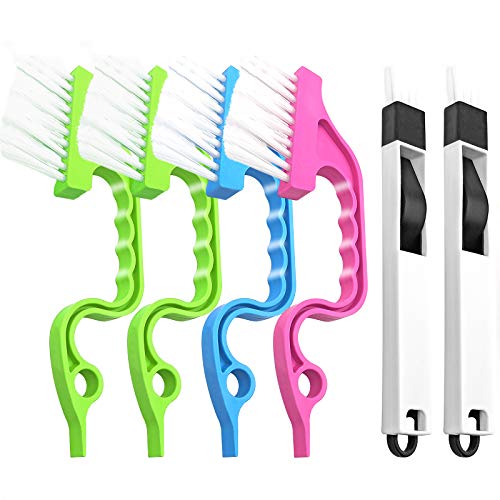
Durable Plastic Construction: Made from sturdy plastic for long-lasting use.

40 YEARS OF FINISHING EXPERTISE – Created by second-generation kitchen specialists who understand the science of wood finishes. Our professional kitchen cabinet cleaner is specially designed as a safe wood cabinet cleaner that protects finishes while cleaning.

16Pcs Crevice Cleaning Brush Set --- This set of 16 small brushes includes three crevice brushes for tight spots, three cleaning brushes (brass bristles + wire bristles + nylon bristles for heavy-duty scrubbing), four straw brushes, two two-in-one window and door track cleaners, two long-handled cleaning brushes, two shovels. It's your ultimate weapon for cleaning every corner of your kitchen, office, restaurant, and more!
Preparing The Area
- Clear the Space: Remove items from the cabinets. This provides unobstructed access to grooves.
- Protect Surfaces: Place a towel or mat beneath the cabinets to catch debris or spills during cleaning.
- Check for Damage: Inspect the grooves for signs of damage. Address any issues before cleaning to prevent further harm.
Cleaning Techniques
- Dusting: Use a microfiber cloth to wipe away loose dust and debris from the grooves.
- Mixing Cleaner: Combine equal parts of warm water and white vinegar in a bowl. For tough grime, add a tablespoon of baking soda.
- Applying the Cleaner: Dampen a soft-bristled toothbrush in the solution. Scrub the grooves gently, ensuring the bristles reach all areas.
- Using Alternatives: For deeper cleaning, utilize a steam cleaner or attach a vacuum nozzle to remove embedded dirt.
- Finishing Up: Rinse the area with a clean, damp cloth to remove any cleaning solution residue.
Drying And Finishing Touches
- Wipe Down: Use a dry microfiber cloth to thoroughly wipe down the grooves. Ensure no moisture remains to prevent mold growth.
- Inspect Your Work: Check for missed spots. Repeat the cleaning process in those areas if necessary.
- Reorganize Items: Once everything’s clean and dry, return items to the cabinets neatly. Keep frequently used items at the front for convenience.
Tips For Maintaining Clean Cabinet Grooves
Recommended Products

ULTRA SOFT MATERIAL & SCRATCH FREE - Ultra soft and highly absorbent microfiber cleaning cloths, great for cleaning windows, kitchenware, car or other delicate surfaces.

MAGICFIBER CLEANING CLOTHS - This 12 pack of thick MagicFiber cleaning cloths includes 3 light gray, 3 light blue, 3 blue, and 3 dark gray cloths. Clean the household items that you care about quickly, effectively, and in style.

Size: 6 x 7 " (15cm x 18cm), each item individually packed in a plastics zip bag.
Regular Dusting
Dust cabinet grooves weekly. Use a microfiber cloth to trap dust and prevent buildup. Consistent dusting stops grime before it settles and becomes harder to remove.
Quick Wipe Downs
After cooking or using the kitchen, wipe down cabinet surfaces. A quick swipe with a damp cloth removes spills and prevents sticky residue from forming in grooves.
Use the Right Cleaner
Choose a gentle, non-toxic cleaner for routine maintenance. Avoid harsh chemicals that can damage the finish. Look for pH-balanced options that effectively clean without harming your cabinets.
Check for Damage
Inspect cabinet grooves regularly for cracks or wear. Spotting issues early prevents further damage and keeps cleaning efforts effective. Address repairs promptly for long-lasting results.
Deep Cleaning Schedule
Set a deep cleaning schedule for cabinet grooves every month. Use a mixture of warm water and white vinegar for a natural, thorough clean. This helps remove tough grime and keeps cabinets looking fresh.
Avoid Overloading Cabinets
Limit the number of items stored in cabinets. Overcrowding can lead to spills and messes in grooves. Organizing items makes it easier to access and clean your cabinets.
Be Mindful of Cooking Spills
Take care when cooking to avoid splashes. Use splatter guards or lids to minimize messes. Keeping spills contained reduces the frequency of deep cleaning sessions.
Store Cleaning Supplies
Keep cleaning supplies accessible near your kitchen. Having microfiber cloths, all-purpose cleaner, and a soft-bristled toothbrush within reach encourages regular upkeep. This enhances efficiency during cleaning sessions.
Educate Household Members
Inform everyone in the household about maintaining cabinet grooves. Encourage them to wipe spills immediately and practice good kitchen habits. Teamwork helps create a consistently clean kitchen environment.
Common Mistakes To Avoid
Cleaning grooves in kitchen cabinets can be tricky. Avoid these common mistakes to ensure you achieve the best results.
- Using Harsh Chemicals
Harsh chemicals can damage the finish of your cabinets. Stick with non-toxic, gentle cleaners that effectively remove grime without causing harm.
- Neglecting to Test Cleaners
Always test your cleaning solution on a small, hidden area first. This practice prevents discoloration or damage before applying it to larger sections.
- Overusing Water
Excess water can seep into cracks and grooves, damaging wood or weakening joints. Use a damp cloth rather than soaking your cleaning tools.
- Forgetting to Dry Surfaces
Not drying cabinet grooves after cleaning leads to moisture buildup. It’s essential to wipe down surfaces with a dry cloth after cleaning.
- Skipping Regular Maintenance
Allowing dirt to accumulate makes deep cleaning more challenging. Regular quick cleanings, like wiping down grooves weekly, maintain cleanliness.
- Ignoring Tools for Deep Cleaning
Neglecting tools like soft-bristled toothbrushes or cotton swabs means missing out on thorough cleaning. These tools do a great job in tight spaces.
- Rushing the Cleaning Process
Hurrying through the cleaning process often results in missed spots or inadequate cleaning. Take your time, moving methodically through each groove.
- Disregarding Manufacturer Recommendations
Not following the manufacturer’s cleaning recommendations can lead to damage or void warranties. Always check guidelines specific to your cabinet material.
By avoiding these mistakes, you’ll maintain clean, well-kept kitchen cabinet grooves, enhancing the overall appearance of your kitchen.
Conclusion
Keeping the grooves in your kitchen cabinets clean doesn’t have to be a daunting task. By following the right steps and using the right tools you can maintain a fresh and inviting kitchen space. Regular maintenance and mindful cooking habits will go a long way in preventing dirt and grime buildup.
Remember it’s not just about aesthetics; a clean kitchen promotes a healthier environment for you and your family. So take a little time each month to give those grooves some love. You’ll be amazed at how much brighter and welcoming your kitchen will feel. Happy cleaning!
Frequently Asked Questions
Why is it important to clean kitchen cabinet grooves?
Cleaning kitchen cabinet grooves is essential to maintain a fresh appearance, prevent pest infestations, reduce the risk of mold growth, and enhance the longevity of your cabinets. Regular cleaning also reflects care for your home and creates a welcoming environment for guests, improving your overall cooking experience.
What tools do I need to clean kitchen cabinet grooves?
To effectively clean kitchen cabinet grooves, gather a non-toxic all-purpose cleaner, microfiber cloths, a soft-bristled toothbrush, warm water, baking soda, and white vinegar. Optional tools for deeper cleaning include cotton swabs and steam cleaners.
What are some tips for maintaining clean cabinet grooves?
To maintain clean cabinet grooves, regularly dust with a microfiber cloth, perform quick wipe-downs after cooking, and use gentle, non-toxic cleaners. Set a monthly deep cleaning schedule, inspect for damage, and avoid overcrowding to keep your cabinets tidy.
What common mistakes should I avoid when cleaning cabinet grooves?
Avoid using harsh chemicals that can damage finishes and neglecting to test cleaners on hidden areas. Don’t overuse water or forget to dry surfaces after cleaning. Regular maintenance is crucial to prevent dirt buildup and ensure you use the appropriate tools.
How often should I deep clean my cabinet grooves?
It is advisable to deep clean your cabinet grooves at least once a month. However, adjusting this frequency based on cooking habits and the level of grime can help maintain better cleanliness in your kitchen over time.
