
Key Takeaways
- Importance of Cleaning: Thoroughly cleaning kitchen cabinets improves paint adhesion, enhances aesthetic appeal, and increases the longevity of the paint job.
- Essential Supplies: Gather necessary cleaning solutions like all-purpose cleaners, degreasers, and natural mixtures, along with tools such as microfiber cloths, sponges, and scrub brushes for optimal results.
- Step-by-Step Process: Prepare the area by removing contents and hardware, clean surfaces effectively, and rinse and dry thoroughly to ensure the best conditions for painting.
- Avoid Common Mistakes: Test cleaners on inconspicuous areas, always rinse off cleaning residues, and refrain from using abrasive scrubbers to prevent damage to cabinet finishes.
- Material-Specific Tips: Use appropriate cleaning methods for different cabinet materials—gentle cleaners for wood, vinegar solutions for laminate, and degreasers for metal—to maintain their integrity.
Are your kitchen cabinets looking a bit worn and ready for a fresh coat of paint? Before you grab that brush, it’s crucial to clean them properly. Dirty surfaces can ruin your hard work and lead to peeling paint down the line.
Imagine the satisfaction of transforming your kitchen into a beautiful space, all starting with clean cabinets. This article will guide you through simple steps to ensure your cabinets are spotless, making your painting project a breeze. You’ll learn effective techniques that save time and effort, so you can focus on creating the kitchen of your dreams.
Importance Of Cleaning Kitchen Cabinets
Cleaning kitchen cabinets thoroughly before painting is vital for achieving a smooth and lasting finish. Dust, grease, and grime can interfere with paint adhesion, leading to peeling and chipping over time. Here’s why it matters:
- Enhances Paint Adhesion
Cleaning removes contaminants that prevent paint from sticking properly. A clean surface allows paint to bond effectively, ensuring durability.
- Improves Aesthetic Appeal
Freshly painted cabinets look better on a clean surface. Dirt and grease beneath the paint can lead to imperfections that stand out after completing the job.
- Increases Paint Longevity
Cabinets that undergo a thorough cleaning prior to painting last longer. Quality paint applied over a clean surface resists wear and tear, retaining its appearance over time.
- Saves Time and Effort
Prepping cabinets correctly minimizes future touch-ups. A solid base eliminates the need for frequent maintenance, allowing you to enjoy your newly painted kitchen longer.
- Promotes Health and Safety
Cleaning disinfects surfaces, removing allergens and bacteria. This process ensures your kitchen remains a healthy space for food preparation and family gatherings.
Implement these practices for more efficient painting:
- Use a degreaser for heavy grease buildup.
- Wipe down surfaces with a microfiber cloth to catch fine dust.
- Rinse with clean water to remove any residue from cleaning products.
By prioritizing the cleaning of your kitchen cabinets, you set yourself up for a successful painting project that exceeds expectations.
Supplies You’ll Need
Cleaning kitchen cabinets effectively requires specific supplies that enhance your painting preparation. Gather these essential items to ensure a thorough job.
Recommended Products

CABINET & FURNITURE CLEANER: Removes dirt, grime & grease buildup
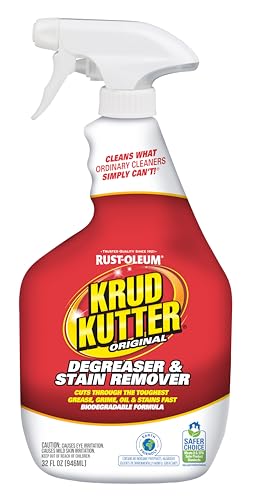
CUTS GREASE AND GRIME: Water-based cleaner degreaser is designed to cut grease, oil, grime, tar and wax fast
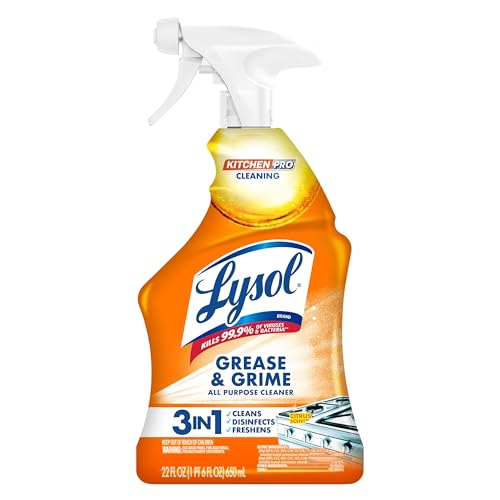
ELIMINATES 99.9% OF KITCHEN VIRUSES AND BACTERIA INCLUDNG SALMONELLA AND E.COLI: Lysol Pro Kitchen Cleaner is tested and proven to eliminate 99.9% of viruses and bacteria* (when used as directed). EPA Reg #777-91.
Cleaning Solutions
- All-Purpose Cleaner: Use an all-purpose cleaner for regular dirt and grime. This solution works well on most cabinet surfaces.
- Degreaser: Opt for a degreaser to tackle heavy grease buildup. This solution breaks down stubborn grease, especially near cooking areas.
- Vinegar and Water Mixture: Combine equal parts vinegar and water for a natural solution. This mixture cuts through residue and offers an eco-friendly option.
- Baking Soda Paste: Create a paste using baking soda and water for tough stains. Apply the paste, let it sit for a few minutes, then scrub gently.
Tools Required
- Microfiber Cloths: Use microfiber cloths for wiping surfaces. They trap dust and debris without scratching the cabinets.
- Sponges: Utilize soft sponges to apply cleaning solutions. Avoid abrasive sponges to prevent damage to the finish.
- Scrub Brushes: Invest in nylon scrub brushes. These help remove stubborn grime from crevices and textured surfaces.
- Bucket: Keep a bucket handy for mixing cleaning solutions and holding your supplies. This keeps your cleaning area organized.
- Protective Gear: Wear gloves and a mask if you’re using strong chemical cleaners. Protecting your skin and lungs is vital during cleaning.
With these supplies, you’re ready to clean your kitchen cabinets before painting.
Step-By-Step Guide
Cleaning kitchen cabinets before painting requires careful preparation and execution. Follow these steps for the best results.
Preparing The Area
Clear the working area for ease of access. Move any furniture and items away from the cabinets. Lay down a drop cloth to protect your floors from drips and debris. This preparation helps maintain a clean workspace.
Removing Contents And Hardware
Take everything out of the cabinets. Remove dishes, utensils, and food items, ensuring a clear surface. Next, take off the cabinet doors and hardware, like handles and knobs. Label screws and hinges to facilitate reassembly later. This step ensures a thorough cleaning of all surfaces.
Cleaning The Cabinet Surfaces
Use a damp microfiber cloth to wipe down the cabinet surfaces. If you encounter heavy grease, apply a degreaser and let it sit for a few minutes. Scrub with a nylon brush or sponge to lift stubborn grime. For tough stains, make a baking soda paste and scrub gently, then wipe clean with a damp cloth. This cleaning guarantees a smooth surface for painting.
Rinsing And Drying
Rinse all surfaces with clean water using a fresh microfiber cloth. Remove any residue from cleaning agents, ensuring no film remains. Finally, dry all surfaces thoroughly with a clean cloth. Allow the cabinets to air dry completely before proceeding to the painting phase. This step prevents moisture from interfering with paint adhesion.
Tips For Effective Cleaning
Cleaning kitchen cabinets properly ensures a smooth painting process. Follow these suggestions for the best results.
Common Mistakes To Avoid
- Neglecting to Test Cleaners: Always test your cleaning solution on a small, inconspicuous area first. This prevents damage to the cabinet finish.
- Skipping Rinsing Steps: Failing to rinse off cleaner residues can affect paint adhesion. Always rinse surfaces after cleaning.
- Using Harsh Scrubbers: Avoid abrasive pads that can scratch the wood or finish. Soft sponges and microfiber cloths are safer options.
- Cleaning with Too Much Water: Excess moisture can warp wood. Use damp, not soaking, cloths when cleaning surfaces.
Best Practices For Different Materials
- Wood Cabinets: Use a gentle all-purpose cleaner paired with a microfiber cloth. Avoid soaking, and always follow up with a dry cloth.
- Laminate Cabinets: A vinegar and water mixture works well. This solution tackles grease without harming the laminate’s surface.
- Metal Cabinets: Use a degreaser for heavy buildup and rinse thoroughly to prevent a slippery surface. Dry immediately to avoid rust formation.
- Painted Cabinets: Apply a diluted dish soap solution for cleaning. A soft cloth preserves the paint finish while removing dirt.
Following these tips will ensure your kitchen cabinets are effectively cleaned and ready for a fresh coat of paint.
Conclusion
Taking the time to clean your kitchen cabinets before painting can make all the difference in achieving a beautiful and lasting finish. By following the right techniques and using the necessary supplies, you’ll set yourself up for success.
Remember to tackle grease and grime effectively and ensure everything is rinsed and dried properly. This prep work not only enhances the look of your cabinets but also prolongs the life of your paint job.
Enjoy the transformation process and the fresh new look of your kitchen. You’ve got this!
Frequently Asked Questions
Why is cleaning kitchen cabinets important before painting?
Cleaning kitchen cabinets before painting ensures a smooth and lasting finish. Dust, grease, and grime can interfere with paint adhesion, leading to issues like peeling and chipping. A thorough clean enhances paint adherence, improves aesthetics, and extends the longevity of your newly painted cabinets.
What supplies do I need to clean my kitchen cabinets?
You will need all-purpose cleaner, degreaser, vinegar, baking soda, microfiber cloths, soft sponges, and nylon scrub brushes. A bucket for organization and protective gear like gloves and masks are also recommended to ensure safety while cleaning.
How do I clean my kitchen cabinets effectively?
Start by removing all contents and hardware. Wipe surfaces with a damp microfiber cloth, then use a degreaser for heavy grease. Apply a baking soda paste for tough stains. Finally, rinse with clean water and dry thoroughly to prepare for painting.
What are the common mistakes to avoid when cleaning cabinets?
Avoid using harsh scrubbers, skipping rinsing steps, or cleaning with too much water. Always test cleaners on a small area first to prevent damage, and make sure to thoroughly dry the cabinets before painting to ensure proper paint adhesion.
What cleaning methods should I use for different cabinet materials?
For wood cabinets, use a gentle all-purpose cleaner. Laminate cabinets benefit from a vinegar and water solution, metal cabinets should be cleaned with a degreaser, and painted cabinets do well with diluted dish soap. Adjust your method based on the material for best results.
