
Key Takeaways
- Importance of Cleaning: Cleaning kitchen cabinets before painting is crucial for better paint adhesion, appearance, and to prevent contamination, ensuring a long-lasting finish.
- Key Cleaning Tools: Essential supplies include mild dish soap, white vinegar, baking soda, soft sponges, microfiber cloths, a scrub brush, and protective gear like gloves and goggles.
- Step-by-Step Cleaning Process: Follow a systematic approach—remove items, dust surfaces, deep clean greasy spots, rinse with a damp cloth, and dry thoroughly for optimal results.
- Sanding and Priming: Sanding prepares the cabinet surfaces for paint adhesion, while priming enhances durability and provides a professional-looking finish.
- Cost Savings: Proper cleaning and preparation can save money by reducing the need for touch-ups or repainting.
- Enhanced Appearance: A clean and well-prepared surface leads to a more aesthetically pleasing and durable paint job on kitchen cabinets.
Are your kitchen cabinets looking a bit tired, and you’re ready to give them a fresh coat of paint? Before you grab that brush, there’s an important step you can’t skip: cleaning. Imagine trying to paint over grease and grime—it’s a recipe for disaster.
Importance Of Cleaning Kitchen Cabinets
Cleaning kitchen cabinets before painting ensures a smooth and long-lasting finish. Dust, grease, and grime interfere with paint adhesion. Without proper cleaning, paint may peel, bubble, or chip within months.
Consider the following reasons why cleaning is critical:
- Improves Adhesion: Removing residue allows paint to stick better to the cabinet surface. Clean surfaces create a solid bond, ensuring durability.
- Enhances Appearance: Cleaning cabinets removes imperfections that can show under paint. A clean surface equals a more professional-looking finish.
- Prevents Contamination: Chemicals from cleaners prevent future paint issues. Grease or dirt on cabinets leads to uneven application and affects color integrity.
- Saves Money: Cleaning saves you money in the long run. It reduces the need for touch-ups or complete repainting due to poor preparation.
To sum it up, cleaning kitchen cabinets properly pays off. It lays a solid foundation for your painting project, ensuring both the beauty and longevity of your cabinets.
Tools And Materials Needed
Gathering the right tools and materials is essential for effectively cleaning kitchen cabinets before painting. Below is a checklist to ensure you have everything ready.
Cleaning Supplies
- Dish soap: Use a mild dish soap for general cleaning. It breaks down grease and grime.
- White vinegar: Acts as a natural degreaser. Mix it with water for an effective cleaning solution.
- Baking soda: Use it to tackle stubborn stains. Create a paste with water for better results.
- Sponges: Soft sponges won’t scratch surfaces. Use them for gentle scrubbing.
- Microfiber cloths: These cloths trap dust and dirt efficiently. They’re perfect for drying surfaces without leaving lint.
- Scrub brush: A small brush helps reach tight spaces and corners effectively.
- Bucket: Use a bucket for mixing cleaning solutions and holding water.
Protective Gear
- Rubber gloves: Protect your hands from cleaning agents and grease. They ensure safety while working.
- Safety goggles: Wear these to shield your eyes from splashes, especially when using vinegar or strong cleaners.
- Dust mask: If cabinets are particularly grimy, a mask can prevent inhaling dust or fumes during cleaning.
Gather these tools and materials for a smooth cleaning process. Following this step makes preparing your kitchen cabinets for painting easier.
Step-By-Step Guide On Cleaning Kitchen Cabinets
Follow these steps to ensure your kitchen cabinets are clean and ready for painting. A thorough cleaning process sets the stage for a smooth paint application and long-lasting results.
Recommended Products

CABINET & FURNITURE CLEANER: Removes dirt, grime & grease buildup
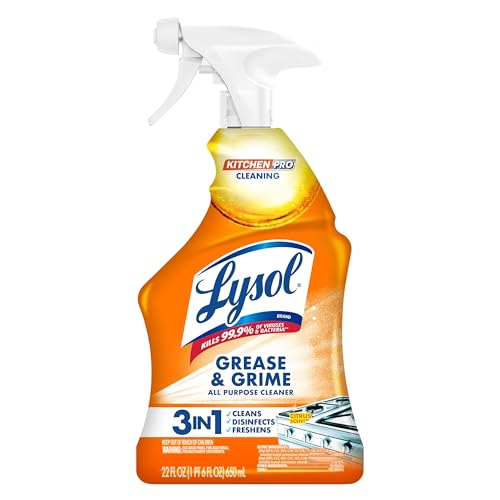
ELIMINATES 99.9% OF KITCHEN VIRUSES AND BACTERIA INCLUDNG SALMONELLA AND E.COLI: Lysol Pro Kitchen Cleaner is tested and proven to eliminate 99.9% of viruses and bacteria* (when used as directed). EPA Reg #777-91.

FORMULATED FOR YOUR MOST CHERISHED WOOD FURNITURE PIECES & CABINETS: Weiman Cabinet & Wood Clean & Shine cleans and restores shine and beauty to your kitchen and home cabinets and wood furniture. No oily, greasy residue left behind!
Removing Items From Cabinets
Start by taking everything out of the cabinets. This includes dishes, utensils, and pantry items. As you remove items, check for expired food or damaged dishes. Sort and organize your belongings to make it easier to put them back later.
Dusting And Wiping Surfaces
Once the cabinets are empty, dust all surfaces. Use a microfiber cloth to trap dust effectively. Wipe the exterior and interior with a damp cloth to remove any remaining particles. This step prevents dirt from mixing with paint.
Deep Cleaning Techniques
For greasy or sticky spots, mix a solution of warm water and mild dish soap. Use a soft sponge to scrub these areas gently. If the grease persists, add a little white vinegar to your cleaning solution or sprinkle baking soda on stubborn spots before scrubbing. Two to three rounds of cleaning may be necessary for heavily soiled areas.
Rinsing And Drying
After deep cleaning, rinse all surfaces with a clean, damp cloth to remove soap and residue. Be sure to wipe down every corner and edge. After rinsing, use a dry microfiber cloth to soak up any excess moisture. Let the cabinets air dry completely before proceeding to paint.
Preparing For Painting
Preparing your kitchen cabinets for painting involves important steps that ensure smooth application and a lasting finish. This preparation phase includes sanding the surfaces and priming them for optimal results.
Recommended Products

Sophisticated Grey Hue: Driftwood offers a chic, sophisticated grey tone that effortlessly adds a touch of elegance and modernity to any cabinet.

Coastal Serenity: Tidal Haze offers a dusty, pale blue reminiscent of misty mornings on the U.S. Eastern coastline, perfect for bright, airy contemporary decor.

Luxurious Deep Brown: Cocoa Couture boasts a rich, dark brown shade, mirroring the chocolate tones of Persian Walnut heartwood, ideal for enhancing classic decor.
Sanding The Cabinets
Sanding the cabinets creates a rough surface, promoting better paint adhesion. Start by using a medium-grit sandpaper (about 120 grit) to scuff the surfaces. Focus on flat areas and edges, applying even pressure. Afterward, switch to fine-grit sandpaper (around 220 grit) for a smoother finish.
- Wear a dust mask to protect your lungs from fine particles.
- Vacuum or wipe down the cabinets with a damp cloth to remove dust after sanding.
- Inspect corners and crevices, as these areas often require extra attention.
Sanding ensures the paint adheres well, preventing issues like peeling down the line.
Priming The Surfaces
Priming the surfaces before painting is essential for a professional-looking finish. Primer acts as a barrier, sealing the wood and improving color coverage. Choose a primer that’s compatible with both your cabinets’ material and the paint type.
- Apply a coat of primer using a brush or roller, ensuring even coverage. Focus on seams and edges.
- Allow the primer to dry fully according to the manufacturer’s instructions. This usually takes about 1 to 2 hours.
- Lightly sand the primed surfaces with fine-grit sandpaper for optimal paint adhesion.
Priming prepares the cabinets for paint, ensuring a uniform finish and enhancing longevity. Following these steps ensures your cabinets look fresh and vibrant after painting.
Conclusion
Taking the time to clean your kitchen cabinets properly before painting can make all the difference in the final result. You’ll not only enhance the appearance of your cabinets but also ensure the paint adheres well and lasts longer.
With the right tools and a little elbow grease you can set the stage for a beautiful transformation. Remember to follow each step carefully and don’t skip the cleaning process. Your cabinets deserve the best preparation for a fresh new look.
Happy painting and enjoy your newly refreshed kitchen!
Frequently Asked Questions
Why is it important to clean kitchen cabinets before painting?
Cleaning kitchen cabinets before painting is essential because it ensures proper paint adhesion by removing grease and grime. This preparation prevents issues like peeling, bubbling, or chipping paint, enhancing the overall appearance while saving money on touch-ups or future repainting.
What tools and materials do I need to clean kitchen cabinets?
To clean kitchen cabinets effectively, gather mild dish soap, white vinegar, baking soda, soft sponges, microfiber cloths, a scrub brush, a bucket, and protective gear like rubber gloves, safety goggles, and a dust mask. These items facilitate thorough and safe cleaning.
What is the best method to clean greasy cabinets?
For greasy cabinets, use a solution of warm water and mild dish soap. Apply this with a soft sponge, adding white vinegar or baking soda for tough spots. After deep cleaning, rinse surfaces with a clean damp cloth and dry them using a microfiber cloth.
How can I prepare my kitchen cabinets for painting?
To prepare kitchen cabinets for painting, start with a thorough cleaning, then sand the surfaces to create texture for paint adhesion. After sanding, apply a primer to seal the wood and improve color coverage, ensuring a smooth and professional-looking finish.
What type of sandpaper should I use for sanding cabinets?
Begin with medium-grit sandpaper (approximately 120 grit) to remove old finishes, then switch to fine-grit sandpaper (around 220 grit) for a smoother finish. This two-step sanding process ensures better paint adhesion and a polished surface for painting.
