
Key Takeaways
- Identify Common Causes: Understand that sink odors typically arise from food residue, clogged drains, grease buildup, and sewer gas.
- Health Implications: Recognize the potential health risks associated with unclean sinks, including bacteria growth, mold development, sewer gas exposure, and allergic reactions.
- Essential Cleaning Supplies: Gather key materials like baking soda, white vinegar, dish soap, and hot water to effectively clean and deodorize your sink.
- Step-by-Step Cleaning: Follow a straightforward process: remove debris, use a baking soda and vinegar mixture, and thoroughly scrub and rinse the sink.
- Regular Maintenance: Establish a cleaning routine to prevent odors, such as weekly cleanings and monthly vinegar treatments.
- Avoid Bad Habits: Prevent future odors by not pouring grease down the drain, addressing clogs promptly, and cleaning dishes immediately after use.
Ever walked into your kitchen only to be hit by a foul smell wafting from the sink? You’re not alone! A stinky sink can turn your cooking space from inviting to unbearable in no time. Whether it’s leftover food particles or pesky grease, that odor can linger and make it hard to enjoy your time in the kitchen.
Understanding the Problem
Sinks can harbor unpleasant odors, often stemming from leftover food particles and grease. Understanding the causes makes it easier to tackle the issue effectively.
Common Causes of Sink Odors
- Food Residue: Food particles stuck in the drain or garbage disposal attract bacteria, leading to foul smells.
- Clogged Drains: Clogs can trap debris and stagnant water, creating a breeding ground for odor-causing bacteria.
- Grease Buildup: Over time, grease accumulates in pipes, hardening and causing persistent odors.
- Sewer Gas: A malfunctioning trap can allow sewer gas to escape into your kitchen, causing a strong, unpleasant smell.
Potential Health Risks
- Bacteria Growth: Bacteria thrive in dirty environments like sinks. Exposure could lead to gastrointestinal issues.
- Mold Development: Moisture combined with organic material can lead to mold, posing respiratory risks.
- Sewer Gas Exposure: Inhaling sewer gas can result in headaches or more serious health problems if not addressed immediately.
- Allergic Reactions: Mold and bacteria in sinks may trigger allergic reactions in sensitive individuals.
Tools and Materials Needed
Cleaning a stinky sink requires specific tools and materials for effective results. Gathering these items beforehand simplifies the process.
Recommended Products

Mrs. Meyer’s Baking Soda Cream Cleaner removes soap scum and grease build-up to make your kitchen sparkle

Effective Odor Elimination: Absorbs and destroys big odors in small spaces, keeping your home smelling fresh and clean.
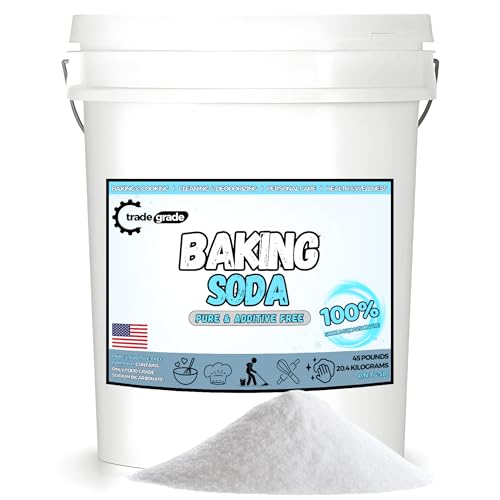
Food-Grade Versatility – Great for cooking, deodorizing, and household use. This bulk baking soda is perfect for a variety of tasks, from freshening your fridge to baking your favorite treats.
Essential Cleaning Supplies
- Baking Soda: Neutralizes odors and removes grime.
- White Vinegar: Acts as a natural disinfectant and odor eliminator.
- Dish Soap: Helps break down grease and food particles.
- Hot Water: Loosens stuck debris and improves cleaning efficiency.
- Scrub Brush: Useful for scrubbing surfaces and hard-to-reach areas.
- Microfiber Cloths: Perfect for wiping down surfaces without scratching.
Optional Additional Tools
- Plumber’s Snake: Clears stubborn clogs that may contribute to odors.
- Rubber Gloves: Protects your hands during cleaning.
- Bowl or Bucket: Collects debris and any liquid waste.
- Squeegee: Helps remove water from sink surfaces for quick drying.
- Porous sponge: Great for applying cleaning agents and scrubbing lightly.
Having these tools and materials ready ensures a smooth and effective cleaning process.
Step-by-Step Guide on How to Clean Stinky Sink
Cleaning your stinky sink doesn’t require advanced skills. Follow these simple steps for a fresh-smelling kitchen.
Recommended Products
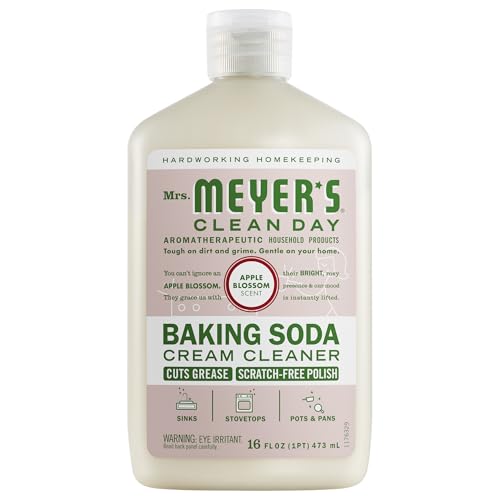
Mrs. Meyer’s Baking Soda Cream Cleaner removes soap scum and grease build-up to make your kitchen sparkle

Aunt Fannie's Sink Refresher: Lemon scented powder packed with the power of baking soda to scrub away stubborn food, grease and stains while also deodorizing sinks & drains

Sink Pipe Cleaner: Formulated to unblock drainage pipe, this chemical cleaner is one of the most powerful cleaners. It is ideal for unclogging bathroom sinks, bath drains, shower pipes and kitchen basins
Step 1: Remove Debris and Food Waste
Start by clearing the sink area. Remove any loose debris, food scraps, or larger items. Use a paper towel or a small container to gather these materials. A clean surface helps prevent further odors. Check the drain for clogs or trapped particles, and remove them as well. This initial step sets the foundation for deeper cleaning.
Step 2: Use Baking Soda and Vinegar
Next, grab your baking soda and white vinegar. Pour ½ cup of baking soda down the drain, followed by 1 cup of vinegar. Expect a fizzing reaction; this indicates it’s working. Let the mixture sit for 15-20 minutes. This combination breaks down grease and eliminates odors effectively. After the wait, flush the drain with hot water to wash away remnants.
Step 3: Scrub and Rinse Thoroughly
After the baking soda and vinegar solution, it’s time to scrub. Take a scrub brush or a sponge and clean the sink surfaces, paying attention to hard-to-reach areas. Rinse everything well with hot water. Ensure all cleaning agents and debris are completely removed. A thorough rinse prevents residue that can cause future odor issues.
Following these steps regularly can help maintain freshness and cleanliness in your sink.
Prevention Tips for Maintaining a Fresh Sink
Keeping your sink smelling fresh requires consistent effort. Simple steps can prevent odors from becoming a problem.
Recommended Products

Stop The Stink: Clean and freshen any drain in your home with quick deodorizing tablets. The unique fizzing and fragrance technology helps eliminate foul drain odors and boosts fragrance to freshen the room.

Prevent Drain clogs & Bad Odors: Our enzyme drain cleaner sticks actively break down grease, food scraps, oil, hair, and soap scumhelping prevent drain blockage and eliminate foul smells from kitchen and bathroom sinks.

PREVENT FOUL ODORS: One Green Gobbler Drain Stick will help remove organic matter that can be the starting point for stinky odors and clogs. It works hard to deodorize pipes and attacks grease, food, fats, oils and scum that cause slow-moving drains.
Regular Cleaning Routine
Establish a routine to clean your sink at least once a week.
- Scrub Surfaces: Use a mixture of dish soap and hot water to scrub the sink’s surface.
- Remove Food Particles: Rinse away any leftover food or grease after each use.
- Flush Drains: Pour hot water down the drain weekly to clear away residue.
- Vinegar Treatment: Once a month, use a solution of equal parts vinegar and water. Pour it down the drain to help neutralize odors.
Avoiding Common Mistakes
Avoiding certain habits can help maintain a fresh sink.
- No Grease Down the Drain: Never pour grease or fatty substances down the sink. Instead, dispose of them in the trash.
- Don’t Ignore Clogs: Address any clogs immediately. A slow drain often leads to bad smells.
- Avoid Harsh Chemicals: Don’t use harsh chemical cleaners that can create harmful residues and odors. Stick to natural options like baking soda and vinegar.
- Don’t Leave Dishes: Avoid letting dirty dishes pile up in the sink. Clean them as soon as possible to prevent mildew and odors.
Conclusion
Keeping your sink fresh and odor-free is easier than you might think. By following the right cleaning steps and sticking to a regular maintenance routine, you can create a welcoming kitchen environment.
Remember to gather your cleaning supplies ahead of time and tackle any food residue as soon as possible. With a little effort and some simple ingredients like baking soda and vinegar, you can say goodbye to those pesky smells.
Make it a habit to flush your drains and clean your sink weekly. You’ll not only enjoy a cleaner kitchen but also a healthier space for you and your family. Happy cleaning!
Frequently Asked Questions
What causes unpleasant odors in kitchen sinks?
Unpleasant odors in kitchen sinks are typically caused by leftover food particles, grease buildup, clogged drains, or even sewer gas. These issues not only create a bad smell but can also pose health risks if not addressed.
How can I clean a stinky sink effectively?
To clean a stinky sink, start by removing any visible debris and waste. Use a mixture of baking soda and white vinegar to break down grease and odors, scrub thoroughly, and rinse with hot water. Regular cleaning helps maintain freshness.
What materials do I need to clean my sink?
Essential materials for cleaning include baking soda, white vinegar, dish soap, hot water, a scrub brush, and microfiber cloths. Optional items like a plumber’s snake and rubber gloves can also help enhance your cleaning routine.
How often should I clean my kitchen sink?
It’s recommended to clean your kitchen sink at least once a week. Regular maintenance ensures that food particles are removed and odors are kept at bay, creating a more inviting cooking environment.
What are some prevention tips for sink odors?
To prevent sink odors, rinse food particles away after each use, flush drains with hot water weekly, and monthly use a vinegar solution to neutralize odors. Maintaining a consistent cleaning routine is key.
What mistakes should I avoid to prevent bad smells in my sink?
Avoid pouring grease down the drain, ignoring clogs, using harsh chemicals, and letting dirty dishes pile up. These practices can significantly contribute to unpleasant odors and unhealthy conditions in your kitchen sink.

