
Key Takeaways
- Importance of Clean Coils: Regularly cleaning the coils on your Whirlpool refrigerator ensures optimal performance, efficient cooling, and helps prolong the lifespan of the appliance.
- Signs of Dirty Coils: Look for increased energy bills, warm interior temperatures, excessive noise, and visible dust buildup as indicators that it’s time to clean the coils.
- Preparation Essentials: Gather necessary tools such as a vacuum cleaner, various brushes, a microfiber cloth, and cleaning solutions, while ensuring safety by unplugging the refrigerator and wearing gloves.
- Step-by-Step Cleaning Process: Access the coils, brush off dust, vacuum excess dirt, and wipe the area with a damp cloth, then reassemble and restore power.
- Maintenance Frequency: Aim to clean the coils every six months, or more frequently in dusty environments or homes with pets, to prevent performance issues.
- Additional Maintenance Tips: Regularly check door seals, clean the interior, monitor temperature settings, and ensure the area around the refrigerator remains dry for optimal performance.
Have you noticed your Whirlpool refrigerator struggling to keep things cool? Dirty coils could be the culprit. Over time, dust and debris accumulate on the coils, making your fridge work harder and less efficiently.
Understanding Coil Cleaning
Keeping the coils on your Whirlpool refrigerator clean is essential for optimal performance. Dirty coils can lead to increased energy consumption and inefficient cooling.
Importance of Cleaning Refrigerator Coils
Cleaning refrigerator coils enhances efficiency and prolongs the appliance’s lifespan. When coils gather dust and debris, they lose their ability to dissipate heat effectively. This inefficiency forces the compressor to work harder, which may lead to higher energy bills and potential breakdowns. Regular cleaning helps maintain consistent temperatures, ensuring your food stays fresh.
Signs Your Coils Need Cleaning
Recognizing when it’s time to clean the coils can prevent bigger issues. Look for these signs:
- Increased energy bills: Higher costs may indicate struggling coils.
- Warm fridge interior: If the fridge isn’t cooling properly, check the coils.
- Excessive noise: Unusual sounds can signal a malfunctioning compressor due to dirty coils.
- Visible dust buildup: If you notice dust or pet hair on or around the coils, it’s time to clean.
Addressing these signs promptly can save you time and money in repairs and energy costs.
Preparing for Cleaning
Cleaning the coils on your Whirlpool refrigerator requires some preparation. Gathering the right tools and ensuring safety creates a smoother cleaning process.
Tools and Materials Needed
- Vacuum Cleaner: Use a vacuum with a brush attachment to remove dust and debris effectively.
- Soft Brush: A soft-bristled brush helps dislodge stubborn dirt from the coils.
- Stiff Brush or Coil Cleaning Brush: Ideal for reaching tight spots and providing deeper cleaning.
- Microfiber Cloth: Use this to wipe down surfaces and pick up any remaining dust after vacuuming.
- Bucket: For any water or cleaning solution if needed, particularly in case of spills.
- Optional Cleaning Solution: If your coils are particularly dirty, a mild detergent or multi-surface cleaner may assist in the cleaning process.
Safety Precautions
- Unplug the Refrigerator: Always unplug your refrigerator before starting the cleaning process to ensure your safety.
- Wear Gloves: Use rubber gloves to protect your hands from dirt and debris.
- Keep Your Area Dry: If you’re using a cleaning solution, keep the surrounding area dry to prevent slips.
- Be Cautious with Sharp Edges: Coils can have sharp edges. Handle them carefully to avoid cuts.
- Check for Stability: Ensure your refrigerator is stable and won’t tip while you’re cleaning the coils.
By following these steps, you create a safe and efficient environment for cleaning your refrigerator coils, ultimately enhancing its performance.
Step-by-Step Guide on How to Clean the Coils on a Whirlpool Refrigerator
Cleaning the coils on your Whirlpool refrigerator helps maintain its efficiency and prolongs its lifespan. Follow these steps to get the job done effectively.
Recommended Products

【Deep Cleaning, Done Right】 Flexible stainless-steel shafts bend effortlessly into dryer vents, fridge coils, AC units, and behind heavy appliances—removing lint, dust, and debris from hard-to-reach areas.
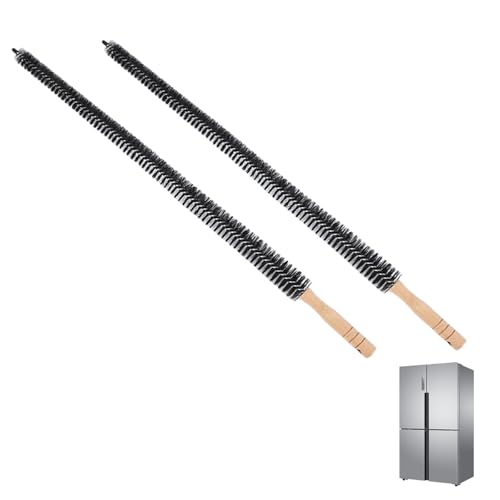
Flexible and Bendable:Fridge coil cleaning brush can bend at any angle for easy cleaning of gaps and corners

Professional Refrigerator Coil Cleaning Brush Set: This set includes 5 practical cleaning tools - 1*flexible coil cleaning brush, 2*small brooms, 1*crevice cleaning brush and 1* metal wire rake. It is specially designed for thorough cleaning of refrigerator coils, easily removing dust and dirt on condensers, evaporators and coils, eliminating the hassle of moving heavy appliances and making daily cleaning a breeze.
Accessing the Coils
- Locate the Coils: Coils are typically located at the back or underneath the refrigerator. Check your owner’s manual if you’re unsure.
- Clear the Area: Move any items or furniture away from the refrigerator to create ample space for access.
- Unplug the Refrigerator: Safety first. Unplugging the appliance prevents electrical hazards while you clean.
- Use a Brush or Vacuum: If your coils are accessible at the bottom, slide out the kick plate. If they’re at the back, you may need to pull the fridge out slightly to reach them.
Cleaning the Coils
- Brush Off Dust: Use a coil cleaning brush or a soft-bristle brush to gently remove dust and debris from the coils. Start from the top and work your way down.
- Vacuum Excess Dirt: Vacuum around and under the coils using a brush attachment. This helps pick up any remaining particles.
- Wipe with a Cloth: Dampen a microfiber cloth with water or a mild cleaning solution to wipe down the area around the coils. Avoid saturating the coils.
- Reassemble and Restore Power: Once cleaning is complete, reattach the kick plate if removed and push the refrigerator back into place. Plug it in to restore power.
Follow these steps every six months for optimal performance and to prevent energy waste.
Maintaining Your Whirlpool Refrigerator
Regular maintenance ensures your Whirlpool refrigerator operates efficiently. Cleaning the coils is just one part of keeping your appliance in top condition.
Recommended Cleaning Frequency
Clean the coils on your Whirlpool refrigerator every six months. If you have pets or live in a particularly dusty environment, consider cleaning them every three to four months. Frequent cleaning prevents dust accumulation, maintaining optimal cooling performance.
Additional Maintenance Tips
- Check Door Seals: Inspect the door seals for cracks or damage. Tight seals keep cold air inside and enhance efficiency.
- Clean Interior Regularly: Wipe down shelves and bins with a mild cleaner to prevent odors and maintain hygiene.
- Monitor Temperature Settings: Keep your refrigerator set between 35°F and 38°F and the freezer at 0°F. Regularly check to ensure they’re within this range.
- Defrost if Necessary: If ice builds up in the freezer, defrost and clean it to restore proper airflow.
- Keep the Area Dry: Ensure the area around the refrigerator remains dry to prevent mold and mildew.
By following these maintenance tips, you enhance your refrigerator’s performance and extend its lifespan.
Conclusion
Keeping the coils on your Whirlpool refrigerator clean is a simple yet effective way to ensure it runs smoothly and efficiently. By dedicating just a bit of time every few months to this task you can prevent bigger issues down the line.
Remember to look out for signs that your coils need attention like increased energy bills or a warm fridge interior. Regular maintenance not only helps save on energy costs but also extends the lifespan of your appliance.
With a little effort you can enjoy a well-functioning refrigerator that keeps your food fresh and your energy bills in check. Happy cleaning!
Frequently Asked Questions
Why is my Whirlpool refrigerator not cooling effectively?
Dirty coils are often the main cause of cooling issues. Dust and debris can accumulate on the coils, making your refrigerator work harder and less efficiently. Regularly cleaning the coils helps maintain optimal cooling.
How can I tell if my fridge coils need cleaning?
Signs that your coils need cleaning include increased energy bills, a warm fridge interior, excessive noise, and visible dust buildup. If you notice these indicators, it’s time to clean the coils.
What tools do I need to clean refrigerator coils?
You’ll need a vacuum cleaner, brushes, microfiber cloths, and optionally, cleaning solutions. These tools will help you effectively remove dust and debris from the coils.
What safety precautions should I take before cleaning my refrigerator?
Before cleaning, unplug the refrigerator, wear gloves, keep the area dry, and be cautious with sharp edges. Ensuring the appliance is stable during cleaning is also crucial for safety.
How often should I clean my refrigerator coils?
It’s recommended to clean the coils every six months. If you live in a dusty environment or have pets, clean them every three to four months for best results.
What additional maintenance can I do for my refrigerator?
In addition to cleaning the coils, check door seals for damage, clean the interior regularly, monitor temperature settings, and keep the area around the fridge dry. This helps extend the appliance’s lifespan.
