
Key Takeaways
- Grease Causes and Effects: Kitchen grease accumulates from cooking splatters and can cause discoloration, stickiness, and damage to cabinet finishes if not cleaned regularly.
- Preparation is Key: Gather necessary cleaning supplies like dish soap, vinegar, baking soda, and microfiber cloths before beginning the cleaning process to ensure efficiency.
- Safety Precautions: Always wear gloves, ensure proper ventilation, and test any cleaning solution on a hidden area to avoid potential damage to cabinet surfaces.
- Cleaning Techniques Vary: Different materials require specific cleaning methods; use gentle approaches for painted and wood cabinets, while laminate and metal can handle more direct cleaning solutions.
- Establish a Cleaning Routine: Regularly clean kitchen cabinets every 1-2 months, focusing on high-use areas, to prevent grease buildup and maintain a fresh look.
- Implement Preventative Measures: Use splatter guards, cover pots, and wipe spills immediately to minimize grease accumulation on cabinets, ensuring long-lasting cleanliness.
Ever looked at your kitchen cabinets and wondered how they got so greasy? It happens to the best of us. Cooking splatters and everyday wear can leave your cabinets looking dull and dirty, making your kitchen feel less inviting.
Understanding Kitchen Grease
Kitchen grease is a common problem that arises from cooking activities. It forms a sticky residue on cabinets over time, making them look unkempt and dull.
What Causes Grease Buildup?
Grease buildup occurs when cooking oils and food particles splatter during meal preparation. High-heat cooking methods, such as frying or sautéing, increase this effect. Smoke from burning food also contributes to grease accumulation. Over time, this grease can adhere to surfaces like kitchen cabinets, resulting in an unsightly layer that attracts dust and grime.
Effects of Grease on Cabinets
Grease negatively impacts kitchen cabinets in several ways. First, it can cause discoloration, making cabinets appear yellowed or tarnished. Second, grease buildup can lead to a sticky surface that attracts more dirt and debris, worsening the appearance. Additionally, prolonged exposure to grease can damage the finish of wood or laminate, requiring costly repairs or replacements. Regular cleaning helps maintain the cabinets’ aesthetic appeal and durability.
Preparation for Cleaning
Before tackling the grease on your kitchen cabinets, preparation is vital. Gathering the right supplies and ensuring safety will streamline the cleaning process.
Gather Your Cleaning Supplies
Gather these essential cleaning supplies:
- Dish soap: Choose a grease-cutting variety.
- White vinegar: Acts as a natural degreaser.
- Baking soda: Helps with stubborn spots.
- Microfiber cloths: Soft, non-abrasive cloths for wiping.
- Spray bottle: For mixing and applying cleaning solutions.
- Gloves: Protect your hands from chemicals and dirt.
- Bucket: Useful for holding warm soapy water.
Ensure you have enough supplies to cover the entire cabinet area. If the cabinets are heavily soiled, consider adding a soft-bristle brush for detailed cleaning.
Safety Precautions
Safety matters during the cleaning process. Follow these precautions:
- Wear gloves: Protect your skin from harsh cleaners.
- Ensure ventilation: Open windows or turn on fans to avoid inhaling fumes.
- Test cleaners: Try any cleaning solution on a small, hidden area first to check for adverse reactions.
- Avoid mixing products: Some combinations can create harmful fumes, like bleach and ammonia.
By taking these steps, you create a safe and effective environment for cleaning your cabinets.
Step-by-Step Guide
Cleaning grease from kitchen cabinets requires a systematic approach. Follow these steps for effective results.
Removing Loose Debris
Start by removing any loose debris from the cabinet surfaces. Use a dry microfiber cloth or a soft brush to wipe away crumbs and dust. Focus on corners and edges where grease may accumulate. This initial step helps prevent scratching the cabinet surface during deeper cleaning.
Choosing the Right Cleaning Solution
Select an appropriate cleaning solution based on the grease level and cabinet type. For light grease, mix warm water with a few drops of grease-cutting dish soap in a bucket. For stubborn grease, combine equal parts of white vinegar and water in a spray bottle. For wood cabinets, opt for a gentle, pH-balanced cleaner. Always test the solution on a hidden area to ensure it doesn’t damage the surface.
Cleaning Techniques for Different Cabinet Materials
- Painted Cabinets: Use a microfiber cloth dampened with your chosen cleaning solution. Wipe gently in a circular motion to remove grease without damaging the paint.
- Wood Cabinets: Apply the cleaning solution with a damp cloth. Follow the wood grain while wiping and avoid soaking the cabinets. Dry immediately to prevent water damage.
- Laminate Cabinets: Spray the cleaner directly onto the surface. Use a microfiber cloth to wipe away grease and provide a polished finish.
- Metal Cabinets: Use a soft cloth with a non-abrasive cleaner. Rinse with water and dry thoroughly to prevent streaks.
Complete the cleaning by wiping all surfaces with a clean, dry cloth. Regular maintenance prevents grease buildup and keeps your cabinets looking fresh.
Tips for Maintaining Clean Cabinets
Maintaining clean kitchen cabinets prevents grease buildup and keeps your space looking fresh.
Recommended Products
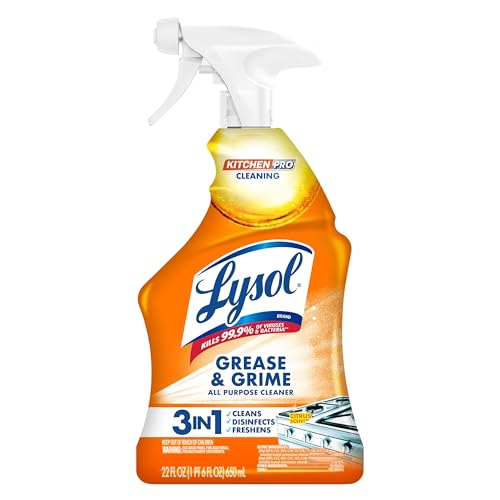
ELIMINATES 99.9% OF KITCHEN VIRUSES AND BACTERIA INCLUDNG SALMONELLA AND E.COLI: Lysol Pro Kitchen Cleaner is tested and proven to eliminate 99.9% of viruses and bacteria* (when used as directed). EPA Reg #777-91.

Complete Cleaning Kit for Effortless Cabinet Care - Everything you need for spotless cabinets in one easy set. This kitchen cabinet cleaner kit includes a precision cleaning brush, and an 8 oz bottle with a calibrated spray top for even coverage. The cabinet cleaner for wood offers a smooth application, while the long-lasting cabinet cleaner degreaser helps you keep your cabinets looking cared for day after day.

EWG VERIFIED: This kitchen cleaner spray is formulated with clean ingredients and certified by the Environmental Working Group to meet their strict health and safety standards. Free from concerning substances like ammonia, SLS, and SLES.
Regular Cleaning Schedule
Establish a regular cleaning routine to manage grease and dirt. Schedule cabinet cleaning every 1-2 months, adjusting frequency based on cooking habits. Set calendar reminders to help you stay on track. When cleaning, focus on high-use areas, such as near the stove. Utilize a diluted cleaning solution to wipe down surfaces, ensuring that you catch any accumulated grease before it hardens.
Preventative Measures
Implement steps to prevent grease from accumulating on your cabinets. Use a splatter guard while frying to minimize airborne grease. Cover pots and pans with lids during cooking to keep splatters contained. Wipe up spills immediately using a damp cloth, before they dry and adhere to cabinet surfaces. Consider using a protective sealant on wooden cabinets to reduce absorption of grease and moisture.
Conclusion
Keeping your kitchen cabinets clean doesn’t have to be a daunting task. With a little regular maintenance and the right cleaning techniques you can easily remove grease and keep your cabinets looking their best.
Remember to gather your supplies and take safety precautions before diving in. By addressing grease buildup promptly you’ll not only enhance the beauty of your kitchen but also extend the life of your cabinets.
So go ahead and make cleaning a part of your routine. Your kitchen will thank you for it!
Frequently Asked Questions
What causes grease buildup on kitchen cabinets?
Grease buildup on kitchen cabinets primarily occurs from cooking splatters and smoke during high-heat cooking methods like frying or sautéing. This sticky residue can dull the cabinet’s finish and may lead to discoloration over time.
How often should I clean my kitchen cabinets?
It’s recommended to clean your kitchen cabinets every 1-2 months to prevent grease buildup. Focus on areas that experience the most cooking activity for the best results.
What supplies do I need to clean greasy cabinets?
You’ll need grease-cutting dish soap, white vinegar, baking soda, microfiber cloths, gloves, and a bucket of warm soapy water. These supplies help effectively remove grease while protecting your cabinets.
Can I use any cleaning solution on my cabinets?
No, it’s important to choose a cleaning solution based on the type of cabinet finish. Test cleaners on hidden areas first to avoid damage, and don’t mix different cleaning products to prevent harmful reactions.
How can I prevent grease from accumulating on my cabinets?
To prevent grease buildup, establish a regular cleaning schedule, use a splatter guard while cooking, cover pots and pans, wipe up spills immediately, and consider applying a protective sealant on wooden cabinets.
