

I like to paint my own Christmas ornaments each year.
Acrylics are easy to work with and they do not require much space.
I put together a list of simple projects that focus on basic designs.
Most of them can be done with just a few colors and brushes.
They are meant for anyone who wants to try something creative without a lot of fuss.
Santa Face on Wood Slice Ornament

A simple Santa face painted directly on a wood slice creates an easy Christmas ornament project. The red hat takes up the top third with a single gold star accent, while the white beard and hat trim fill the rest of the circle and let the natural wood edge show through. Closed eyes, pink cheeks, and a small smile keep the face readable even with basic brushwork and no fine line work.
What makes this idea useful is how the round wood shape already frames the design so you only need to block in the hat, beard, and face areas. The strong red and white contrast helps the ornament read clearly from a distance, which works well when making multiples for a tree or gifts. You can swap the gold star for stripes or dots, adjust the beard texture with a dry brush, or change the hat color to create a quick set of matching ornaments without changing the layout.
Reindeer Ornament with Red Nose and Bell

A reindeer head with large antlers sits centered on a round canvas, using a green background filled with simple leaves and red berries to frame the subject. The red nose and matching collar with a small bell create strong focal points against the brown fur and green tones. This approach falls into the cute seasonal animal category where the round format and limited color accents keep the design compact and clear for ornament use.
The round canvas shape makes this layout a natural fit for painted ornaments since it needs no extra border work. You can reduce the foliage to a few strokes or swap the berries for small dots to change the look without repainting the whole reindeer. The direct contrast between the red elements and the rest of the painting helps it show up well in photos for project sharing.
Holly Branch Ornament
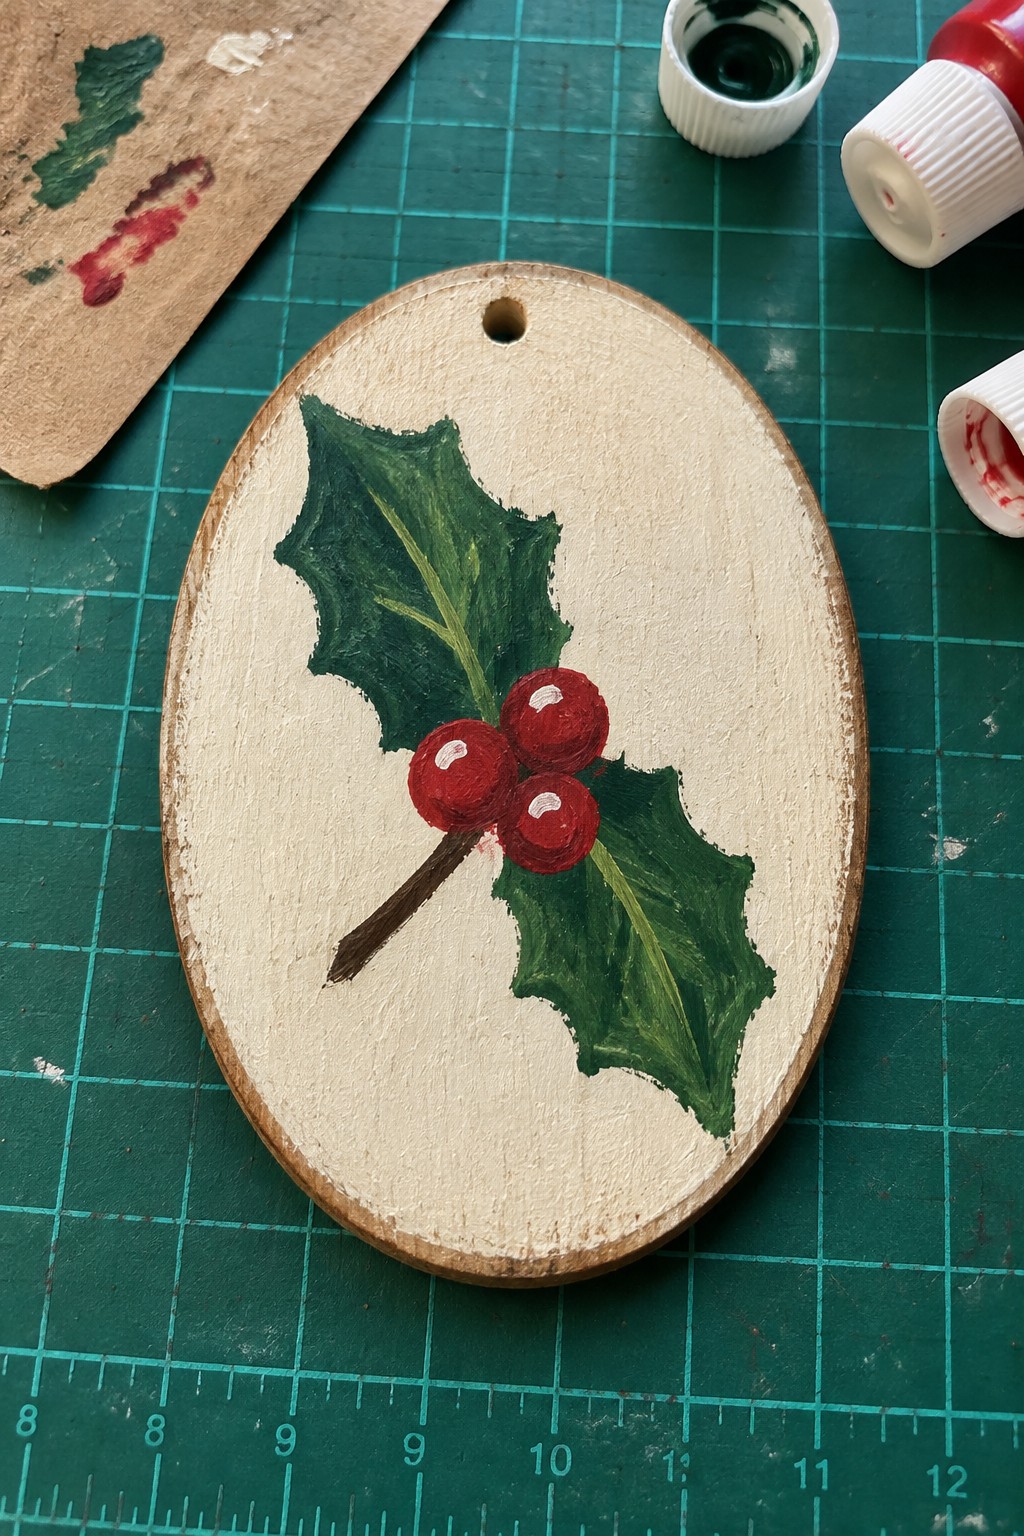
A holly branch painted across an oval ornament gives a direct Christmas design using just a few leaves and berries. The stem runs diagonally so the three red berries land near the center while the green leaves fill out the sides without crowding the space. The light background keeps the red and green sharp so the whole piece reads clearly from a distance.
What makes this idea useful is how the limited color palette and simple shapes speed up painting on small surfaces. The same layout transfers easily to round ornaments or a set of matching pieces, and you can adjust the berry count or leaf size without changing the overall structure. The bold contrast also helps the finished ornament stand out in photos for gift tags or tree displays.
Stacked Heart Folk Ornament Design
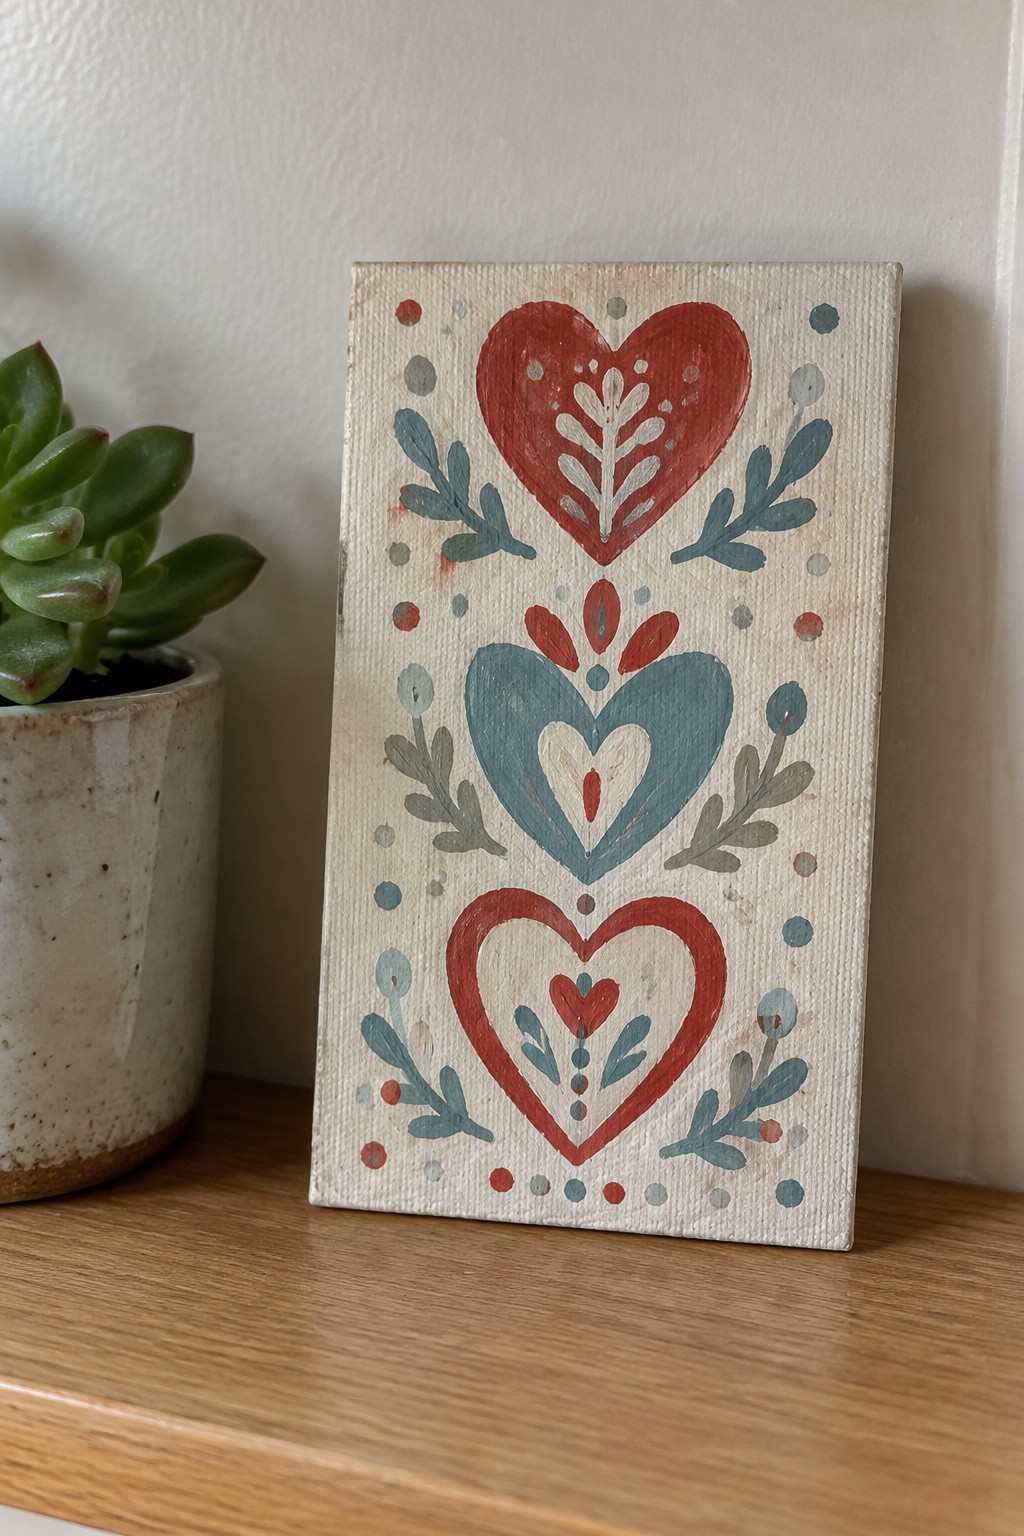
A vertical row of three hearts in two alternating colors forms a compact design that fits well on small round surfaces. Simple leaf shapes and scattered dots fill the spaces between the hearts without adding extra layers or complex shading. The flat color blocks and clear outlines keep the whole pattern easy to read once reduced to ornament size.
What makes this idea useful is how the repeating heart shape lets you reuse the same stencil or tracing method three times. You can switch the teal for green to match classic Christmas colors or keep the cooler tones for a different look. The limited palette also means fewer paint changes when working on multiple ornaments at once. For practice, start by painting the hearts on paper first so the spacing feels natural before moving to wood or glass.
Mini Snowflake Canvas for Ornaments
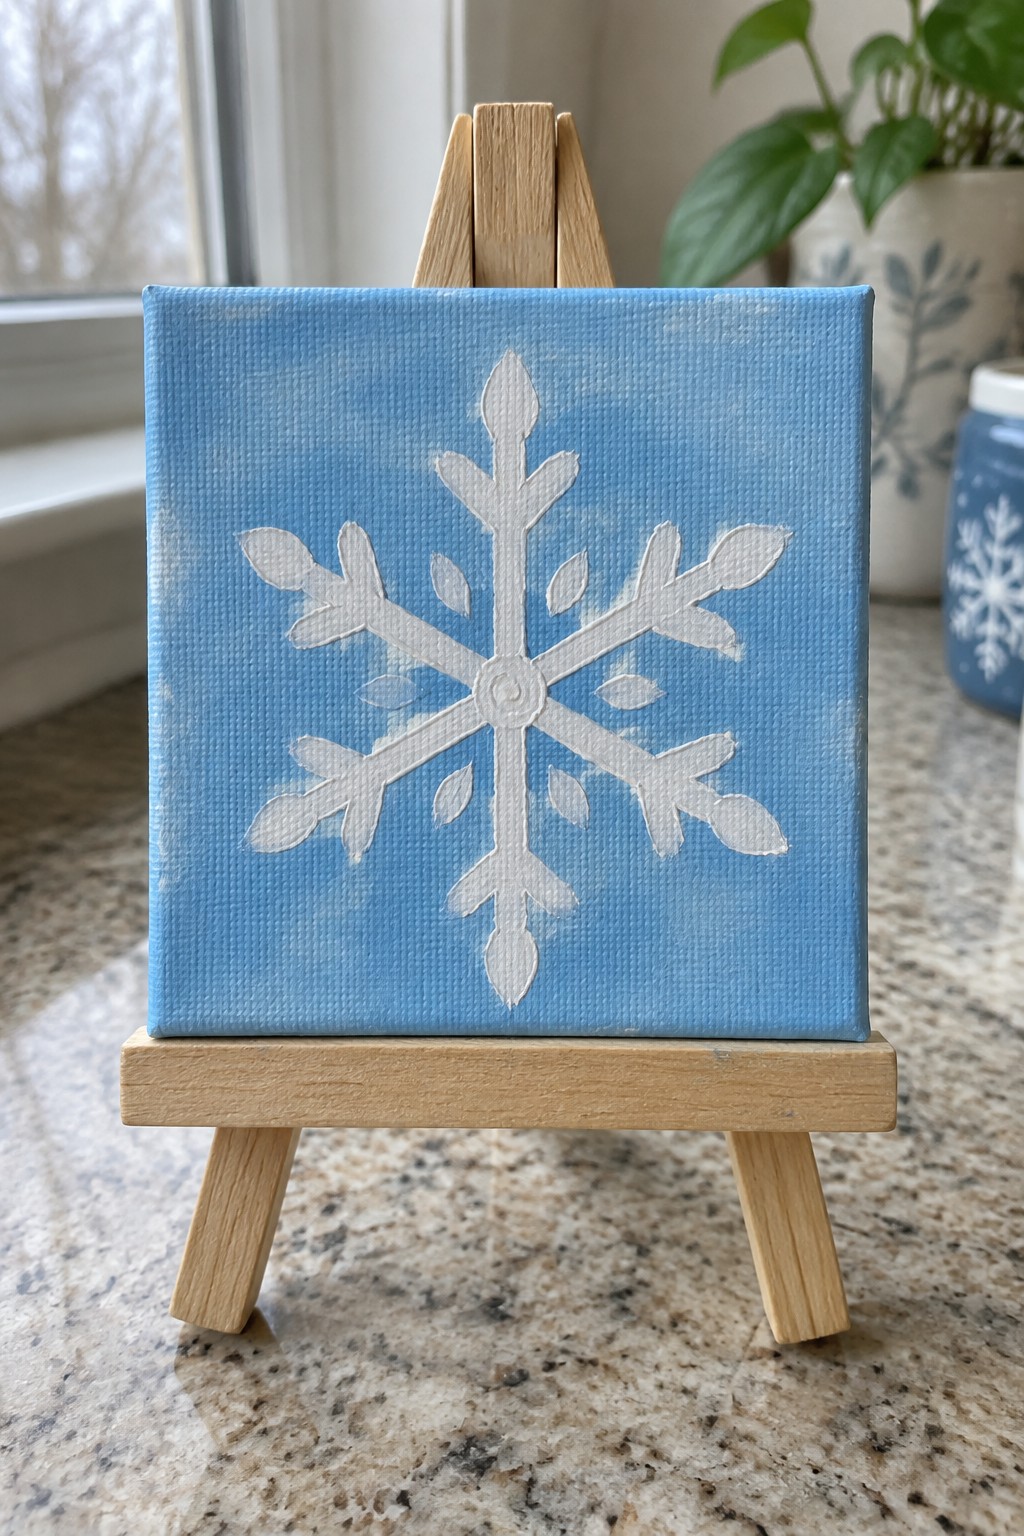
A white snowflake centered on a light blue acrylic background creates a clean Christmas design suited to small canvases. The symmetrical arms of the snowflake give the composition balance while the strong color contrast keeps the shape readable from a distance. This fits the seasonal decorative category and works especially well when the goal is a quick, graphic result rather than heavy detail.
The bold outlines let you paint the snowflake freehand or trace a template without much trouble. You can shrink the same layout onto wooden rounds or baubles for actual ornaments or keep the square format as a shelf accent. Swapping the blue for a deeper tone or adding a soft white edge around the canvas changes the look fast while keeping the core idea intact. The flat color scheme also photographs well for sharing.
Candy Cane Striped Wood Slice Ornament

A wood slice painted with wide diagonal red and white stripes gives a clear candy cane look while the small holly cluster with green leaves and berries sits in one corner as a simple accent. The stripes run at a slight angle across the surface and leave most of the wood visible between the red bands. This layout relies on strong color contrast and a minimal focal point rather than fine detail.
What makes this idea useful is how the broad stripes cover the wood grain quickly and still look finished even if the edges are not perfectly straight. You can change the stripe direction, swap the red for another color, or move the holly to a different corner without changing the overall feel. The same pattern works on smaller slices for actual ornaments and reads clearly from a distance on a tree.
Simple Christmas Tree on a Mini Canvas

A basic Christmas tree built from layered green brushstrokes makes an easy acrylic painting idea for small canvases or ornaments. The triangular shape stays readable even when simplified, and the three red ornaments create strong contrast without adding extra steps. This fits the seasonal decorative category where limited elements and clear shapes work better than fine detail.
What makes this idea useful is how the loose layering lets you build the tree quickly without precise edges. You can swap the red for other bright colors or shrink the whole design to fit round ornaments while keeping the same layout. For practice or gifts, the bold color blocks help the finished piece stand out in photos even at small sizes.
Gingerbread House on a Wooden Tag

A gingerbread house painted on a wooden tag works as a straightforward holiday ornament idea. The design centers on a simple house shape with a peaked roof, a green door, and a chimney, then layers on white icing lines and small red and green circles to suggest candy trim. The brown base against the off-white tag background keeps the shape easy to read even with basic brushwork.
What makes this idea useful is how the tag itself supplies the outer edge so you only need to paint the house and details inside it. You can swap the red and green accents for other colors you already have or reduce the number of candy dots to finish more pieces quickly. This layout stays consistent if you want to make a set of matching ornaments for gifts or a tree.
Round Canvas Christmas Wreath with Bold Red Bow

A Christmas wreath painted on a round canvas uses a ring of layered green holly leaves, small clusters of red berries, and one large red bow at the top. This seasonal decorative idea works because the circular format already suggests the wreath shape, so the painter only needs to build the ring and place the bow for balance. The strong red against the plain background keeps the focus on the bow while the repeated berry clusters add even spots of color around the ring.
What makes this idea useful is the simple layout of repeated leaf and berry shapes that do not require fine detail work. The limited color palette of red and green on white makes it easy to adjust the size for ornaments or larger canvases without changing the design. You can swap in different leaf shapes or move the bow to the side if you want a fresh variation. The clean contrast also helps the finished piece stand out clearly in photos for sharing.
Stacked Snowman Tag Ornament

A vertical stack of three snowmen painted on a tall wooden tag shape creates a compact Christmas project that fits the narrow canvas well. The snowmen vary only in their hats and scarves, with two wearing black top hats and red scarves while the middle one has a blue knit cap and striped scarf, all set against a solid dark blue background scattered with white dots and simple snowflake shapes. This keeps the focus on the rounded bodies and the small color accents without requiring complex backgrounds or shading.
What makes this idea useful is that the tall format lets you paint three figures without crowding while still using basic round shapes and limited details. The strong white-on-blue contrast does most of the visual work, so you can finish it quickly with just a few accent colors. You could easily change the scarf patterns or hat styles to use whatever paints you already have, or shrink the design onto smaller wooden discs for actual ornaments.
Gold Starburst on Navy Square

A large eight-pointed gold star centered on a deep navy square creates a simple Christmas ornament with strong visual impact. The radiating points and small dotted accents give the design clear structure while the solid background keeps the focus tight. This approach works as a seasonal decorative piece that relies on color contrast and geometric shape rather than fine detail.
What makes this idea useful is how the flat background reduces blending work and lets the star edges stay sharp. The limited palette of navy and gold makes it easy to paint multiple versions quickly for gifts or tree sets. You could swap the square for a round base or change the background color without altering the star layout. This graphic style also photographs cleanly for sharing project ideas.
Nativity Scene with Golden Star

A nativity scene painted with flat shapes on a deep blue background makes a strong Christmas subject for small projects. The idea centers the manger between Mary and Joseph, with a large star above that creates a clear focal point through contrast. This seasonal approach works because the limited detail and bold silhouettes stay readable even when the design is reduced to ornament size.
What makes this idea useful is how the simple shapes adapt easily to round surfaces like wooden slices or baubles. You can keep the same layout by placing the star near the top edge and the figures below, using the same dark-to-light contrast to avoid crowding. The restricted color range also cuts down on drying time between layers when working on multiple ornaments at once.
Red Mitten Ornaments with Bow Accents

Pairing two matching mittens under a central bow gives a clear, balanced layout for a round canvas ornament. The design uses repeating red tones with green and white accents to keep the focus on the mitten shapes and their simple snowflake patterns. This seasonal decorative approach works because the bow and side foliage fill negative space without competing with the main subject.
What makes this idea useful is the straightforward mitten silhouette that lets you build the base color first then add stripes and snowflakes on top. The limited palette makes it simple to match with other Christmas projects or adjust the bow size for different canvas diameters. You can replace the snowflakes with dots or stripes to change the look in just a few minutes.
Joy Script Ornament on Dark Green
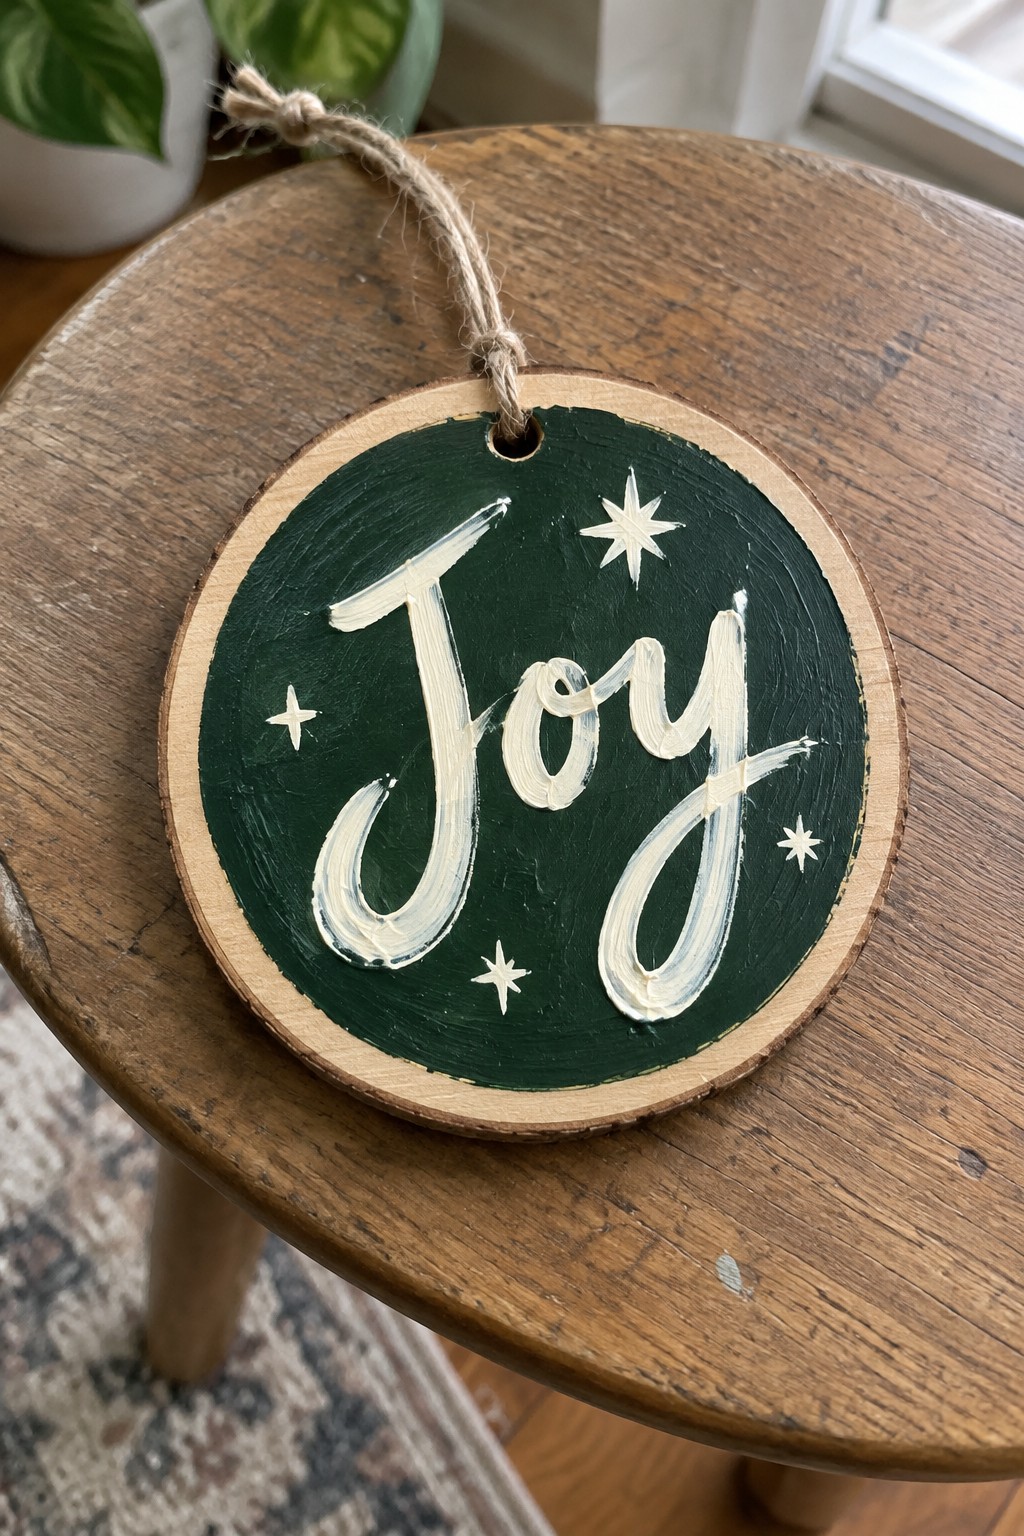
A simple Christmas ornament idea is to paint a wooden slice with a solid dark green acrylic base then add white cursive lettering for the word Joy. Small star shapes placed around the text keep the design balanced without crowding the space. The strong contrast between the white paint and deep green background makes the lettering stand out clearly on a round surface.
What makes this idea useful is how few elements you need to complete it. You can change the background color or swap the word for another short phrase while keeping the same layout. The stars are quick to add with a small brush or even a stamp, so the design works for making several ornaments at once. This approach also translates easily to other round surfaces like coasters or tags.
Dot Painted Ornament Pattern
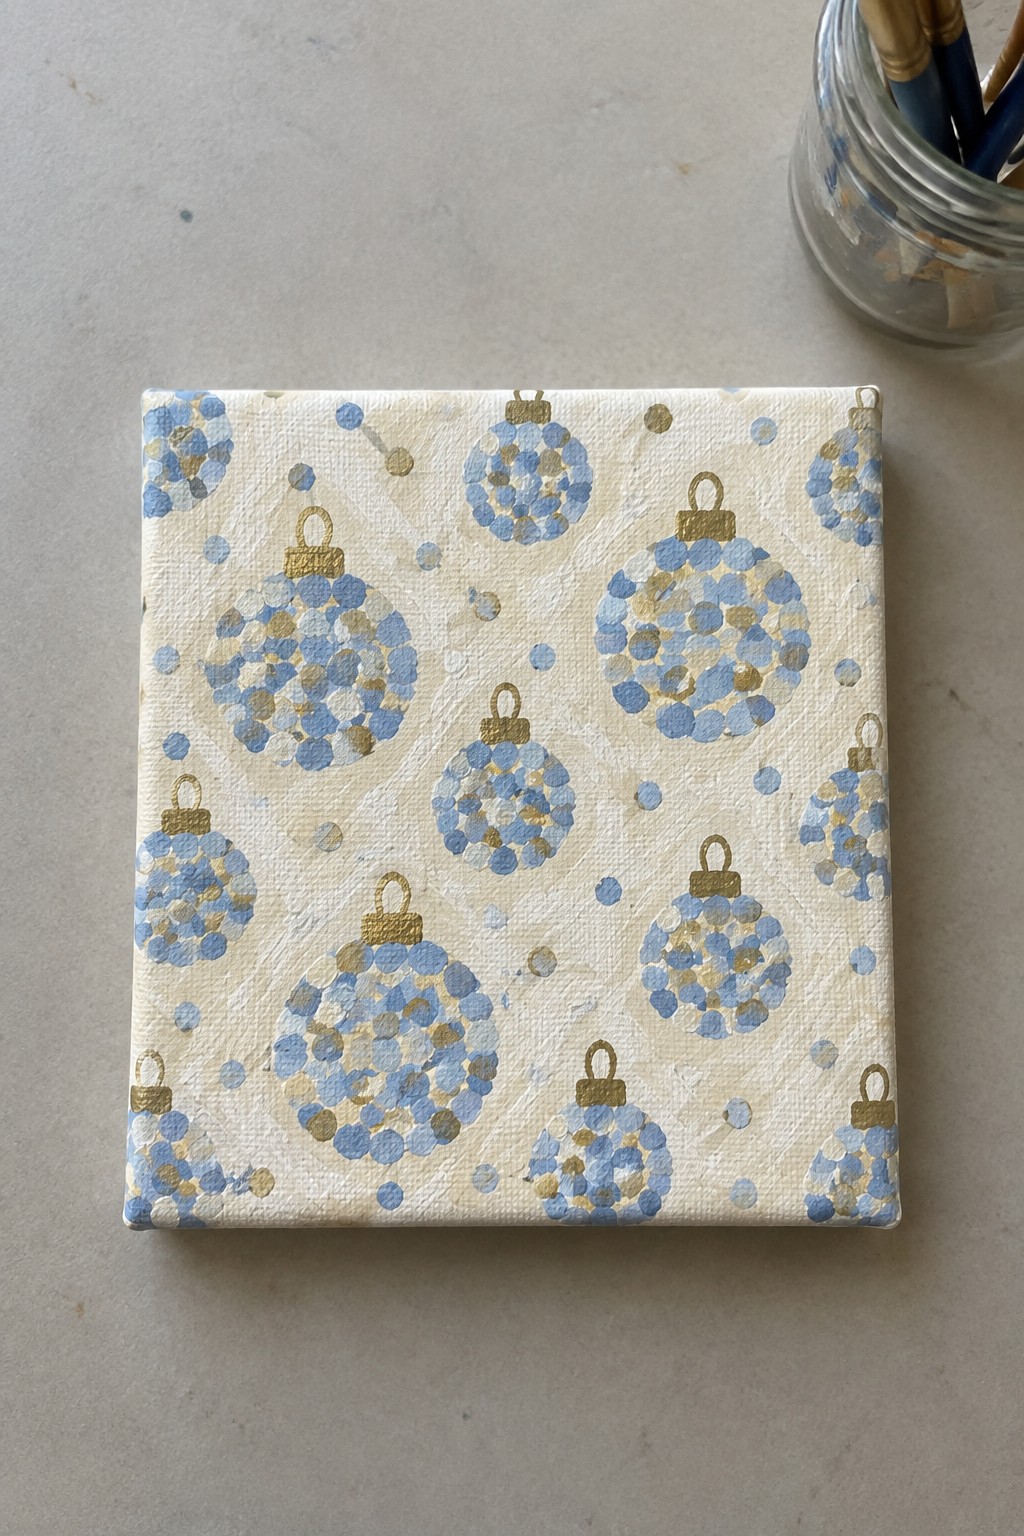
This acrylic idea uses simple dot clusters to build repeating Christmas baubles across a canvas. Each ornament is formed by overlapping blue and gold dots in different sizes, with a small gold cap added at the top. The pale background keeps the focus on the circular shapes while the metallic dots add contrast without extra detail.
What makes this idea useful is how the dot method removes the need for steady outlines or shading. You can swap the blue and gold for any holiday colors or shrink the design to fit wooden ornaments or small canvases. The layout works especially well for quick seasonal pieces since the repeating pattern fills space evenly without complex planning.
Frequently Asked Questions
1. What supplies do I need to start these acrylic painting projects for Christmas ornaments? You will need acrylic paints in holiday colors, a variety of small paintbrushes, clear glass or plastic ball ornaments, a palette for mixing, rubbing alcohol for cleaning, and optional items like glitter glue or ribbons. Buy a basic set of paints if you are new to this and add more colors as you try different projects from the list.
2. How should I prepare the ornaments before painting to get the best results? Wipe each ornament inside and out with rubbing alcohol on a cotton ball to remove oils and dust. Allow them to air dry fully. This step ensures the acrylic paint sticks well and prevents peeling later on.
3. What tips help when the paint dries too quickly during these projects? Work in a cool room and mist your palette lightly with water to keep acrylics workable longer. Paint one section at a time and keep a damp cloth nearby to wipe brushes. Thin layers dry slower than thick ones so apply details gradually.
4. How do I seal the finished ornaments so the designs last through multiple seasons? Let the paint cure for at least 24 hours after completing your design. Then spray or brush on a clear acrylic sealer in a well-ventilated area. Two light coats give good protection without changing the colors.
5. Can children join in these easy ornament painting ideas? Yes many projects like dot patterns or simple snowmen work well for kids age six and up with adult help. Choose non-toxic paints, cover the table, and focus on fun shapes rather than perfect lines. Supervise closely when using glitter or small tools.

Hi, I’m Camille.
I’m a self-taught painter and creative blogger with a soft spot for acrylic painting, color play, and all the little art ideas that make everyday life feel more inspiring.
I started this space because I’ve always believed painting should feel joyful, approachable, and a little personal. Some of my favorite pieces come from simple ideas, messy palettes, and evenings where I just felt like making something pretty.
Most of what I share begins with acrylic painting, but I also love exploring other mediums when creativity pulls me in a new direction. My goal is to collect and share painting ideas that feel fun, beautiful, and actually doable, whether the mood is calm and minimal or bright and playful.
This is a space for inspiration, experimenting, and enjoying art without overcomplicating it.