
Have you ever struggled with keeping your projects dust-free or preventing unwanted air bubbles? If you’ve faced these challenges, building a vacuum box could be the perfect solution for you. This handy tool can help you achieve a cleaner workspace and improve the quality of your work, whether you’re into woodworking, resin casting, or any other craft.
Key Takeaways
- Understanding Vacuum Boxes: Vacuum boxes create a controlled environment that reduces air pressure, effectively minimizing dust and air bubbles during projects like woodworking and resin casting.
- Key Components: Essential elements for building a vacuum box include a sturdy container, a reliable vacuum pump, flexible gaskets for airtight seals, and a vacuum gauge for monitoring pressure.
- Step-by-Step Assembly: Building a vacuum box requires a sturdy base, careful seal creation, and secure attachment of a vacuum hose to ensure optimal functionality.
- Testing for Efficiency: After construction, check the vacuum box’s performance by monitoring the vacuum gauge, observing for fluctuations, and ensuring all seals are airtight.
- Regular Maintenance: Keep your vacuum box in top condition by regularly inspecting gaskets for wear and maintaining the vacuum pump to ensure long-lasting efficiency and performance.
Overview of Vacuum Boxes
Vacuum boxes serve vital roles in various projects. These devices create a controlled environment that removes air and minimizes contaminants. You can use vacuum boxes in woodworking, resin casting, and other crafts to enhance results.
Recommended Products
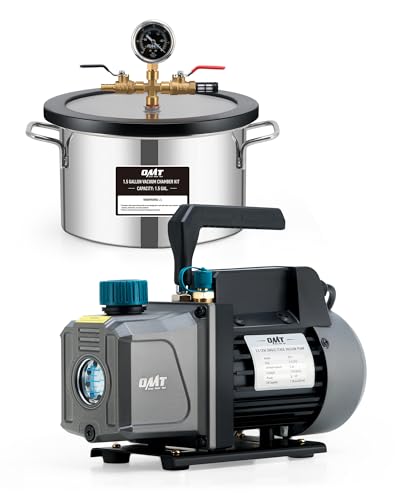
Comprehensive Vacuum Chamber Set: Orion Motor Tech's degassing kit includes a 1/4 hp vacuum pump, a 1.5 gallon chamber, a wire hose, and all the accessories needed for easy wood stabilization, silicone degassing, and various molding and casting applications
3.6CFM Vacuum Pump: An integrated tank and all copper motor maximize the vacuum's power. It delivers 3.6 CFM flow rate and -29.92inHg vacuum with relatively low noise.
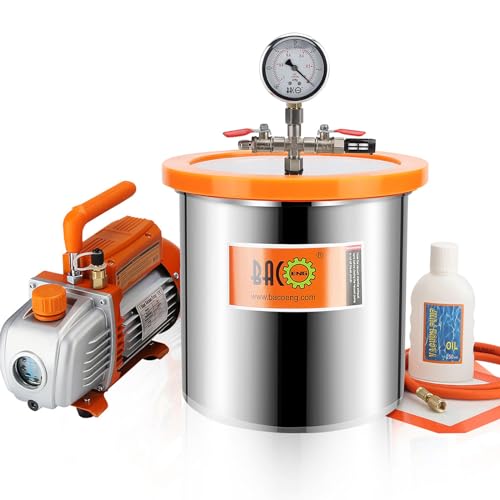
Comprehensive Vacuum Chamber Set: Orion Motor Tech's degassing kit includes a 1/4 hp vacuum pump, a 2 gallon chamber, a wire hose, and all the accessories needed for easy wood stabilization, silicone degassing, and various molding and casting applications
Functionality of Vacuum Boxes
Vacuum boxes work by creating a sealed space where air pressure is reduced. This reduction prevents dust and air bubbles from forming in your materials. For instance, in resin casting, a vacuum box allows you to eliminate air pockets, resulting in smoother finishes.
Key Components of a Vacuum Box
- Container: Use a sturdy container with a tight seal. Wooden or plastic boxes are common choices.
- Vacuum Pump: Select a vacuum pump strong enough to achieve an efficient vacuum. Models vary; choose one that suits your projects.
- Gaskets: Incorporate gaskets to ensure an airtight seal. Foam or rubber gaskets work well.
- Vacuum Gauge: Install a vacuum gauge to monitor the pressure inside the box. This ensures optimal conditions for your work.
Building Your Own Vacuum Box
- Gather Materials: Collect your container, vacuum pump, gaskets, and vacuum gauge.
- Create a Seal: Apply gaskets around the edges of your container to prevent leaks.
- Attach the Pump: Connect the vacuum pump to your container. Ensure all connections are secure.
- Test for Air Leaks: Before use, check for air leaks by running the pump. A decrease in pressure indicates a successful seal.
Maintenance of Vacuum Boxes
Maintain your vacuum box for optimal performance. Regularly inspect gaskets for wear and replace them as needed. Also, ensure the vacuum pump remains clean and free of debris. Regular maintenance prolongs the life of your vacuum box and enhances its efficiency.
Materials Needed
To build a vacuum box, gather a selection of essential components and optional accessories. These elements ensure functionality and efficiency while creating your workspace.
Recommended Products

Complete Degassing Kit: Achieve flawless results with our all-in-one PBMT Vacuum Degassing Kit. This comprehensive setup features a robust 4.5CFM vacuum pump, a spacious 3-gallon stainless steel vacuum chamber with a tempered glass lid, a reinforced rubber hose, and essential accessories—all meticulously organized for effortless setup and tool access right out of the box

1.2QT Resin Traps come complete with glycerin-filled vacuum gauge, fittings for use with 1/4" vacuum tubing,brass ball valve and instruction manual.

Perfect DIY Resin Kit for Beginners and Pros: This resin kit is the ultimate choice for newcomers and experienced crafters alike. As a complete resin starter kit for beginners and a resin art kit, it’s perfect for making custom resin art, jewelry, home décor, and more.
Essential Components
- Container: Choose a sturdy container that can withstand vacuum conditions. Common options include plastic bins, metal boxes, or acrylic enclosures. Ensure the size accommodates your projects.
- Vacuum Pump: A reliable vacuum pump is crucial for removing air from the box. Look for a pump with sufficient horsepower for your container’s volume. A small rotary vane or diaphragm pump works well for smaller boxes.
- Gaskets: Use durable, flexible gaskets to create airtight seals between the container and the lid. Silicone or rubber gaskets provide excellent sealing properties.
- Vacuum Gauge: This tool helps monitor the vacuum level inside the box. A simple analog or digital gauge will suffice, but ensure it fits your system’s specifications.
- Lid or Cover: The lid must secure tightly to maintain the vacuum pressure. You can use a solid piece of material like plywood or acrylic, fitted with gaskets to prevent leaks.
- Vacuum Hose: Connect your vacuum pump to the container with a vacuum hose. Choose a hose that fits snugly to prevent air leaks. Various lengths and materials are available, ensuring flexibility in design.
- Pressure Relief Valve: Installing a valve can help regulate the pressure inside your vacuum box. This accessory is useful for safely releasing vacuum without dismantling the entire setup.
- Sealing Tape: Use sealing tape to reinforce connections and ensure airtight seals. This tape can enhance the performance of your gaskets.
- Filters: Consider adding filters to your setup. These can help keep dust and debris out of the pump, extending its lifespan and maintaining optimal performance.
By gathering these materials, you set the stage for successfully building a vacuum box tailored to your specific project needs.
Step-by-Step Guide to Building a Vacuum Box
Building a vacuum box involves several straightforward steps. Gather your materials and follow the instructions below for a successful build.
Recommended Products

Efficient Degassing Performance: Our 3.5 CFM vacuum pump is engineered specifically for degassing and de-bubbling applications, achieving an impressive 5Pa ultimate vacuum. Whether you're working in a lab, handling food packaging, or resin casting, this pump ensures thorough air extraction, avoiding bubbles and enhancing reliability. (Note: This vacuum chamber with pump kit is not suitable for wood stabilization.)

Vacuum Chamber with Vacuum Pump:The package includes a 5-gallon vacuum chamber, a 4.5 cfm vacuum pump, a 1.5 m hose,2 silencers, a silicone pad, one set of installation tools, and other tools like rubber gloves and waterproof tape

3.5 CFM VACUUM PUMP: Powered by a 1/4 HP powerful copper motor, the 3.5 CFM vacuum pump can draw the system down to 5 Pa; The high-quality die-cast aluminum housing and the non-slip rubber base of the machine reduce friction and contribute to better performance; It comes with 2 inlet fittings of 1/4" SAE and 1/2’’ ACME, an additional 1/4" SAE Female to 5/16" SAE Male adapter, and a 1/4" SAE Female to 3/8" SAE Male adapter for various situations; The 1/4" pagoda adapter can connect the wire hose
Preparing the Base
- Choose a sturdy container. Opt for a plastic or wooden box that can withstand atmospheric pressure.
- Measure the interior dimensions. Ensure the size fits your specific project requirements.
- Cut a base piece. If using wood, make it slightly smaller than the container’s interior for easy placement.
Assembling the Structure
- Attach the walls. Secure the walls to the base, using screws or sturdy adhesives.
- Create a lid. Ensure it fits snugly on top of the container to maintain an airtight seal.
- Drill a hole. Make a small hole in the lid for the vacuum hose, ensuring it’s centered for better airflow.
Sealing and Insulating
- Apply sealing tape. Cover all joints and gaps to prevent air leaks.
- Use gaskets. Install rubber gaskets around the edge of the lid for an additional airtight seal.
- Insulate if needed. Consider adding insulation around the container for temperature stability, especially in sensitive projects.
- Attach the vacuum hose. Insert the hose into the drilled hole and secure it tightly.
- Connect to the vacuum pump. Ensure the other end of the hose is connected to the vacuum pump.
- Check for leaks. Turn on the pump and observe for any air escaping. If present, reseal as necessary.
These steps provide a practical approach to building a vacuum box tailored to your woodworking or resin casting projects. Each component functions together, creating an optimal environment for your work.
Testing Your Vacuum Box
Testing your vacuum box ensures it operates effectively for your woodworking and resin casting projects. Conduct thorough performance checks and address any potential issues before using it.
Performance Checks
- Connect the Vacuum Pump: Attach the vacuum hose securely to the vacuum pump and the vacuum box.
- Turn on the Pump: Power on the vacuum pump and observe the vacuum gauge. It should show a significant drop in pressure, indicating that the box is creating a vacuum.
- Monitor the Pressure: Within a few minutes, the gauge should reach stable low pressure. Note any fluctuations as they may indicate leaks.
- Check the Seal: Close the box and run it for around 10 minutes. If there’s a drop in pressure during this time, inspect the seals and gaskets.
- Introduce Materials: Place materials inside and again check the vacuum gauge. Proper suction should hold the materials in place.
- Pressure Loss: If pressure drops unexpectedly, check all seals and connections. Ensure the gasket is undamaged and well-seated.
- Inadequate Suction: Inspect the vacuum pump for performance issues. Make sure it’s the right size for your box. Replace or service as needed.
- Noise During Operation: Listen for excessive noise during the pump’s operation. If it sounds abnormal, check for loose components or debris in the pump.
- Suction Surface Damage: Inspect materials for deformation or damage due to excessive suction. Adjust the settings on the vacuum pump if necessary.
- Unstable Vacuum Gauge: Replace the gauge if it fluctuates despite a stable vacuum. A faulty gauge can lead to misdiagnosis of issues.
Testing ensures your vacuum box meets your project needs. Regular performance checks and prompt troubleshooting keep it running smoothly.
Conclusion
Building a vacuum box can really enhance your woodworking and resin casting projects. By following the steps and tips provided you can create a reliable tool that minimizes dust and air bubbles. Regular testing and troubleshooting will help you maintain its effectiveness over time.
Don’t forget to monitor your vacuum box’s performance to ensure it meets your needs. With a little effort you’ll find that this handy device can make a significant difference in the quality of your work. Enjoy creating in a cleaner and more efficient workspace!
Frequently Asked Questions
What is a vacuum box and how does it help in woodworking and resin casting?
A vacuum box is a device that creates a vacuum environment to remove air bubbles during woodworking and resin casting projects. It eliminates dust and enhances the quality of the final product, ensuring a smoother finish.
What materials do I need to build a vacuum box?
To build a vacuum box, you typically need a sturdy container, vacuum pump, seals, fittings, and tubing. Additionally, you may require a vacuum gauge and some basic tools for assembly.
How do I test my vacuum box for effective operation?
To test your vacuum box, securely connect the vacuum pump, monitor pressure levels, and check all seals. Introduce materials for suction tests, and observe for consistent vacuum gauge readings.
What troubleshooting steps should I take if there’s pressure loss?
If you experience pressure loss, inspect seals and connections for leaks. Ensure the vacuum pump is functioning correctly and check for any blockages in the tubing that may hinder performance.
How can I tell if my vacuum box is losing suction?
Signs of inadequate suction include unstable vacuum gauge readings, unusual noise from the pump, or difficulty in holding materials in place. Regular monitoring can help identify these issues early on.

