
Ever wondered why your Dirt Devil vacuum isn’t picking up dirt like it used to? A clogged or dirty filter might be the culprit. If you’ve noticed a decline in suction power or strange odors during cleaning, it’s time to give that filter some attention.
Key Takeaways
- Understanding Filter Types: Dirt Devil vacuums utilize pre-motor and post-motor filters to trap dust, dirt, and allergens—key for maintaining optimal performance.
- Regular Filter Changes: Changing filters every 3 to 6 months is essential for preserving suction power, minimizing odors, and improving air quality, especially for allergy sufferers.
- Essential Tools: To change the filter, ensure you have a compatible replacement filter, a Phillips-head screwdriver, a lint-free cleaning cloth, and a soft brush for optimal maintenance.
- Step-by-Step Process: Follow a systematic approach to locate, remove, and replace the old filter, ensuring your vacuum functions effectively afterward.
- Maintenance Tips: Regularly clean your filter and check for signs of wear to maximize your Dirt Devil vacuum’s performance and prolong its lifespan.
Understanding Your Dirt Devil Vacuum
Your Dirt Devil vacuum relies on various filters to maintain optimal performance. Knowing the types of filters and the importance of regular changes helps you keep your vacuum running smoothly.
Types of Filters
Dirt Devil vacuums often use two main types of filters: pre-motor filters and post-motor filters.
- Pre-Motor Filters: Located before the motor, these filters trap dust and debris. They prevent particles from entering the motor, which can extend its life.
- Post-Motor Filters: Found after the motor, these filters capture any remaining dirt and allergens, ensuring that the air released is clean.
Many models feature HEPA filters. HEPA filters capture 99.97% of particles as small as 0.3 microns, helping reduce allergens in your home.
Importance of Regular Filter Changes
Changing filters regularly is crucial for maintaining suction power and reducing odors.
- Enhanced Performance: Clean filters promote better airflow, improving the vacuum’s efficiency. Expect stronger suction after a filter change.
- Odor Control: Dirty filters can lead to unpleasant smells. Regular replacements help keep your vacuum odor-free.
- Health Benefits: Replacing filters reduces allergens and improves air quality, especially for allergy sufferers.
Check the manufacturer’s recommendations for how often to change the filters. Typically, inspect filters every 3 to 6 months, depending on usage. Regular maintenance ensures your Dirt Devil vacuum works effectively for years.
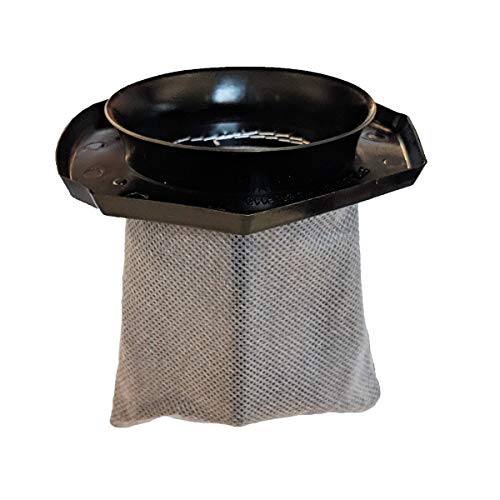
Tools Needed for Changing the Filter
To change the filter on your Dirt Devil vacuum, you’ll require a few essential tools. Having the right equipment simplifies the process and ensures you get the job done effectively.
Recommended Products

Made of the highest quality plastic and Sponge materials, deep filtration, washable and reusable, easy to install and change to filter effect, can protect your vacuum cleaner and long time to use

ADVANCED FILTRATION & ODOR CONTROL: Designed with a three-stage Endura filtration system, these vac filters effectively capture dust and debris while neutralizing odors, helping keep your vacuum performing at its best and your home smelling fresh.
VACUUM REPLACEMENT FILTER: Designed to trap dust and debris before they reach the motor, this high-quality replacement filter helps support powerful suction by preventing clogs to extend the lifespan of your Dirt Devil vacuum.
Essential Equipment
- Replacement Filter: Purchase a compatible filter for your specific Dirt Devil model. Check your user’s manual or the manufacturer’s website for the correct part number.
- Screwdriver: A Phillips-head screwdriver is often necessary for removing screws that hold the vacuum’s casing in place.
- Cleaning Cloth: Use a lint-free cloth for cleaning surfaces around the filter and vacuum to prevent dust buildup.
- Vegetable Brush or Soft Brush: A brush helps remove any debris or dirt from the filter area to ensure a clean installation.
- Unplug the Vacuum: Always unplug your vacuum before starting any maintenance. This prevents accidental activation.
- Wear Gloves: Consider wearing gloves to protect your hands from dust and allergens when handling the filter.
- Work in a Well-Ventilated Area: Ensure your workspace has good airflow. This reduces the risk of inhaling dust particles.
- Follow Manufacturer Instructions: Refer to the specific guidelines provided in your Dirt Devil user manual regarding filter changes and maintenance.
Step-by-Step Guide on How to Change Filter on Dirt Devil Vacuum
Changing the filter on your Dirt Devil vacuum is essential for maintaining its performance and air quality. Follow this step-by-step guide for a smooth filter replacement process.
Locating the Filter
Locate the filter by referring to your vacuum’s user manual. Most Dirt Devil vacuums have filters situated in the canister or under the top cover. For models with both pre-motor and post-motor filters, find the pre-motor filter near the dust compartment and the post-motor filter at the back of the vacuum.
Removing the Old Filter
- Unplug the Vacuum: Ensure the vacuum is unplugged for safety.
- Release the Canister: If your model has a canister, remove it by pressing the release button.
- Access the Filter: Open the cover protecting the filter. Depending on your model, this may involve unscrewing a lid or simply lifting it off.
- Take Out the Filter: Gently pull out the old filter. If it’s stuck, wiggle it slightly to loosen it.
- Prepare the New Filter: Check that the new filter is compatible with your vacuum.
- Insert the Filter: Position the new filter in the same spot as the old one, ensuring it fits snugly.
- Secure the Cover: Close the filter cover and, if necessary, screw it back into place.
- Replace the Canister: Reattach the canister by pressing it back into position until it clicks.
- Plug in the Vacuum: Plug the vacuum back into the outlet and turn it on to ensure it’s functioning properly.
Following these steps keeps your Dirt Devil vacuum running efficiently and helps improve suction power and overall cleanliness in your home.
Maintenance Tips for Your Dirt Devil Vacuum
Keeping your Dirt Devil vacuum in top condition requires regular maintenance. Simple steps can enhance performance and extend the life of your vacuum.
Cleaning the Filter
Cleaning your filter helps maintain suction power and improve air quality. Start by checking the filter monthly. If it’s dirty, follow these steps:
- Remove the filter from your vacuum as described in the filter-changing guide.
- Tap it gently to dislodge dirt and debris.
- Rinse it under warm water until the water runs clear. Avoid using detergents.
- Allow the filter to air dry completely before re-installing it.
Cleaning the filter enhances airflow and ensures optimal function.
When to Replace the Filter
Knowing when to replace the filter is crucial for maintaining your vacuum’s efficiency. Generally, replace the filter every 3 to 6 months, depending on usage. Look for these signs:
- Reduced suction power
- Increased noise during operation
- Visible damage or wear
For optimal performance, always use filters that match your specific Dirt Devil model. Regularly replacing the filter keeps your vacuum running smoothly.
Conclusion
Keeping your Dirt Devil vacuum in top shape is easier than you think. By regularly changing and maintaining your filters you’ll not only boost suction power but also improve the air quality in your home. Remember to check for signs that it’s time for a filter replacement and always use compatible filters for the best results.
With just a little effort you can ensure your vacuum runs smoothly and efficiently for years to come. Happy cleaning!
Frequently Asked Questions
What is the main purpose of filters in Dirt Devil vacuums?
Filters in Dirt Devil vacuums help maintain suction power and improve air quality by trapping dust and allergens. Both pre-motor and post-motor filters play important roles in keeping your vacuum efficient.
How often should I change my Dirt Devil vacuum filter?
It’s recommended to check and change your Dirt Devil vacuum filter every 6 to 12 months, depending on usage. Signs like reduced suction power or increased noise may indicate that it’s time for a replacement.
Can I clean my Dirt Devil vacuum filter?
Yes, you can clean your Dirt Devil vacuum filter by tapping off debris and rinsing it under warm water. Ensure it is completely dry before reinstalling it to maintain suction efficiency.
How do I know when to replace my vacuum filter?
You should consider replacing your vacuum filter when you notice a decrease in suction power, increased noise, or visible damage to the filter. Regular checks can help maintain your vacuum’s performance.
Are all Dirt Devil filters compatible with every model?
No, not all filters are compatible with every Dirt Devil model. Always refer to your vacuum’s user manual or consult the manufacturer to ensure you are using the correct filter for optimal performance.
