
Is your Bissell vacuum struggling to pick up dirt like it used to? You’re not alone. A worn or broken belt can turn your cleaning routine into a frustrating experience. Luckily, changing the vacuum belt is a simple fix that can restore its power and efficiency.
Key Takeaways
- Understanding Belt Importance: Bissell vacuum belts connect the motor to the brush roll, essential for maintaining suction and cleaning efficiency.
- Signs of Wear: Look for loss of suction, unusual noises, a non-spinning brush roll, or visible damage to identify a worn or broken belt.
- Tools Needed: Essential tools include a screwdriver, replacement belt, pliers, flashlight, torque wrench, and your vacuum’s manual for model-specific instructions.
- Step-by-Step Replacement: Unplug, remove the old belt, install the new belt, reassemble the vacuum, and test for proper functioning to successfully change the belt.
- Regular Maintenance: Inspect the belt monthly and practice proper vacuum usage to extend its lifespan and ensure optimal performance.
Understanding Bissell Vacuum Belts
Bissell vacuum belts play a critical role in your vacuum’s performance. Understanding their function helps keep your vacuum running smoothly and efficiently.
Importance of a Good Vacuum Belt
A good vacuum belt maintains optimal suction and cleaning power. This belt connects the motor to the brush roll and enables it to spin. Without a proper belt, the brush roll won’t rotate, leading to ineffective dirt pickup. Regularly checking and replacing the belt ensures your vacuum works at peak performance, making cleaning faster and easier.
Signs of a Worn-Out Belt
Detecting a worn-out belt is crucial for effective cleaning. Look for these common signs:
- Loss of Suction: If dirt and debris don’t seem to be picked up, the belt may have lost tension or broken.
- Strange Noises: If you hear excessive grinding or squeaking sounds, the belt could be slipping or failing.
- Brush Roll Not Spinning: If the brush roll isn’t moving during operation, the belt is likely damaged or detached.
- Visible Wear and Tear: Inspect the belt for cracks, frays, or stretched areas.
Identifying these signs early can save time and improve your cleaning experience.
Tools You Will Need
Changing a Bissell vacuum belt requires a few essential tools. Having these tools on hand makes the process quicker and easier.
Recommended Products

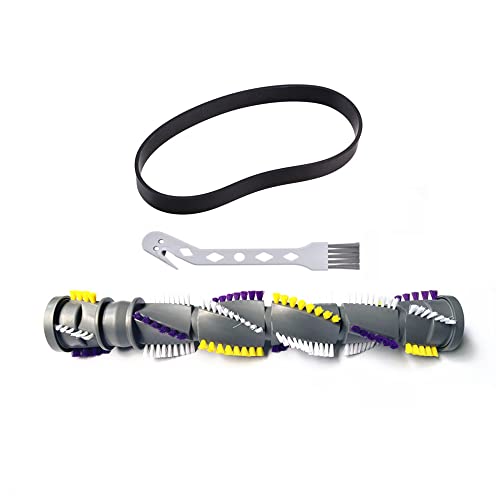
Broad Compatibility - These Belts are compatible with Bissell PowerForce Helix Bagless Upright Vacuum 2191U, 2191, 2190, 1700, 1240, 12B1; PowerForce Helix Turbo Rewind Pet 1797, 2691, 2692, 68C7, 68C71 and Pet Hair Eraser 3920 Series.

PERFECT UNIVERSAL COMPATIBILITY:These 3031120 belt Compatibility With Perfectly fits Bissell style 7/9/10/12/14/16,Suitable for most Bissell vacuum cleaner models series :2252, 2254,1793,1792,2259,22543,2256 ,82H1, 2191U,2191,2260,21K3,22C1, 3522, 3545, 35451, 35455, 3590, 35931, 3574, 3575, 3576, 3590,3591,3593, 3910,3920, 3594, 3990, 4104, 44M3, 46E5, 6390W, 6579, 6582, 6583, 6584,6585, 8975,6590,6594, 6596, 71Y7, 82G7, 92L3P, 92L3,1797,1331,1831,1825, 2258,2487 ,2488, 2490,82H1,1739 ,2019, 68C7,98N4 ,2491, 2492, 2739, 2190,1240,1700,2692 etc

Broad Compatibility - These Belts are compatible with Bissell Cleanview Bagless Vacuum Cleaner Models 1319,1319A,1320,13202,1320A,1322,1328,1328V,1329,1330,13302,1330R,1331,1332,1332R,1333,1334,1327,1819,1820,1813,1822,1823,1824,1825,18252,1825R,1830,1831,1831K,1831R,1834,1836,1837,1838,2410,24101,2412,9595A,2486,2487,2488,2489,2490,2491,2492, 2494,7482,3918,3918C and CleanView with OnePass Technology 3583,35831,35835,3583R,9595,9595A,95953,95954,95956,95957,9595R Series.
Essential Tools for the Job
- Screwdriver: Use a flathead or Phillips screwdriver, depending on your vacuum model. This tool removes screws securing the vacuum cover.
- Replacement Belt: Purchase the correct Bissell belt model for your vacuum. Ensure compatibility for optimal performance.
- Pliers: Use standard pliers to help remove the old belt or grab any stubborn components.
- Flashlight: A flashlight illuminates tight spaces, allowing you to see better while working.
- Torque Wrench: If your model requires specific torque, a torque wrench ensures screws are tightened to the correct specification.
- Brush or Cloth: Cleaning brushes or cloths can help clear debris from the vacuum’s inner parts before replacing the belt.
- Vacuum Cleaner Manual: Having the manual on hand provides guidance for model-specific instructions and diagrams.
Gather these tools before starting the belt replacement for a smoother experience.
Step-by-Step Guide on How to Change a Bissell Vacuum Belt
Changing the vacuum belt on your Bissell is a straightforward process. Follow these steps for a successful replacement.
Recommended Products
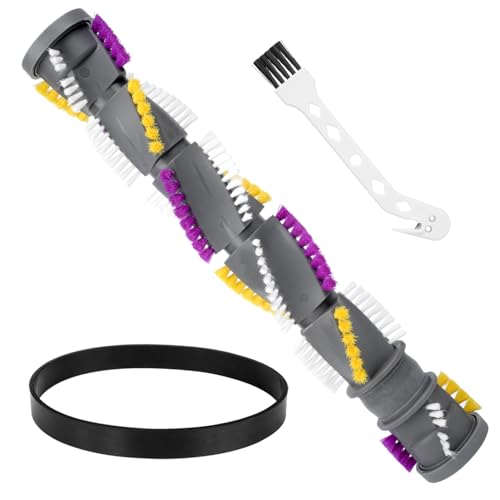
1. The product is suitable for Bisser vacuum cleaner brush roller belt 2252 2489 22543 24899 3195 3196 3197 3197A 3198 3198A 1327 1333 1820, 2383, 1825, 1813, 1823, 18252, 1825R, 1836, 1838, 2256, 2254, 22543, 22548, 2255, 2739, 2256K, 2258, 22582, 2259, 1830, 2260, 2253, 22547, 22549, 2316, 2252, 2488, 2486, 2487, 2492, 2490, 2489, 24899, 2491, 2494, 2254 replacement part number 1604545, 1611230
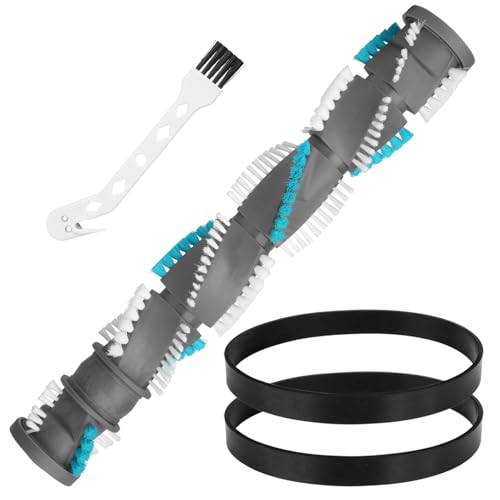
Complete Replacement Kit Restore your vacuum’s original cleaning power with this complete brush roll and belt kit. Includes 1× brush roller and 1–2× drive belts and 1× multipurpose cleaning brush.to replace worn parts and improve vacuum efficiency.
Complete Brush Roll & Belt Replacement Kit (#3031120) Restore strong cleaning performance with this complete replacement kit. Includes a high-quality brush roll and a multipurpose cleaning brush—designed to bring your vacuum back to peak efficiency.
Preparing Your Vacuum
- Unplug the vacuum. Safety comes first.
- Gather your tools: a screwdriver, pliers, flashlight, torque wrench, and the correct replacement belt.
- Check the manufacturer’s manual for specific instructions related to your model. Knowing your model helps in identifying the right belt and procedure.
Removing the Old Belt
- Flip the vacuum over. Position it on a flat surface for easier access.
- Remove the screws. Typically, you’ll find screws securing the bottom cover.
- Take off the cover. Gently lift it away; it may require some wiggling.
- Locate the old belt. Check where it loops around the motor and brush roll.
- Use pliers to remove the old belt. If it’s stuck, carefully pry it loose.
Installing the New Belt
- Position the new belt around the motor shaft. Ensure it fits snugly.
- Loop the belt over the brush roll. Ensure the belt is correctly aligned to avoid slippage.
- Rotate the brush roll. This action helps seat the new belt properly.
- Reattach the bottom cover. Align it with any notches or clips.
- Secure it with screws. Ensure that it’s tight but avoid stripping the screws.
- Flip the vacuum back to its upright position.
- Plug in the vacuum and test it. Check for proper functioning and listen for unusual sounds.
By following these steps, you can effectively change the vacuum belt on your Bissell, ensuring optimal performance for dirt pickup.
Tips for Maintaining Your Vacuum Belt
Maintaining your Bissell vacuum belt ensures optimal performance. Regular care prevents wear and extends the lifespan of your vacuum’s components.
Regular Inspection
Inspect the vacuum belt every month. Check for signs of wear, such as cracks or fraying. A damaged belt reduces suction and leads to motor strain. Replace the belt immediately if you notice any issues. Clean the area around the belt to remove debris and prevent further damage.
Proper Usage Techniques
Use your vacuum correctly to prolong belt life. Avoid vacuuming large debris or objects, which can stress the belt. Always adjust your vacuum height based on the type of flooring. This adjustment ensures the belt operates efficiently without excess strain. Regularly empty the dirt container to maintain proper suction and reduce blockage.
Conclusion
Changing your Bissell vacuum belt isn’t just about keeping your vacuum running; it’s about ensuring your home stays clean and fresh. By taking the time to inspect and replace the belt when needed, you’re investing in the longevity of your vacuum.
Remember to use the right tools and follow the steps carefully for a smooth replacement process. With a little attention and care, you’ll keep your vacuum performing at its best. Happy cleaning!
Frequently Asked Questions
What is the role of a Bissell vacuum belt?
A Bissell vacuum belt powers the vacuum’s brush roll, ensuring effective suction and cleaning performance. A well-functioning belt is crucial for maintaining the vacuum’s efficiency and longevity.
How can I tell if my vacuum belt is worn?
Signs of a worn vacuum belt include diminished suction, unusual sounds during operation, or the brush roll not spinning. Regularly inspect the belt for cracks, fraying, or any visible damage.
What tools do I need to replace a Bissell vacuum belt?
To replace a Bissell vacuum belt, you typically need a screwdriver, a new vacuum belt, and a clean cloth for maintenance. Consult your vacuum manual for any specific requirements.
How do I change the Bissell vacuum belt?
To change the belt, first unplug the vacuum. Then, remove the brush cover and the old belt. Install the new belt on the motor shaft and brush roll. Finally, reassemble the vacuum and plug it back in.
How often should I check my vacuum belt?
It’s recommended to inspect your vacuum belt every few months or whenever you notice a drop in performance. Regular checks help catch wear early and maintain optimal cleaning efficiency.
What can I do to prolong the life of my vacuum belt?
To prolong your vacuum belt’s life, avoid overloading the vacuum, regularly clean hair and debris from the brush roll, and check for any obstructions that can strain the belt. Regularly inspect the belt for signs of wear.
