
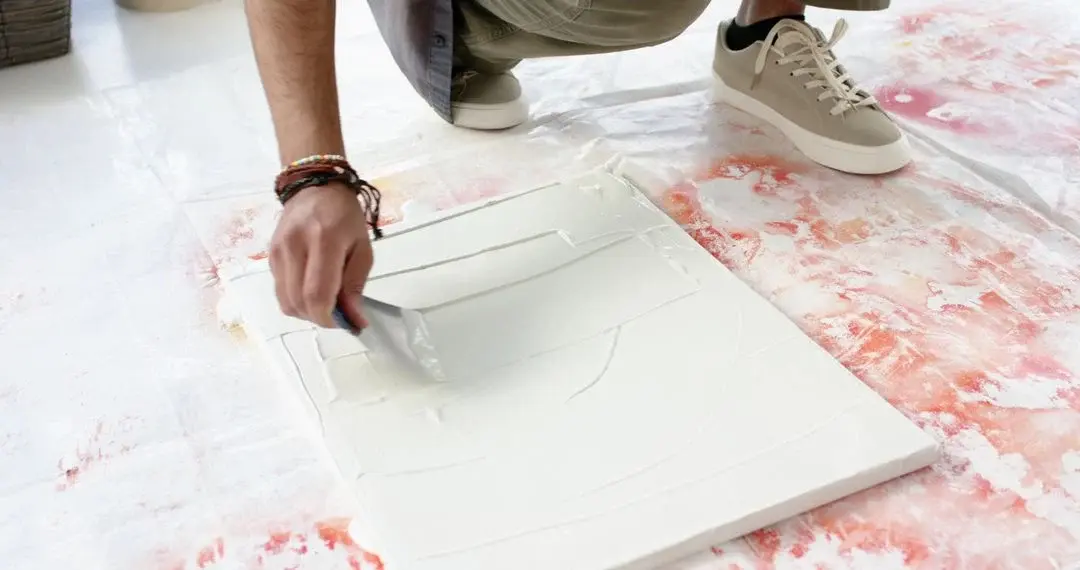
Gesso is one of those words that shows up in every beginner tutorial without much explanation. Do you need it? Your canvas already looks white. Here’s what gesso actually does, when it makes a real difference, and how to apply it without leaving ridges you’ll fight for the rest of the painting.
What gesso is (and isn’t)
Modern “acrylic gesso” is a primer: an acrylic binder with white pigment and a mineral filler such as calcium carbonate. The filler gives the dried surface a slight texture, often called tooth, that paint grips well. It also seals the fabric so it doesn’t soak up your paint.
It isn’t the same as traditional gesso made from animal glue and chalk, which is used on rigid panels for oil or egg tempera. For acrylic painting, acrylic gesso is what you want.
Do pre-primed canvases need more gesso?
Most stretched canvases and canvas panels sold in art stores are labeled “primed” or “triple primed” and are ready for acrylics as they come. So, strictly speaking, no.
That said, adding one or two coats can help when:
- The canvas feels rough or very absorbent, so your first layer dries instantly and looks patchy.
- You want a smoother surface for fine details, such as eyes, feathers or lettering.
- You’re reusing an old painting and want a fresh, even base.
- You’re painting on raw canvas, wood, cardboard or paper, which really do need sealing.
If you’re painting loose skies or abstract textures, the factory primer is usually plenty.
What you’ll need
- Acrylic gesso (white, or clear/black if you want a different base)
- A wide flat brush you don’t mind dedicating to gesso, or a small foam roller
- A small cup of water
- Fine sandpaper, around 220 grit or finer (optional, for a smooth finish)
- Something to prop the canvas on so the edges can dry

How to apply gesso, step by step
- Stir, don’t shake. Shaking adds bubbles that dry as pinholes.
- Thin the first coat slightly if it’s very thick, with a small splash of water, so it brushes on smoothly. Check your brand’s label for how much water it tolerates.
- Brush in one direction. Use long, even strokes from edge to edge, say horizontally. Keep the coat thin. Thick coats tend to crack or leave ridges.
- Let it dry completely. Thin coats are often touch-dry within an hour, but drying depends on the product, humidity and temperature, so follow the label.
- Sand lightly if you want it smooth. A gentle pass with fine sandpaper knocks down brush ridges. Wipe off the dust.
- Apply the next coat at a right angle, vertically this time. Crossing directions gives a more even surface.
- Two or three thin coats are usually enough. Paint the edges too if your painting will hang without a frame.
- Wash your brush right away. Gesso is acrylic, so once it dries in the bristles, it’s there for good.
Tinted grounds: a small trick with a big payoff
Starting on stark white can make it hard to judge your values, and tiny gaps in coverage show up as bright specks. Many painters tint their gesso, or brush a thin wash of acrylic over it, before starting. A mid-tone such as a soft gray, a muted blue or a warm orange underlayer can make skies glow and hide little gaps. Pick a color that suits the subject: a warm ground under a sunset, a cool one under a snowy scene.
Common gesso problems
- Visible brush ridges: coats were too thick, or the gesso started drying while you were still brushing. Use thinner coats and sand between them.
- Tiny bubbles or pinholes: often from shaking the jar or overworking the coat. Brush gently and let bubbles pop before the coat sets.
- A sagging canvas after priming: wet gesso can loosen the fabric briefly. It usually tightens again as it dries. If not, many stretched canvases include small wooden keys you can tap into the corners.
- Paint still looks patchy: the surface may be fine and the issue is the paint itself. See why acrylic paintings look streaky.
Where to go next
If you’re still collecting supplies, our beginner acrylic supply guide lists what’s worth buying first. Then try a forgiving first project from our easy color study paintings.
Materials checklist for priming
- Acrylic gesso (student gesso is fine for practice canvases)
- A wide flat brush or foam brush dedicated to priming
- Fine sandpaper (around 220 grit) for optional smoothing between coats
- A clean, dust-free drying spot
- Optional: a little water to thin the first coat slightly if the gesso is very thick
Shake or stir gesso so settled solids redistribute. Do not shake so hard that you whip a foam of bubbles into the jar.
Step-by-step: two thin coats
- Wipe dust off the pre-primed canvas.
- Load the brush and spread gesso in parallel strokes across the whole surface, including the sides if you plan to hang the canvas unframed.
- Aim for coverage that still shows a hint of the weave, not a frosting-thick layer.
- Let it dry fully. Touch the center; if it feels cool or tacky, wait.
- Optional: lightly sand raised nubs, wipe dust, then apply a second coat at a right angle to the first for a more even tooth.
Tinted grounds (gesso mixed with a little acrylic color) can kill the glare of pure white and make early value judgments easier. Keep the tint light so it does not fight later layers.
When skipping extra gesso is reasonable
Many store canvases already carry an acrylic primer. If the surface feels evenly sealed, accepts a test stroke without sudden dry patches, and you like a bit of tooth, you can paint. Extra gesso is most helpful when the canvas feels absorbent, when you want a smoother portrait surface, or when you are covering a previous painting.
Troubleshooting
- Brush marks in the gesso: Thin slightly, use a wider brush, and sand lightly between coats.
- Cracking: Usually from overly thick application or flexing a canvas before deep layers cure. Prefer thin coats.
- Yellowing cardboard show-through: Seal raw boards before gesso; do not rely on one skim coat over porous craft board.
Once the ground is ready, a simple subject with big shapes is the best test. If the first color coat still looks patchy, that may be pigment or water habits rather than priming — see why acrylic paint looks streaky.
Priming day is also a good day to paint the edges of a gallery-wrapped canvas in a neutral gray or a color that will suit the finished piece. Waiting until after the painting is done can mean awkward brushwork around delicate border details.
If you are reusing a canvas, scuff glossy varnish, clean dust, and apply gesso until prior images no longer telegraph strongly — or accept ghost images as part of an experimental underlayer. Multiple heavy cover-ups can create a brittle film; when a canvas becomes a graveyard of failed starts, retire it to texture experiments and stretch or buy a fresh surface for important work.
Putting it into a weekly practice
Choose one small canvas size and repeat the same exercise three times in one week rather than inventing a new subject every session. Repetition reveals which mistakes are habits. Keep notes on drying time in your room, which mixes skinned too fast, and which edges looked best in a daytime photo.
Share progress with yourself by lining up the three attempts side by side. The middle attempt is often where understanding appears: not yet polished, but clearer than the first. Use the third attempt to apply only one improvement goal, such as cleaner edges or better value range.
When a painting fails, scrape or gesso over it and reuse the panel for drills. Failure panels are cheaper teachers than unused premium canvases that intimidate you into stillness. Momentum matters more than preciousness while skills are forming.
Finally, connect technique pages to subject hubs so practice has a destination. A blending drill should lead to a finished small landscape; a dry-brush drill should lead to a small animal study. Technique without a next painting becomes abstract advice that evaporates.

Hi, I’m Camille. I write The Everyday Painter, where I share acrylic painting ideas, beginner guides and practical fixes for common painting problems. I love color, simple compositions and projects that fit into an ordinary evening.