
Have you ever noticed your vacuum isn’t picking up dirt like it used to? A vacuum leak might be the culprit, and fixing it can be more affordable than you think. If you’re wondering how much it’ll cost to repair that pesky leak, you’re not alone. Many people face this common issue and want to know what to expect.
In this article, you’ll get a clear idea of the costs involved in repairing a vacuum leak. We’ll break down the factors that influence the price and offer tips on how to approach the repair. By the end, you’ll feel more confident about making an informed decision and getting your vacuum back to its best.
Key Takeaways
- Understanding Vacuum Leaks: Vacuum leaks occur when unwanted air enters the system, impacting suction and cleaning efficiency. Common causes include worn seals, cracked hoses, loose connectors, clogged filters, and damaged vacuum bodies.
- Signs of a Vacuum Leak: Key indicators include reduced suction power, unusual noises (hissing or whistling), increased energy consumption, frequent overheating, and unstable motor performance.
- Cost Factors: Repair expenses range from $100 to $500, influenced by parts and labor costs, diagnostic fees, type and model of the vacuum, severity of the leak, and geographic location.
- DIY vs Professional Repair: DIY repairs can save labor costs, typically only requiring payment for parts ($10 to $100). Professional repairs ensure expert diagnosis and typically range from $100 to $500.
- Budgeting for Repairs: Understanding typical costs and potential repair needs helps you prepare financially for addressing vacuum leaks effectively.
Understanding Vacuum Leaks
Vacuum leaks impact your vacuum’s performance and cleaning efficiency. Recognizing what they are and their common causes helps you address the issue effectively.
What Is a Vacuum Leak?
A vacuum leak occurs when air enters the system where it shouldn’t. This disruption diminishes the suction power your vacuum relies on for effective cleaning. Even a tiny leak can significantly affect performance, leading to poor results.
- Worn Seals: Seals degrade over time, creating gaps where air can seep in.
- Hoses: Cracks or holes in hoses often lead to leaks. Inspect both flexible and hard hoses for wear.
- Connectors: Loose or damaged connectors fail to ensure a tight fit, allowing air to breach the system.
- Filters: Clogged or improperly fitted filters can obstruct airflow, resembling a vacuum leak.
- Vacuum Body: Damage to the vacuum casing, such as cracks, can also result in air leaks.
Identifying these common causes helps you troubleshoot the problem faster and can lead to cost-effective repairs.
Diagnosing a Vacuum Leak
Diagnosing a vacuum leak is essential for restoring your vacuum’s performance. Understanding the signs and gathering necessary tools simplify the process.
Recommended Products

[Built-in Air Pump]: Smoke machine features a built-in air pump, eliminating the need for an external air source, allowing you to perform tests anytime, anywhere. Simply add about 20ml of baby oil or Glycerin (oil not included) to start your testing effortlessly

The Smoke Machine provides quick and accurate leak detection for various automotive systems. It’s designed to help DIY repair technicians in the garage by identifying hard-to-find leaks without dismantling parts
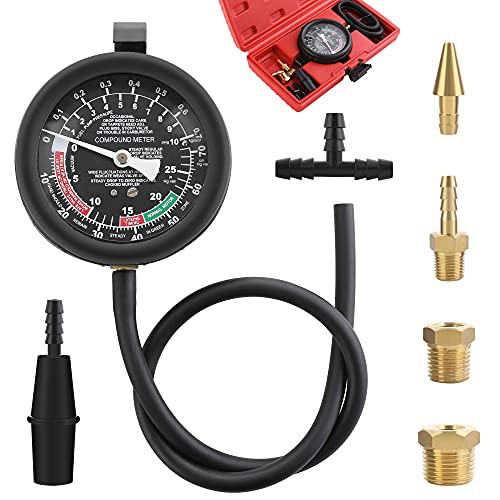
FUEL PUMP - This pressure gauge set can be used to test fuel pump pressure, emission control devices, leaky, stuck open or burnt valves. Clogged muffler, turbo or exhaust system. Helps to locate leaks in the gas line, valve timing, worn out rings and seals, heating and air conditioning components.
Signs of a Vacuum Leak
Recognizing a vacuum leak involves observing specific symptoms. Look for these clear indicators:
- Reduced Suction Power: Noticeable drop in suction strength while cleaning.
- Unusual Noise: Hearing hissing or whistling sounds during operation.
- Increased Energy Consumption: Your vacuum uses more power than usual while achieving less.
- Frequent Overheating: The motor overheats quickly or shuts off unexpectedly.
- Unstable Motor Performance: The motor may run erratically or struggle to maintain speed.
Tools Needed for Diagnosis
Gather these tools for an effective diagnosis of a vacuum leak:
- Vacuum Gauge: Measures suction levels to identify inconsistencies.
- Soapy Water: Mix water with dish soap to spray on suspected areas; bubbles indicate leaks.
- Flashlight: Helps inspect hard-to-reach places around seals and hoses.
- Wrenches and Screwdrivers: Needed for removing components for a closer look.
- Duct Tape: Temporarily seals areas to test for leaks.
Using these tools assists in pinpointing the source of the leak, enabling efficient and effective repairs.
Cost Factors for Repairing a Vacuum Leak
Repairing a vacuum leak involves various cost factors that can affect your overall expenses. Understanding these factors helps you budget for the repair accurately.
Parts and Labor Costs
Parts and labor costs play a significant role in the total expense of repairing a vacuum leak.
- Replacement Parts: Common parts that may require replacement include hoses, seals, and connectors. Prices range from $5 to $100, depending on the part’s quality and compatibility with your vacuum.
- Labor Costs: Labor rates vary widely. On average, you might pay $50 to $150 per hour, depending on the technician’s experience and location. Some repairs can take one to three hours.
- Diagnostic Fees: Technicians often charge a diagnostic fee, which can range from $50 to $100. This fee generally covers the assessment of the vacuum and helps identify the source of the leak.
Additional Considerations
Several other factors can influence the overall cost of repairing a vacuum leak.
- Type of Vacuum Cleaner: The model and brand can affect parts availability and labor complexity. Higher-end models often have parts that are more expensive and require specialized knowledge for repairs.
- Severity of the Leak: Minor leaks that affect performance lightly may incur lower costs compared to major leaks that compromise your vacuum’s functionality, necessitating more extensive repairs.
- Location: Costs may vary depending on where you live. Urban areas typically have higher labor rates due to increased demand for repair services.
- Warranty Coverage: If your vacuum is under warranty, some repair costs may be covered. Check your warranty details to see what expenses you might save.
Understanding these cost factors allows for better planning when repairing a vacuum leak.
How Much to Repair Vacuum Leak
Repairing a vacuum leak can vary significantly in cost. Understanding the average expenses and options for repair helps you prepare for this necessary maintenance task.
Recommended Products

VACUUM BREAKER REPAIR KIT: This repair kit prevents water from siphoning back into the potable water supply

Package Includes: 1 x Vacuum Breaker Repair Kit replaces VACVBKX1B vacuum breaker for outdoor sillcock valves. Includes brass cap, body, O-ring, and plunger seal

For use with model No. 578 series wall hydrants
Average Repair Costs
Repair costs for vacuum leaks typically range from $100 to $500. Factors influencing this range include:
- Diagnostic Fees: Expect around $50 to $100 for initial diagnostics performed by a technician.
- Parts Costs: Replacement parts like hoses or seals cost between $10 and $100, depending on quality and specific vacuum model.
- Labor Costs: Labor charges usually fall between $75 and $200, influenced by your location and the technician’s expertise.
Knowing these potential expenses aids in budgeting effectively when dealing with vacuum leaks.
DIY vs Professional Repair
Deciding between a do-it-yourself (DIY) approach or hiring a professional can impact your repair costs.
- DIY Repair: Tackling the repair yourself can save you labor fees. You might only pay for parts, totaling around $10 to $100. Resources like online tutorials or forums can guide you through simple fixes.
- Professional Repair: Professional assistance guarantees expert diagnosis and repair. While it costs more (usually $100 to $500), it often ensures a lasting fix and peace of mind.
Evaluate your comfort level with DIY repairs and the complexity of the vacuum’s issues before making a decision.
Conclusion
Repairing a vacuum leak doesn’t have to be a daunting task. With a clear understanding of the costs involved and the options available to you, you can make informed choices that fit your budget. Whether you decide to tackle the repair yourself or seek professional help, knowing what to expect can save you time and money.
Remember to stay proactive about maintenance to avoid future leaks. Keeping your vacuum in top shape will not only enhance its performance but also extend its lifespan. So go ahead and take the necessary steps to ensure your vacuum runs smoothly and efficiently. You’ve got this!
Frequently Asked Questions
What are the common causes of vacuum leaks?
Vacuum leaks typically occur due to worn seals, damaged hoses, or faulty connectors. These issues can diminish cleaning efficiency and increase repair costs. Regular inspection and maintenance can help prevent these leaks.
How can I identify signs of a vacuum leak?
Signs of a vacuum leak include decreased suction power, unusual noises, and visible damage to hoses or seals. Additionally, if the device is overheating or struggling to maintain suction, a vacuum leak might be the culprit.
What tools do I need to diagnose a vacuum leak?
To diagnose a vacuum leak, you may need a basic toolset that includes a multimeter, vacuum gauge, smoke machine, and soapy water spray. These tools help locate leaks by checking for pressure loss and visual indicators.
How much does it cost to repair a vacuum leak?
Repairing a vacuum leak typically costs between $100 and $500. This range includes diagnostic fees, parts, and labor costs. The final price depends on the severity of the leak and the method of repair chosen.
Should I repair a vacuum leak myself or hire a professional?
Deciding between DIY and professional repair depends on your skill level and comfort. DIY repairs can save money but might require specific tools and knowledge. Professional repairs ensure correct fixes but will be more expensive. Consider your budget and expertise when choosing.
