
Have you ever found yourself struggling with a central vacuum outlet that just won’t work? It’s a frustrating situation that can disrupt your cleaning routine and leave you searching for solutions. Whether it’s a worn-out outlet or an outdated design, knowing how to change it can save you time and hassle.
Key Takeaways
- Understand Outlet Types: Familiarize yourself with different types of central vacuum outlets, including standard, flush-mount, high-voltage, and inlet valves, to choose the right replacement.
- Identify Common Issues: Recognize prevalent problems like clogs, loose connections, damage, wiring issues, and outdated designs that may necessitate an outlet change.
- Gather Tools and Materials: Prepare essential tools such as screwdrivers, wire strippers, and a voltage tester, along with a compatible replacement outlet and electrical supplies for a smoother installation.
- Follow a Step-by-Step Guide: Ensure safety by turning off the power, removing the old outlet, and correctly installing the new outlet while adhering to the noted wiring configuration.
- Prioritize Safety: Always use protective gear like safety goggles, gloves, and a dust mask to minimize risks while handling electrical components during the replacement process.
Understanding Central Vacuum Outlets
Central vacuum outlets serve as essential access points for your cleaning equipment. Knowing their types and potential issues helps you maintain your system effectively.
Types of Central Vacuum Outlets
- Standard Outlets: Standard outlets connect directly to your central vacuum system. They’re typically located in walls and allow for immediate use after installation.
- Flush-Mount Outlets: Flush-mount outlets blend seamlessly into the wall. Their design minimizes visibility while still providing functional access.
- High-Voltage Outlets: High-voltage outlets support advanced features like powerheads. These require direct wiring and are suitable for specialized cleaning needs.
- Inlet Valves: Inlet valves can close automatically when not in use. They help maintain cleanliness by preventing dust and debris from escaping.
- Clogged Outlets: Blockages in the outlet can prevent suction. Clearing debris or using a flexible tool often remedies this issue.
- Loose Connections: Outlets may become loose due to wear. Tightening screws and ensuring secure connections restores functionality.
- Damaged Outlets: Outlets can suffer from cracks or electrical damage. Inspecting for visible signs of wear prompts timely replacement.
- Wiring Issues: Improper wiring can disrupt power supply. Testing connections with a voltmeter helps identify potential faults.
- Outdated Designs: Older outlet styles may lack modern features. Upgrading to newer models enhances performance and reliability.
Tools and Materials Needed
Changing a central vacuum outlet requires specific tools and materials for an efficient process. Gather the following items before starting the project.
Recommended Products
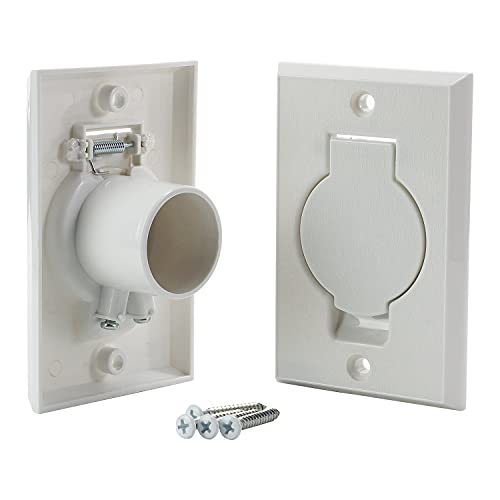
Fit Perfectly: The central vacuum wall plate features a Round door. Worked perfectly for Beam central vac units.

UNIVERSAL COMPATIBILITY: Designed to fit all kinds of central vacuum rough-in outlets, making it a versatile replacement or upgrade option.

【PRODUCT SIZE】Standard central vacuum wall valve inlet, measures 4.92" in height, 3.15" in width, 1.77" in depth. Fits the standard 1 3/8" vac hose. (Please note: this valve plate does not have the electric hookup.)
Essential Tools
- Screwdriver: A flathead or Phillips screwdriver is essential for removing screws from the outlet cover and mounting bracket.
- Wire Strippers: Use wire strippers to expose the necessary wire lengths when connecting new wires.
- Drill: A power drill helps with drilling new holes if you need to reposition the outlet.
- Voltage Tester: Ensure the electrical supply is off by using a voltage tester. This tool adds safety while working on the outlet.
- Utility Knife: A utility knife can help with cutting through any insulation or taping.
- Replacement Outlet: Purchase a compatible outlet specific to your central vacuum system.
- Electrical Wire: Use high-quality electrical wire, preferably 12 or 14-gauge, to handle the vacuum’s electrical load.
- Wire Nuts: Wire nuts secure your connections and maintain electrical safety.
- Electrical Tape: Electrical tape provides additional insulation where needed and ensures a tight seal on connections.
- Sealant or Caulk: If the outlet requires weatherproofing, use a silicone sealant or caulk around the edges.
Having these tools and materials ready makes the process smoother and reduces interruptions while changing your central vacuum outlet.
Step-by-Step Guide to Changing a Central Vacuum Outlet
Changing a central vacuum outlet isn’t difficult. Follow these steps for a successful replacement.
Recommended Products
Perfect Fit: The Central Vacuum Inlet Valve features a round door that effortlessly fits beam central vac units for the ultimate in convenience
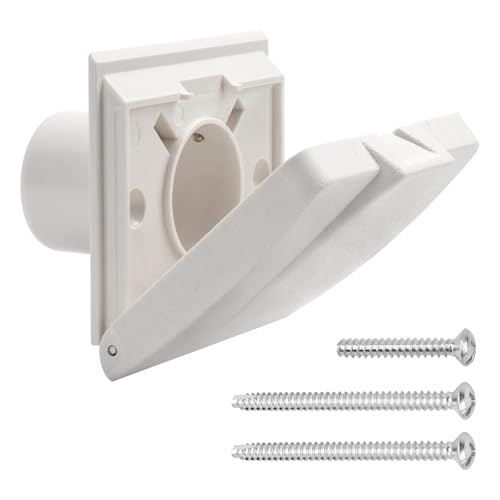
Seamless Mounting Compatibility: Compatible with Broan-NuTone 360 series central vacuum cleaner system, the central vacuum wall plate (3-3/4" W × 3" H × 5/8" D) works flawlessly with CH515 CH230L hoses and install with CF361 CF361F mounting bracket, or 395 or 396-3 rough-in kits.
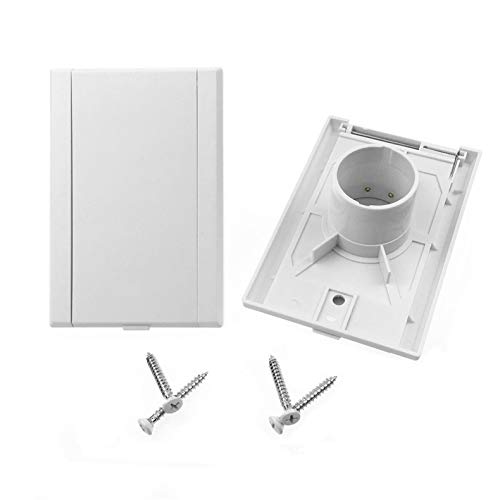
Central Vacuum Wall Plate: 𝐍𝐞𝐰 𝐔𝐩𝐠𝐫𝐚𝐝𝐞𝐝 Central Vacuum Inlet Valve 775595V3W, For Nutone Central Vacuum Cleaner White Automatic Inlet 330W,07-0601-06. 2 Pack Inlet Valve as pictured
Turning Off the Power
- Locate the main power supply for your central vacuum system.
- Switch off the circuit breaker that supplies power to the vacuum outlets.
- Use a voltage tester on the outlet to confirm there’s no electricity before proceeding.
Removing the Old Outlet
- Unscrew the outlet cover plate with a screwdriver. Set it aside.
- Detach the outlet from the electrical box by unscrewing the mounting screws.
- Carefully pull the outlet away from the wall, exposing the wires connected to it.
- Note the wiring configuration or take a photo for reference.
- Disconnect the wires by removing the wire nuts.
Installing the New Outlet
- Take the new outlet and connect the wires according to your earlier notes. Typically, the black wire connects to the brass terminal, while the white wire connects to the silver terminal.
- Secure the connections with wire nuts, ensuring they’re tight.
- Carefully push the outlet back into the electrical box, and align it with the mounting holes.
- Screw the outlet into place and then attach the cover plate.
- Turn the power back on at the circuit breaker.
- Plug in your central vacuum hose and turn the vacuum on.
- Check for proper suction and functionality at the new outlet. If it works correctly, the replacement completed successfully.
Safety Precautions
Prioritizing safety during the outlet change process is essential. Following these precautions ensures a successful and injury-free experience.
Importance of Safety
Safety is crucial when replacing a central vacuum outlet. Working with electrical components poses risks such as electric shock or circuit damage. By taking necessary precautions, you protect yourself and your home’s electrical system.
- Safety Goggles: Protects your eyes from debris and dust.
- Gloves: Safeguards your hands from sharp edges and electrical hazards.
- Dust Mask: Prevents inhalation of dust while working around the outlet.
- Non-slip Shoes: Ensures stability and reduces the chance of slipping during the process.
Conclusion
Changing a central vacuum outlet might seem daunting but with the right tools and safety precautions you can tackle it confidently. By following the steps outlined you’ll not only restore functionality to your system but also enhance your cleaning experience.
Remember to take your time and prioritize safety throughout the process. Once you’ve successfully installed the new outlet you can enjoy a more efficient and reliable central vacuum system. Happy cleaning!
Frequently Asked Questions
What are common issues with central vacuum outlets?
Malfunctioning central vacuum outlets can include loss of suction, inconsistent power, and physical damage to the outlet itself. These issues can stem from wear and tear, electrical faults, or incorrect installation. Regular maintenance can help identify problems early.
What tools do I need to replace a central vacuum outlet?
To replace a central vacuum outlet, you’ll typically need a screwdriver, wire stripper, electrical tape, and a voltage tester. Safety goggles, gloves, a dust mask, and non-slip shoes are also recommended to ensure your safety during the process.
How do I safely replace a central vacuum outlet?
Start by turning off the power to the central vacuum system. Always wear safety gear, like goggles and gloves. Carefully remove the old outlet, making sure to note the wiring. Install the new outlet, secure the connections, and test for functionality before restoring power.
What safety precautions should I take when replacing an outlet?
Before replacing a central vacuum outlet, always turn off the power at the circuit breaker. Use insulated tools, wear safety goggles, gloves, and a dust mask, and ensure your work area is dry and free from clutter to minimize the risk of electric shock.
How can I test the new central vacuum outlet?
Once the new outlet is installed, restore power and plug in your central vacuum hose. Check for consistent suction and make sure the outlet responds properly to activation. If it doesn’t work, ensure all connections are secure and the circuit breaker is on.
