
Is your Dyson vacuum losing power right when you need it most? You’re not alone. Many people face the frustration of a fading battery, especially during those crucial cleaning sessions.
Key Takeaways
- Understand Battery Types: Recognize the differences between nickel-cobalt-aluminum and lithium-ion batteries, with the latter offering superior performance for Dyson vacuums.
- Battery Lifespan Awareness: Expect a battery lifespan of 2 to 5 years, and monitor for signs like decreased suction to assess battery health.
- Replacement Process: Follow a step-by-step guide for battery replacement, including gathering necessary tools and disassembling the battery compartment carefully.
- Troubleshooting Common Issues: Familiarize yourself with common problems during and after replacement, such as charging issues and unusual noises, and learn to address them promptly.
- Safety Precautions: Always disconnect power, work in a ventilated area, and use gloves during the battery replacement process to ensure safety.
- Professional Help: When in doubt or if persistent issues occur after a DIY replacement, seek professional assistance to avoid further complications.
Understanding Dyson Vacuum Batteries
Dyson vacuum batteries play a crucial role in the performance and longevity of your vacuum. Knowing how they function helps maintain optimal cleaning capabilities.
Types of Dyson Batteries
Dyson uses different battery types, including nickel-cobalt-aluminum and lithium-ion batteries. Lithium-ion batteries provide better energy density, longer runtime, and quicker charging times. Choose extensions compatible with your specific Dyson model for the best results.
Battery Lifespan
The life of a Dyson vacuum battery typically ranges from 2 to 5 years, depending on usage patterns. Regularly charging your vacuum and allowing it to fully discharge can extend its lifespan. Look for signs of wear, such as decreased suction or longer charging times, to gauge battery health.
Charging the Battery
Charging a Dyson vacuum battery is straightforward. Simply connect the charger to the vacuum and plug it into a wall outlet. Ensure the vacuum is switched off during charging. Allow it to charge fully for about 3.5 hours for optimal performance.
Replacing the Battery
When replacing the battery, obtain a compatible replacement, as using the correct model ensures compatibility and safety. Follow the manufacturer’s instructions for the most effective replacement procedure.
Troubleshooting Common Battery Issues
If your Dyson vacuum runs briefly before losing power or fails to charge, consider these steps:
- Check Connections: Ensure the charger connects securely to the vacuum and the outlet.
- Inspect the Charger: Look for any damage or wear in the charging cord or plug.
- Clear Dust and Debris: Dust can clog the charging port; cleaning it may help restore functionality.
These measures can resolve common battery issues and restore your vacuum’s performance.
Tools Required for Battery Replacement
To replace your Dyson vacuum battery effectively, gather the right tools beforehand. Having these tools on hand simplifies the process and ensures you complete the task efficiently.
Recommended Products

🌳【Battery Type】Battery type: lithium-ion battery. Voltage: 22.2V, Capacity: Upgraded 6000mAh(No Fake High Capacity Label). No memory effect, no pollution, and low self-discharge, can be charged or discharged as needed without loss of capacity. 100% compatible with original charger, docking station. Vacuum cleaner battery, Vacuum cleaner accessories.

【for Dyson V7 V8 Series Vacuum】Compatible with Dyson V7 and V8 ,SV10, SV11, Motorhead /Animal /Absolute /Trigger /Car+boat etc. (Not for V6 V10 V11 V12 V15...)

【Compatible with Dyson V7 V8 Series Vacuum Cleaner】compatible with Dyson V7 series vacuum cleaners, like V7 Motorhead Pro, V7 Trigger, V7 Animal, V7 Mattress, V7 Absolute, V7 Car+Boat, etc.; Works with v8 animal vacuum 229602-01, v8 absolute vacuum 214730-01, v8 motorhead vacuum, v8 hand-held series vacuum cleaner, v8 SV10 967834-02 96783402 vacuum cleaner, and v8 animal cordless stick vacuum cleaner.
Recommended Tools
- Screwdriver: Use a Phillips-head screwdriver to remove screws securing the battery compartment.
- Replacement Battery: Ensure you have a compatible Dyson battery model designed for your vacuum. Check the model number for accuracy.
- Pliers: Pliers help with battery connections if they seem too tight or inconvenient to handle with fingers.
- Soft Cloth: A soft cloth protects your vacuum’s surface from scratches during the replacement process.
- Disconnect Power: Before starting, turn off the vacuum and unplug it to prevent accidental activation.
- Wear Gloves: Using gloves protects your hands from sharp edges or any potential battery leakage.
- Work in a Ventilated Area: Ensure good airflow while handling the battery to avoid inhaling any fumes or smells.
- Follow Manufacturer Guidelines: Refer to the manual for specific instructions and safety alerts related to your vacuum model for the safest experience.
These tools and precautions not only facilitate a smoother battery replacement but also promote a safe working environment.
Step-by-Step Guide to Change Dyson Vacuum Battery
Changing the battery on your Dyson vacuum can restore its performance and extend its lifespan. Follow these steps for a smooth battery replacement process.
Recommended Products
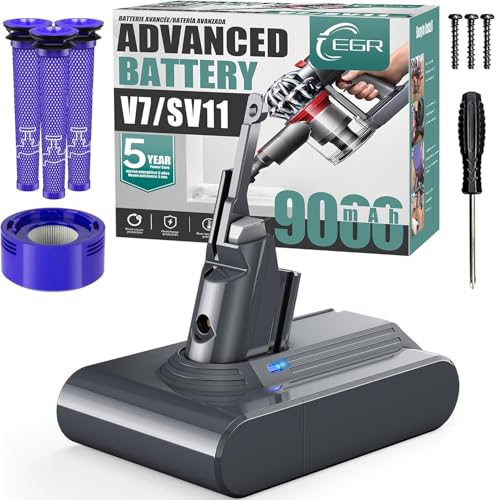
【Long Battery Life of V7 Rechargeable Battery】9000mAh rechargeable V7 animal battery replacement is designed to provide more power. V7 battery replacement provides more than 30 minutes in the normal mode, 9 minutes in high-performance mode, longer runtime than OEM batteries.(Note: Please cool down the battery before charging)
Compatible with Dyson V8 Cordless Vacuum Cleaner Models: V8 Plus, V8 Animal, V8 Absolute, V8 Motorhead, V8 Pro+, V8 Extra, V8 Allergy, V8 Slim, V8 Mattress, V8 Origin+, SV10, SV25, 214730-01, 257253-02, 400495-01, 400496-01, 405901-01, 481768-01, 96834-02, 96783402, and more.

【Upgraded 9000mAh Long-Lasting Battery】Crafted with upgraded Li-ion cells, this high-capacity 9000mAh V8 replacement battery delivers 21.6V of stable power. It is designed to support extended cleaning sessions for large homes. Activate Max mode for a powerful boost to tackle ground-in pet hair and stubborn dirt on both carpets and hard floors.
Preparing Your Vacuum
- Disconnect the vacuum from its charger. Make sure it’s powered off to ensure safety.
- Gather necessary tools. You’ll need a screwdriver, pliers, and a soft cloth to prevent scratching surfaces.
- Work in a ventilated area. Adequate airflow helps during the battery replacement process.
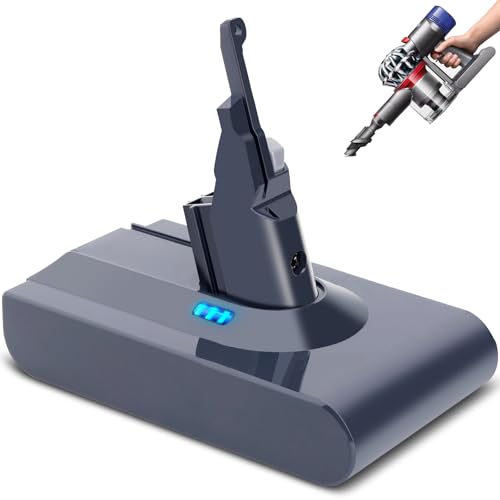
Removing the Old Battery
- Locate the battery compartment. This is typically found near the handle of your Dyson vacuum.
- Use the screwdriver. Unscrew any screws securing the battery compartment cover. Set the screws aside in a safe place.
- Gently remove the battery. If it’s stuck, use pliers to carefully pull it out without damaging surrounding components.
Installing the New Battery
- Align the new battery correctly. Make sure is oriented as the old battery was installed.
- Insert the new battery. Slide it into the compartment firmly until it clicks into place.
- Secure the compartment. Replace the cover and tighten the screws using the screwdriver.
- Reconnect the vacuum to the charger. Allow the new battery to charge fully before use.
- Perform a test run. Turn on your Dyson and check for proper suction and performance.
- Monitor the vacuum’s operation. Ensure that it’s running smoothly without any unusual sounds or loss of power.
By following these steps, you can easily replace the battery on your Dyson vacuum and enjoy its full functionality again.
Common Issues When Changing the Battery
Changing a Dyson vacuum battery can sometimes lead to unexpected challenges. Understanding these issues helps ensure a smoother battery replacement process.
Recommended Products

9000 mAh High-Capacity Rechargeable Battery:V8 animal battery replacement has been rigorously tested for more than 1500 hours, with a capacity of 9000mAh, 21.6V, 194.4Wh, which lasts longer than the original battery and most V8 batteries on the market, and has stronger suction, providing reliable electric power for daily use.
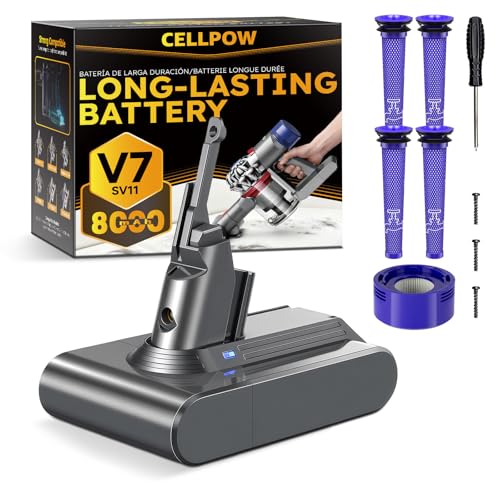
【Upgraded 8000mAh V7 Battery Replacement - Experience Extended Runtime & Powerful Suction】This upgraded V7 battery replacement features a high-capacity 8000mAh Li-ion pack and 21.6V voltage, which designed to provide extended runtime, helping to reduce interruptions during cleaning tasks. This V7 battery replacement is the ideal upgraded solution for those seeking enduring power and superior performance.

【Perfectly Compatible With V10/SV12 Models】V10 Replacement Battery designed for Cyclone V10 Animal/Absolute/Motorhead/Fluffy, SV12 cordless vacuum, and V10 wall charger. NOTE: Not compatible with SV10 & V8 models.
Troubleshooting Tips
- Battery Doesn’t Charge: If the new battery isn’t charging, double-check the contacts inside the battery compartment. Clean any dust or debris that might interfere with the connection.
- Vacuum Doesn’t Turn On: After replacing the battery, press the power button firmly. If it still doesn’t activate, ensure the battery is inserted correctly and securely.
- Battery Indicator Issues: The battery indicator may not show the correct charge level. This can happen if the battery calibration is off. Recouple the vacuum with the charger for a few hours to reset it.
- Unusual Noises: Listen for strange sounds during use. These could signal a poor connection or incorrect battery seating. Disassemble and check for any loose parts.
- Overheating: If the vacuum overheats, disconnect it immediately. Ensure the battery is genuine and compatible with your model.
- Persistent Problems: If related issues continue after troubleshooting, consider reaching out for professional assistance. Signs of persistent power loss or malfunction indicate an underlying problem that requires expert analysis.
- Damaged Components: If you notice any damage to the vacuum body or internal parts during the battery change, consult with a professional. Damaged components could lead to further complications.
- Warranty Considerations: If your vacuum is still under warranty, avoid DIY repairs that could void it. It’s better to consult Dyson’s customer service or an authorized repair center for guidance.
- Complex Models: For advanced models with intricate electronic configurations, professional help might be necessary. Experienced technicians can better handle these devices’ complexity.
Conclusion
Changing your Dyson vacuum battery doesn’t have to be a daunting task. With the right tools and a little patience you can have your vacuum running like new in no time. Remember to follow safety precautions and take your time during the process.
If you encounter any issues don’t hesitate to seek help. Keeping your vacuum in top shape ensures it’ll continue to serve you well for years to come. So go ahead and tackle that battery replacement—you’ll be glad you did!
Frequently Asked Questions
What types of batteries do Dyson vacuums use?
Dyson vacuums primarily use two types of batteries: nickel-cobalt-aluminum and lithium-ion. Lithium-ion batteries are more common due to their efficiency and longer lifespan, providing reliable power for cleaning tasks.
How long do Dyson vacuum batteries last?
The lifespan of a Dyson vacuum battery typically ranges from 2 to 4 years, depending on usage and maintenance. Regular charging and proper care can help extend the battery’s life.
How can I troubleshoot my Dyson vacuum if it’s losing power?
To troubleshoot a Dyson vacuum losing power, check the battery connection, ensure it’s properly charged, and inspect for clogs in the vacuum. If issues persist, consider replacing the battery or seeking professional assistance.
What tools do I need to change a Dyson vacuum battery?
To change a Dyson vacuum battery, you’ll need a screwdriver and pliers. Gather these tools before starting the battery replacement process for a smoother experience.
What safety precautions should I take when replacing a Dyson vacuum battery?
When replacing a Dyson vacuum battery, disconnect it from the charger, work in a dry area, and avoid touching the terminals. Always follow instructions to prevent injury and ensure a successful replacement.
What should I do if my vacuum doesn’t charge after battery replacement?
If your vacuum doesn’t charge after replacing the battery, ensure it’s properly connected to the charger and check for any obstructions. If problems persist, verify the charger’s functionality or consult a professional.
How do I know if my Dyson vacuum battery is damaged?
Signs of a damaged Dyson vacuum battery include frequent power loss, inability to hold a charge, swelling, or unusual noises during operation. If you notice these issues, consider replacing the battery.
Can I replace the battery myself, or should I seek professional help?
You can replace the Dyson vacuum battery yourself if you’re comfortable following instructions and using basic tools. However, if you’re unsure or encounter complex problems, seeking professional help may be best.

