
Is your vacuum cleaner losing suction or making strange noises? It might be time to change the belt. This common issue can leave your floors dirty and your cleaning routine frustrating. The good news is that replacing a vacuum cleaner belt is a simple task that you can tackle on your own.
Key Takeaways
- Understanding the Importance: Vacuum cleaner belts are crucial for the appliance’s performance, influencing suction power and brush roll movement.
- Identifying Issues: Common signs of a failing belt include reduced suction, unusual noises, a stopped brush roll, and burning smells.
- Required Tools: Essential tools for changing a vacuum belt include screwdrivers, pliers, a replacement belt specific to your model, and safety gear like gloves and safety glasses.
- Step-by-Step Process: Follow a structured approach when replacing the belt, including unplugging the vacuum, removing the old belt, and installing the new one correctly.
- Regular Maintenance: Regularly inspect the vacuum cleaner belt and clean the surrounding area to extend its lifespan and maintain optimal performance.
Understanding Vacuum Cleaner Belts
Vacuum cleaner belts play a crucial role in the operation of your vacuum. Understanding the types and signs of wear can help you maintain your cleaner’s performance.
Types of Vacuum Cleaner Belts
- Flat Belts: Flat belts are the most common type. They transfer power from the motor to the brush roll. These belts often wear out quickly due to their flat surface.
- Round Belts: Round belts are circular and used in some older models. They can stretch over time, affecting performance. Regular inspections can help you catch issues early.
- V-Belts: V-belts have a trapezoidal shape. They’re stronger and often seen in heavier-duty models. These belts tend to last longer but still require periodic checks.
- Reduced Suction: If your vacuum loses suction, a worn-out belt may be the cause. Check for obstructions first, then inspect the belt’s condition.
- Strange Noises: Unusual sounds can indicate a belt problem. If you hear grinding or squealing, it’s time to look closer at the belt.
- Brush Roll Not Spinning: If the brush roll stops spinning while the vacuum runs, the belt might be broken or loose.
- Burning Smell: A burning odor often signals overheating, possibly due to a belt issue. Turn off the vacuum immediately and inspect the belt for damage.
Tools Needed for Changing the Belt
Changing a vacuum cleaner belt requires some essential tools. Having the right equipment ensures a smooth process and effective results.
Recommended Products

ACCESSORY KIT: KU1010 foam filters and replacement belt are designed to fit Kenmore FeatherLite bagless upright vacuum cleaners. Check your manual to ensure proper fit.

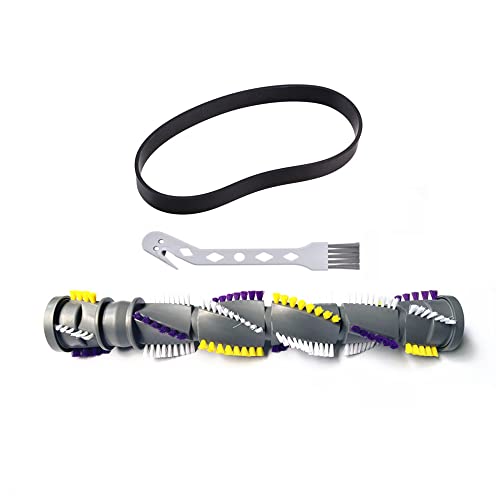
【Perfect compatibility】-- Erinice replacement brush roller belts wheels filter kit is perfect compatible with Shark rotator professional lift-away upright vacuum NV500 NV501 NV502 NV505 NV550 NV520 UV560, compare to Part XFF500 & XHF500. (Since the difference of filter, so this set only compatible with these models) (Please double check the model of your vacuum cleaner before ordering, to avoid mistake purchase!)

【Fit Models】Designed for Shark Navigator Lift Away NV350 NV351 NV352 NV356E S2 NV355 NV356 NV358 NV360 Vacuum Cleaner
Essential Tools
- Screwdriver: A flat-head or Phillips screwdriver helps remove screws securing the vacuum cleaner cover.
- Replacement Belt: Ensure you have the correct size and type of belt for your specific vacuum model.
- Pliers: Use pliers for gripping and adjusting parts, easing the removal of the old belt.
- Cleaning Cloth: A cloth helps clean any debris inside the vacuum while you work.
- Vacuum Cleaner Manual: The manual provides specific instructions and diagrams related to your model.
- Gloves: Wearing rubber or latex gloves protects your hands from dirt and sharp edges.
- Safety Glasses: Use safety glasses to shield your eyes from dust or debris while working.
- Dust Mask: A dust mask filters out particles, especially if your vacuum contains fine dirt.
- Knee Pads: If kneeling is necessary, knee pads provide cushioning, making the task more comfortable.
Gathering these tools ensures you’re prepared for the task ahead. Armed with the right gear, you can confidently proceed with changing your vacuum cleaner belt.
Step-by-Step Guide on How to Change Vacuum Cleaner Belt
Changing your vacuum cleaner belt is a straightforward task that improves your vacuum’s performance. Follow this guide to ensure you do it correctly.
Recommended Products
1. The product is suitable for Bisser vacuum cleaner brush roller belt 2252 2489 22543 24899 3195 3196 3197 3197A 3198 3198A 1327 1333 1820, 2383, 1825, 1813, 1823, 18252, 1825R, 1836, 1838, 2256, 2254, 22543, 22548, 2255, 2739, 2256K, 2258, 22582, 2259, 1830, 2260, 2253, 22547, 22549, 2316, 2252, 2488, 2486, 2487, 2492, 2490, 2489, 24899, 2491, 2494, 2254 replacement part number 1604545, 1611230

Compatibility and Versatility: This kit is specifically designed for XL Upright Vacuum Cleaners, ensuring a perfect fit and seamless integration. Enjoy the convenience of using genuine replacement parts that optimize your vacuum's performance.
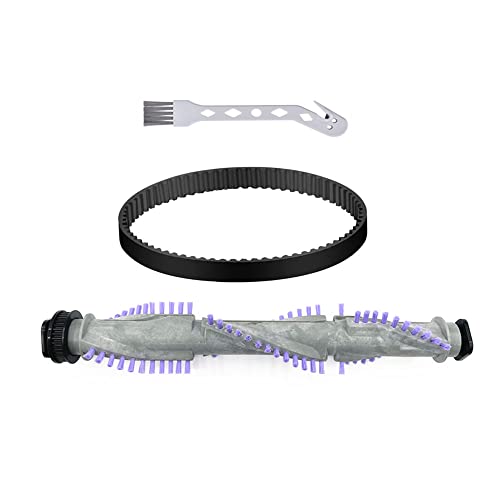
1. Wide Compatibility: For Shark Navigator NV350 NV351 NV352 NV353 NV355 NV360 NV361 NV356E 31 NV361BK NV361PR NV42 NV22 Replacement part numbers 117FFJ and 1135FC
Preparing Your Vacuum Cleaner
- Unplug the vacuum cleaner to ensure safety.
- Gather the necessary tools: screwdrivers, pliers, and cleaning cloths.
- Wear safety gear like gloves and safety glasses.
- Find a clean, well-lit workspace to make the process easier.
Removing the Old Belt
- Locate the vacuum’s base cover. It usually has screws or clips.
- Use a screwdriver or your hands to remove the cover.
- Identify the old belt; it typically loops around the brush roller and motor shaft.
- Gently pull the brush roller out, if removable, to access the belt.
- Slide the old belt off the motor shaft and the brush roller.
Installing the New Belt
- Check that the new belt matches the old one in size and type.
- Position the new belt around the motor shaft first.
- Carefully stretch the belt over the grooves of the brush roller. Ensure it sits snugly.
- If applicable, reinsert the brush roller back into the vacuum cleaner.
- Replace the base cover by lining it up with the original screw holes or clips.
- Secure it with screws or clips, ensuring everything is tight.
- Plug the vacuum cleaner back into the outlet.
- Test the cleaner to ensure it’s functioning properly and the belt is seated correctly.
Following these steps keeps your vacuum cleaner running efficiently and extends its lifespan.
Tips for Maintaining Your Vacuum Cleaner Belt
Maintaining your vacuum cleaner belt is essential for ensuring optimal performance. By following these tips, you’ll enhance the longevity of your vacuum cleaner.
Recommended Products

PERFECT UNIVERSAL COMPATIBILITY:These 3031120 belt Compatibility With Perfectly fits Bissell style 7/9/10/12/14/16,Suitable for most Bissell vacuum cleaner models series :2252, 2254,1793,1792,2259,22543,2256 ,82H1, 2191U,2191,2260,21K3,22C1, 3522, 3545, 35451, 35455, 3590, 35931, 3574, 3575, 3576, 3590,3591,3593, 3910,3920, 3594, 3990, 4104, 44M3, 46E5, 6390W, 6579, 6582, 6583, 6584,6585, 8975,6590,6594, 6596, 71Y7, 82G7, 92L3P, 92L3,1797,1331,1831,1825, 2258,2487 ,2488, 2490,82H1,1739 ,2019, 68C7,98N4 ,2491, 2492, 2739, 2190,1240,1700,2692 etc

【Wide Compatibility】 E0205 vacuum belt widely compatible with Eureka NEU202, NEU182B, NEU182A, NEU188A, NEU181, NEU180, NEU180B, NEU180C, NEU182, NEU186, NEU188, NEU192, NEU195, please confirm your model before buying

COMPATIBILITY: These 3031120 belt compatible with Bissell vacuum cleaner model 2252, 2260, 2259, 1793, 1792, 2254, 22543, 21K3, 22C1, 3522, 3545, 35451, 35455, 3590, 35931, 3574, 3575, 3576, 3590, 3591, 3593, 3910, 3920, 3594, 3990, 4104, 44M3, 46E5, 6390W, 6579, 6582, 6583, 6584, 6585, 8975, 6590, 6594, 6596, 71Y7, 82G7, 82H1, 92L3P, 92L3
Regular Inspection
Inspect the vacuum cleaner belt every 1 to 3 months. Look for signs of wear, such as cracks, frays, or stretching. If you notice any damage, replace the belt immediately. Regular inspections help prevent low suction and unusual noises caused by a worn or broken belt.
Cleaning the Belt Area
Clean the area around the vacuum belt after each use. Remove hair, dirt, and debris that may accumulate. Use a soft cloth or brush to wipe down the belt and surrounding components. Keeping the belt area clean enhances performance and reduces the likelihood of blockages that can strain the belt and motor.
By following these straightforward tips, you can maintain your vacuum cleaner belt effectively and keep your vacuum running smoothly.
Conclusion
Keeping your vacuum cleaner in top shape is easier than you think. By regularly checking and replacing the belt you can avoid many common issues and ensure your vacuum runs smoothly. Remember to clean the belt area often to keep debris at bay.
With just a little effort every few months you can extend the life of your vacuum and enjoy a cleaner home. So grab that new belt and get to work—your vacuum will thank you for it!
Frequently Asked Questions
What are common issues with vacuum cleaners?
Common issues include reduced suction and strange noises. These problems often result from a worn or damaged belt, clogged filters, or blockages in the hose.
How do I know if my vacuum cleaner belt needs to be replaced?
Signs that your vacuum belt needs replacement include excessive wear, cracks, frays, or if the vacuum isn’t picking up dirt effectively. Regular inspections help catch these issues early.
How often should I inspect my vacuum cleaner belt?
It’s recommended to inspect your vacuum cleaner belt every 1 to 3 months. This helps ensure performance and addresses any wear before it becomes a bigger issue.
What maintenance tips can help prolong my vacuum cleaner belt?
Maintain your vacuum belt by inspecting it regularly for wear, replacing it when necessary, and cleaning the belt area after each use to remove debris that can affect performance.
How does cleaning the belt area improve vacuum performance?
Cleaning the belt area removes dirt and debris that can impede the belt’s movement and suction capability. This ensures smoother operation and helps maintain the vacuum’s overall effectiveness.

