
Ever found yourself struggling with a vacuum that just doesn’t pick up dirt like it used to? You’re not alone. A worn-out vacuum head can make cleaning feel like a losing battle. But don’t worry; changing it is easier than you might think.
Key Takeaways
- Understanding Vacuum Heads: Different types of vacuum heads (upright, canister, robotic, wet/dry, specialty) serve unique purposes and significantly impact cleaning efficiency.
- Essential Tools: Gather necessary tools (screwdriver, pliers, replacement head, cleaning cloth, user manual) before making the change to streamline the process.
- Safety First: Always unplug the vacuum and wear gloves before starting to protect yourself from accidents and sharp edges.
- Step-by-Step Process: Follow clear steps to change the vacuum head: gather tools, disconnect the vacuum, remove the old head, install the new head, and test its functionality.
- Troubleshooting: Be aware of common installation issues, such as improper fit or loose connections, and know how to resolve them for optimal performance.
- Maintenance Tips: Regularly clean the vacuum head and check for wear to maintain effective cleaning and prolong the life of your vacuum.
Understanding Vacuum Heads
Vacuum heads play a crucial role in maintaining effective cleaning performance. Knowing the types and purposes of vacuum heads helps you select the right one for your vacuum.
Types of Vacuum Heads
- Upright Vacuum Heads: Designed for wide cleaning paths, these heads excel on carpets. They come with rotating brushes that agitate carpet fibers, ensuring deep cleaning.
- Canister Vacuum Heads: These heads are versatile and suitable for various surfaces, including hardwood floors and upholstery. They offer adjustable settings for different cleaning tasks.
- Robotic Vacuum Heads: Equipped with sensors, these heads navigate autonomously. They focus on maintaining cleanliness in smaller spaces, often featuring rotating brushes for effective debris pickup.
- Wet/Dry Vacuum Heads: Ideal for multitasking, these heads handle both liquid and solid waste. They’re useful in garages or workshops where spills are common.
- Specialty Vacuum Heads: Designed for specific tasks, these heads include narrow attachments for tight spaces and pet grooming tools to remove fur effectively.
Purpose of Vacuum Heads
Vacuum heads directly impact cleaning efficiency. Each type serves distinct purposes:
- Carpet Cleaning: Upright and canister heads with brushes agitate dirt, reaching deep into fibers.
- Surface Adaptability: Canister heads adjust to various surfaces, ensuring gentle cleaning for delicate materials like hardwood or tile.
- Convenience: Robotic heads offer hands-free operation, saving you time and effort in daily maintenance.
- Liquid and Solid Pickup: Wet/dry heads tackle different messes, providing a comprehensive cleaning solution.
- Specialized Tasks: Specialty heads enhance performance for specific needs, like removing pet hair or cleaning corners.
Understanding the types and purposes of vacuum heads allows you to make informed decisions when it comes time to change yours.
Tools Needed for Changing Vacuum Head
Changing your vacuum head requires specific tools to ensure a smooth process. Gathering these tools ahead of time saves you time and frustration during the task.
Recommended Products

Universal Fit – 1.25” (32mm) Inner Diameter: Compatible with most standard vacuum cleaners, this floor brush attaches easily for quick and convenient cleaning without needing special adapters.

[Fit for Dyson] --- The mini head tool is just suitable for Dyson V7/ V8/ V10/ V11/ V15 cordless stick vacuum cleaners. Please kindly check your machine model before ordering.

–––––––PLEASE CHECK THE SIZE OF YOUR MACHINE BEFORE PURCHASE––––––– Will not fit Eureka WhirlWind Bagless Canister Vacuum Cleaner
Essential Tools
- Screwdriver: A flathead or Phillips screwdriver allows you to remove any screws holding the vacuum head in place.
- Pliers: Pliers help grip and remove any stubborn clips or fasteners that might hold the vacuum head.
- Replacement Vacuum Head: Ensure you have the correct model replacement head compatible with your vacuum.
- Cleaning Cloth: A cloth is useful for cleaning any dust or debris from the vacuum before attaching the new head.
- User Manual: Keeps guidelines for model-specific steps, providing clarity on the process.
- Unplug the Vacuum: Always unplug your vacuum before beginning any repair to avoid accidents.
- Wear Gloves: Using gloves protects your hands from sharp edges or small parts during the process.
- Ensure Adequate Lighting: Work in a well-lit area to clearly see the components and identify any issues.
- Keep Small Parts Organized: Use a container to hold screws and small parts, preventing loss and making reassembly easier.
- Inspect for Damage: Check for any cracks or wear on the vacuum body or wires as a precaution before changing the head.
Following these guidelines will streamline your vacuum head change, making it a quick and straightforward task.
Steps to Change Vacuum Head
Changing your vacuum head is a simple task that improves cleaning efficiency. Follow these steps for a smooth transition.
Recommended Products

WIDELY COMPATIBLE - The vacuum head replacement for Dyson V7 V8 V10 V11 V15 SV10 SV11 SV12 SV14 SV15 SV17 SV22 SV25 SV27 SV28 SV47 Cordless Vacuum Cleaner. Doesn't fit V6 V12 DC Series. Compare to Part # 968266-02, 968266-04, 967483-01, 967483-03, 967483-04. Product Dimensions 9.8*3.8*6.1 inches
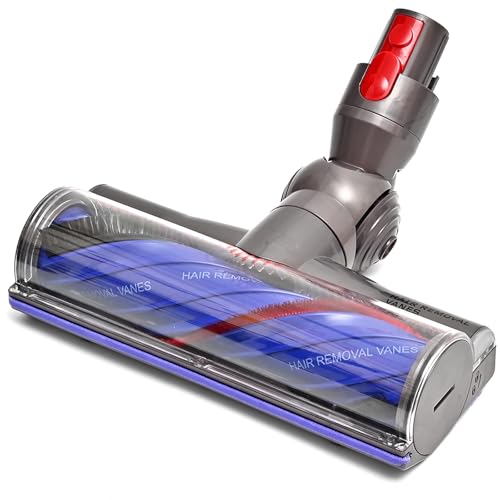
Perfect fits: This Vacuum cleaner motor head replacement Compatible for Dyson V7 V8 V10 V11 V15 SV10 SV11 SV12 SV14 SV15 SV22 SV25 SV27 SV28 SV37 Cordless Vacuum Cleaner.(NOTE:Doesn't fit V6,V10SLIM,V12,Gen5,DC Series)
[Wide Compatibility] This vacuum head replacement for Dyson is compatible with Dyson V7, V8, V10, V11, and V15 cordless vacuum cleaners. Not COMPATIBLE with Slim series, V12 Detect Slim, V6, Outsize, DC, or Ball models. Please check your vauum cleaner model before purchasing.
Step 1: Gather Your Tools
Gather essential tools for the job. You’ll need:
- Screwdriver (flathead or Phillips, depending on your vacuum)
- Pliers for removing stubborn parts
- A soft cloth for cleaning
- Optional: flashlight for better visibility
Step 2: Disconnect the Vacuum
Ensure safety by unplugging the vacuum. Disconnecting prevents accidental activation. If your vacuum has a removable battery, take that out as well.
Step 3: Remove the Old Head
Locate the attachment point of the old head. Use your screwdriver to unscrew any fasteners holding the head in place. If it’s stuck, gently wiggle it with your hands or use pliers to pull it away. Be cautious not to damage any connectors.
Step 4: Install the New Head
Align the new vacuum head with the attachment point. Push it firmly until it clicks into place. If applicable, secure it using the screwdriver to fasten any screws. Make sure it’s tightly attached to prevent wobbling during use.
Step 5: Reconnect and Test
Plug in your vacuum again. If applicable, reinsert the battery. Turn on your vacuum to test the new head. Check for suction and mobility. Use it on a small area first to ensure it functions well before proceeding with your cleaning tasks.
Common Issues and Solutions
Changing your vacuum head can lead to a few common issues. Knowing the solutions helps ensure everything runs smoothly.
Recommended Products

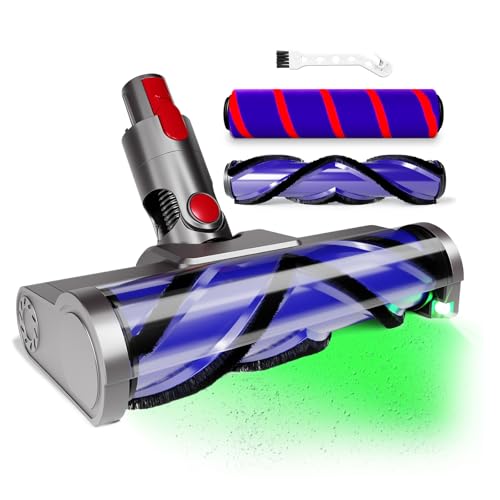
【Wide Compatible】The vacuum cleaner motor head replacement is fully compatible with Dyson V7 V8 V10 V11 V15 cordless vacuums.NOTE:Doesn't fit V6,Digital SLIM,V11 outsize,V12/V12slim,Gen5,Big Ball,DC Series.Just confirm your vacuum model before purchasing for precise compatibility.

【Universal Fit with an Adapter Gift】:Designed to fit most central vacuum systems and models using a standard 32mm diameter hose. We now include a FREE 35mm conversion adapter to ensure compatibility with a wider range of vacuums. Please verify your brush or tube’s inner diameter before ordering for the perfect fit.

Carbon Fiber Design: A built-in carbon fiber brush strip can clean stubborn stains and suck off dirt faster and more efficiently, allowing your house-cleaning easier.
Troubleshooting Installation Problems
- Head Doesn’t Fit: Ensure you selected the correct head type. Check compatibility with your vacuum model. If it doesn’t fit, consult the manual.
- Loose Connections: Examine all connections after installation. Tighten screws and ensure the head is securely attached. A loose head can impact performance.
- Unusual Noises: Listen for strange sounds while running the vacuum. This could indicate a misaligned head or foreign objects stuck inside. Disconnect the vacuum and inspect for blockages.
- Regular Cleaning: Clean the vacuum head every few weeks. Remove hair, dust, and debris to maintain optimal suction and efficiency.
- Check for Wear: Inspect the brush rolls and wheels for signs of wear or damage. Replace them if needed to ensure effective cleaning.
- Store Properly: Store your vacuum in a dry place to prevent moisture buildup and preserve components. Keeping it in a well-ventilated area prevents premature wear.
Conclusion
Changing your vacuum head doesn’t have to be a daunting task. With the right tools and a little know-how you can make the process quick and easy. Remember to stay organized and follow safety precautions to keep everything running smoothly.
Taking the time to maintain your vacuum will pay off in the long run. Regular checks and cleanings will keep your vacuum in top shape and ensure it performs at its best. So don’t hesitate to tackle that vacuum head change when needed. Your floors will thank you for it!
Frequently Asked Questions
What are the different types of vacuum heads?
There are five main types of vacuum heads: upright, canister, robotic, wet/dry, and specialty heads. Each type serves different cleaning needs, such as deep cleaning carpets, handling hard floors, or reaching tight spaces.
How do I change a vacuum head?
To change a vacuum head, unplug the vacuum first. Use a screwdriver and pliers to remove the old head. Align the new head with the connection point and secure it. Make sure everything is tight before plugging the vacuum back in and testing it.
What tools do I need to change a vacuum head?
You typically need a screwdriver and pliers to change a vacuum head. These tools will help you securely detach the old head and attach the new one without damaging the vacuum.
Why is safety important when changing a vacuum head?
Safety is crucial when changing a vacuum head to avoid any electric shocks. Always unplug the vacuum before starting the process to ensure that it is completely powered down.
What common issues occur when changing a vacuum head?
Common issues include improper fitting of the new head, loose connections, or unusual noises. It’s important to double-check that the head is securely attached and that all parts are aligned properly.
How can I maintain my vacuum’s performance after changing the head?
Regularly clean the vacuum, check brush rolls and wheels for wear, and store it properly. This maintenance ensures optimal performance and longevity of your vacuum after changing the head.
What should I do if my vacuum head makes noise after changing?
If your vacuum head makes noise post-change, shut off the machine immediately. Check for any loose connections or debris causing the noise, and ensure the head is securely attached. If the problem persists, consider consulting the manufacturer’s guidelines.

