
Have you noticed your Sub Zero refrigerator struggling to keep things cool? A dirty vacuum condenser might be the culprit. Keeping this essential component clean is key to maintaining your fridge’s efficiency and longevity.
Key Takeaways
- Importance of Cleaning: Regularly cleaning the vacuum condenser is crucial for maintaining your Sub Zero refrigerator’s efficiency, reducing energy costs, and preventing costly breakdowns.
- Essential Tools: Gather necessary tools such as screwdrivers, soft brushes, vacuum cleaners, and cleaning solutions like mild dish soap and vinegar for effective cleaning.
- Step-by-Step Process: Follow a systematic approach for cleaning, including unplugging the refrigerator, accessing the condenser, removing dust, and wiping down the coils before reattaching the cover.
- Maintenance Schedule: Establish a cleaning routine every three to six months, or more frequently if you notice dust accumulation, to ensure your refrigerator operates smoothly.
- Signs of Needed Cleaning: Monitor for indicators such as increased noise levels, overheating, extended cooling times, and visible dust to determine when it’s time for cleaning.
Importance Of Cleaning Sub Zero Vacuum Condenser
Cleaning the vacuum condenser of your Sub Zero refrigerator directly impacts its performance. A clean condenser promotes efficient cooling, which maintains optimal temperatures for your stored food. Dirt and debris coat the condenser coils, reducing their ability to dissipate heat. This inefficiency may lead to the refrigerator working harder, driving up energy costs and reducing its lifespan.
Regular cleaning prevents potential issues. When the condenser is clogged, it can cause the compressor to overheat, leading to breakdowns and costly repairs. Keeping the vacuum condenser clean avoids these risks and ensures reliable operation.
You can also enhance air circulation by cleaning the condenser. Proper airflow prevents frost buildup and maintains the temperature consistency your food requires. By dedicating a few minutes to this task every few months, you ensure your appliance runs smoothly, saving you time and money in the long run.
Tools And Materials Needed
Gather the right tools and materials before starting the cleaning process for your Sub Zero vacuum condenser. Having everything ready ensures a smooth clean and saves time.
Recommended Products
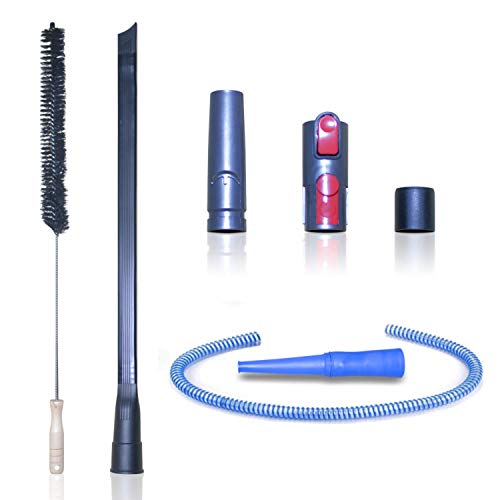
✔ Improve Dryer Efficiency & Preventing Fire Risks of Your Beautiful House: Dryer manufacturers recommend regular lint removal to extend dryer life. By using this tool kit, you can remove years of lint build-up deep within dryer gap, exhaust port and dryer vent so your appliance run more safely and efficiently. Using this dryer lint cleaning brush and flexible vacuum attachment for dryer vent regularly to clean your dryer vent and help prevent deadly dryer vent fires from sparking.
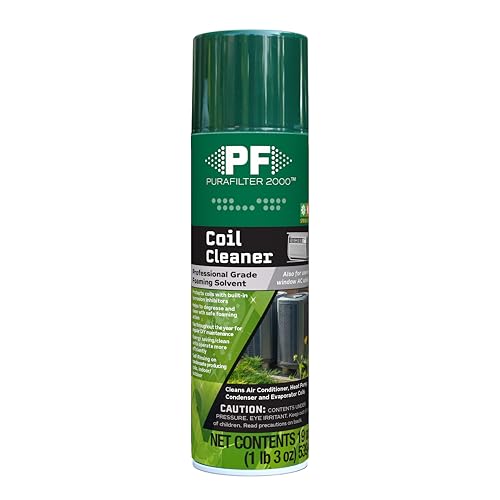
Designed for use on HVAC condenser and evaporator coils

Ac Coil Brushes: 4 packs hvac brushes in package, you can take these hvac tools to clean different items in your home, the hvac coil brushes enough to satisfy your cleaning needs
Essential Cleaning Tools
- Screwdriver: Use a flathead or Phillips screwdriver to remove panels and access the condenser.
- Soft Brush: Choose a soft-bristled brush to gently dislodge dirt and debris without damaging the coils.
- Vacuum Cleaner: An attachment with a brush or hose helps remove loose particles from the condenser.
- Cloth or Rag: A lint-free cloth is useful for wiping down surfaces and absorbing any moisture.
- Protective Gloves: Wear gloves to protect your hands from sharp edges and cleaning solutions.
- Mild Dish Soap: Mix a few drops of mild dish soap with warm water for cleaning. It’s effective without being harsh.
- White Vinegar: Use a mixture of equal parts vinegar and water to eliminate odors and stubborn grime. Vinegar is a natural disinfectant.
- Commercial Coil Cleaner: For tougher buildup, a specialized coil cleaner can be effective. Follow the manufacturer’s instructions for application.
By preparing these tools and materials, you create an efficient setup for cleaning your Sub Zero vacuum condenser, ensuring it runs smoothly and effectively.
Step-By-Step Guide
Cleaning your Sub Zero vacuum condenser is essential for maintaining optimal performance. Follow these steps for effective cleaning.
Recommended Products
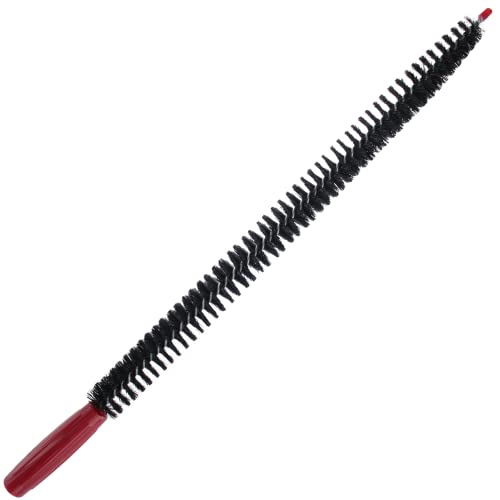
The Vanitek multi-use long flexible dryer lint brush vent cleaner and refrigerator coil cleaning brush features strong bristles for grabbing dust lint & dirt from the highest energy consuming products. The dryer cleaner vent kit will prevent you from fire risks.

Attachment Specs: 24.4" Long, Inside Nozzle Fits 1 3/8 Inces(35mm), Fits All Vacuum Hoses with 1.25 Inches or Less
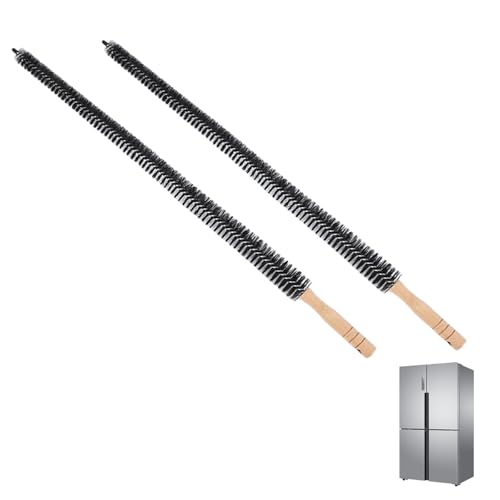
Flexible and Bendable:Fridge coil cleaning brush can bend at any angle for easy cleaning of gaps and corners
Preparing The Vacuum Condenser
- Unplug Your Refrigerator: Ensure safety by disconnecting the power supply before starting any cleaning.
- Access the Condenser: Locate the condenser at the back or bottom of the refrigerator. Move any obstacles away, like furniture or other appliances.
- Gather Your Tools: Have a screwdriver, soft brush, vacuum cleaner, cloth, protective gloves, mild dish soap, and white vinegar ready.
Cleaning The Condenser Coils
- Remove the Cover: Use the screwdriver to take off the protective cover covering the condenser coils.
- Dust the Coils: Use the soft brush to gently sweep away dust and debris from the coils. Be careful not to bend or damage the fins.
- Vacuum the Area: Employ the vacuum cleaner to remove any remaining dust around the condenser coils to ensure thorough cleaning.
- Wipe Down: Mix water with mild dish soap or white vinegar. Dampen the cloth with this solution and wipe the coils to remove stubborn grime. Avoid excess moisture.
- Reattach the Cover: Once the coils are clean and dry, carefully replace the protective cover and secure it using the screwdriver.
- Reconnect Power: Plug your refrigerator back in to restore power.
- Dispose of Debris: Safely dispose of any collected dust and debris to keep your area clean.
Regular cleaning not only enhances efficiency but also extends the lifespan of your Sub Zero appliance.
Maintenance Tips
Maintaining the vacuum condenser in your Sub Zero refrigerator is vital for optimal performance. Implementing a regular cleaning routine and being aware of signs that indicate when cleaning is needed enhances efficiency and extends appliance life.
Regular Cleaning Schedule
Establish a cleaning schedule to keep your vacuum condenser in top shape. Clean every three to six months, or more frequently if you notice excessive dust accumulation. Use this schedule as a guide:
- Every Three Months: Ideal if your refrigerator is located in a dusty environment.
- Every Six Months: Suitable for most households.
- After Renovations: Clean the condenser after construction work or major home improvements.
Signs That Indicate Cleaning Is Needed
Pay attention to specific signs that indicate the vacuum condenser needs cleaning. Regularly check for these indicators:
- Increased Noise Level: A louder operation can signify debris blocking the coils.
- Overheating: If the exterior feels unusually hot, it’s time to clean.
- Longer Cooling Times: If your food takes longer to cool, dust buildup may affect performance.
- Visible Dust or Debris: If you see a layer of dust over the condenser, clean it immediately.
By following these tips, you maintain your refrigerator’s efficiency and prolong its lifespan.
Conclusion
Keeping your Sub Zero vacuum condenser clean is key to its performance and durability. By following the steps outlined and sticking to a regular cleaning schedule you can prevent issues that might arise from neglect. Remember to stay alert for any signs that it’s time for a cleaning session.
With just a little effort you’ll ensure your refrigerator runs smoothly and efficiently for years to come. Taking these simple steps not only enhances your appliance’s functionality but also saves you from potential costly repairs down the line. Happy cleaning!
Frequently Asked Questions
Why is cleaning the vacuum condenser in a Sub Zero refrigerator important?
Cleaning the vacuum condenser is crucial for optimal performance and longevity of your Sub Zero refrigerator. A clean condenser helps maintain efficient cooling, reducing energy consumption and preventing overheating, which can extend the appliance’s lifespan.
How often should I clean the vacuum condenser?
It’s recommended to clean the vacuum condenser every three to six months. If your refrigerator is in a dusty environment, you may need to clean it more frequently to ensure efficient operation.
What signs indicate that my vacuum condenser needs cleaning?
Signs that your vacuum condenser needs cleaning include increased noise levels, overheating, longer cooling times, and visible dust or debris on the condenser. Regular checks can prevent performance issues.
Are there safety precautions I should take while cleaning?
Yes, always unplug your refrigerator before cleaning. Wear gloves and a dust mask to protect yourself from debris. Follow the manufacturer’s guidelines to avoid causing any damage during the cleaning process.
Can neglecting the vacuum condenser affect my refrigerator’s performance?
Absolutely. Neglecting to clean the vacuum condenser can lead to overheating, inefficient cooling, increased energy costs, and even potential breakdowns. Regular maintenance ensures your refrigerator runs smoothly and efficiently.
