
Ever found yourself struggling with a vacuum cleaner that just won’t cooperate? Maybe it’s clogged or making strange noises, and you’re not sure how to fix it. Disassembling your vacuum cleaner might seem daunting, but it’s a task you can tackle with a little guidance.
Key Takeaways
- Understand Your Vacuum Type: Familiarize yourself with different vacuum cleaners (upright, canister, robot, handheld, stick) to simplify the disassembly process.
- Essential Tools Required: Equip yourself with basic tools like screwdrivers, wrenches, and pliers, as well as brushes and towels for effective cleaning during disassembly.
- Prioritize Safety: Always unplug your vacuum before disassembling and wear protective gear such as gloves and safety glasses to avoid injuries.
- Follow a Step-by-Step Guide: Remove components like the dust container and brush roll carefully, addressing any clogs or wear during disassembly for optimal performance.
- Check for Common Issues: Regularly inspect for clogs in hoses and worn-out parts like belts and brush rolls to maintain your vacuum’s efficiency.
- Reassemble Carefully: Pay attention during reassembly by reversing the disassembly steps and ensuring all parts are securely in place, followed by a functional test to confirm proper operation.
Understanding Your Vacuum Cleaner
Understanding your vacuum cleaner is essential before disassembling it. Knowing its components and features can simplify the process.
Types of Vacuum Cleaners
- Upright Models: These have a single unit with the motor and brush roller in one body. Easy to maneuver, they are great for carpets.
- Canister Models: These separate the motor from the cleaning head. They offer versatility and are effective on various surfaces.
- Robot Vacuums: Automated and compact, they navigate rooms on their own. They may require additional care for maintenance.
- Handheld Vacuums: Lightweight and portable, these are ideal for quick clean-ups in small areas. Great for cars and tight spaces.
- Stick Vacuums: These are lightweight and easily stored. They perform well on both carpets and hard floors.
- Screwdrivers: Flathead and Phillips screwdrivers help remove screws holding your vacuum together.
- Wrenches: Adjustable wrenches can assist in loosening bolts and nuts.
- Pliers: These help grip and pull components when necessary.
- Brushes: Use soft-bristle brushes to clean dust and debris from small crevices.
- Towels: Keep towels handy to clean up spills or wipe surfaces.
- Bowl or Tray: Use a bowl or tray to organize screws and small parts during disassembly.
Being familiar with the types of vacuum cleaners and equipped with the right tools makes disassembling easier and more efficient.
Safety Precautions
Disassembling a vacuum cleaner requires attention to safety. Follow these steps to prevent accidents and ensure a smooth process.
Disconnecting Power
Always unplug the vacuum cleaner before starting any disassembly. Disconnecting power eliminates the risk of accidental activation. If the vacuum has a removable battery, take it out. Never work on a plugged-in appliance. This precaution can prevent electric shocks or injuries.
Wearing Protective Gear
Wearing protective gear is essential. Use safety glasses to shield your eyes from dust and debris. Consider wearing gloves to protect your hands from sharp edges or hot components. If there’s a risk of encountering small parts, such as screws or springs, heavy-duty gloves can prevent injuries. Ensure any clothing fits snugly to avoid snagging on moving parts.
Step-by-Step Guide on How to Disassemble Vacuum Cleaner
Disassembling a vacuum cleaner is straightforward with the right steps. Follow this guide to easily take apart your vacuum.
Recommended Products
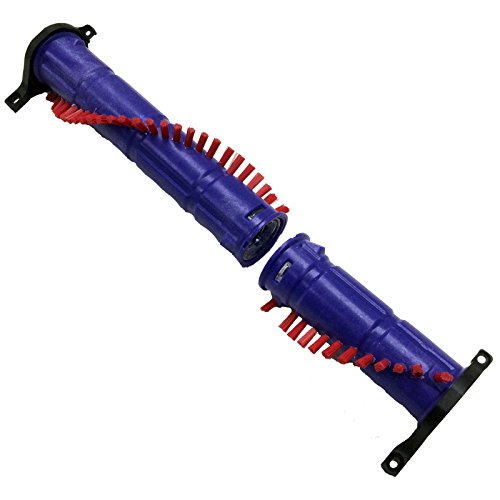
✅ First4Spares supreme quality replacement vacuum cleaner brush bar brushroll spinner brushes for Dyson DC65

Genuine replacement part

This is an O.E.M. Authorized part
Removing the Dust Container
- Locate the dust container release button on your vacuum. This is often near the top of the dust container.
- Press the release button to detach the dust container from the body. Hold it over a trash can to avoid spills.
- Empty the container thoroughly. Clean with warm, soapy water if necessary, and let it dry completely before reassembling.
Taking Off the Brush Roll
- Find the access panel on the bottom of the vacuum cleaner; this usually involves unscrewing a few screws.
- Remove the screws using a screwdriver, placing them in a safe spot for reassembly later.
- Lift the access panel off to expose the brush roll.
- Pull out the brush roll and clean it. If there are hair or fibers wrapped around it, cut them off with scissors.
- Inspect the brush roll bearings for any wear. Replace if needed before reinserting the brush roll.
- Identify the hose connections, which typically involve a simple twist or press mechanism.
- Twist or press to detach the hoses from their fittings. Be gentle to avoid damaging the attachments.
- Check for blockages in the hoses. Clear any debris to ensure optimal performance.
- Remove attachments by locating the release mechanisms, which may vary by model. Use caution not to force them, as this can cause damage.
These steps will help you effectively disassemble your vacuum cleaner for cleaning or repairs. Follow each section carefully for best results.
Common Issues to Look For
Watch out for common problems when disassembling your vacuum cleaner. Identifying these issues helps ensure your device operates effectively after reassembly.
Recommended Products
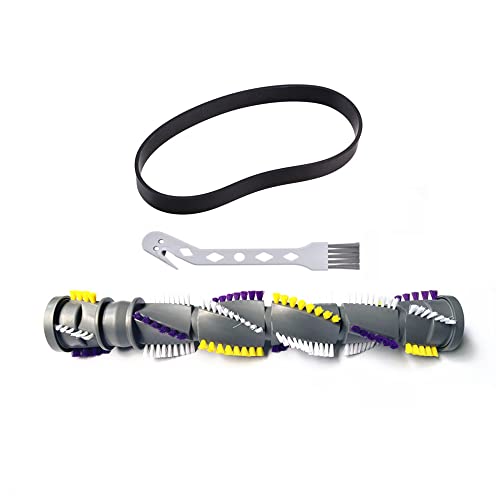
1. The product is suitable for Bisser vacuum cleaner brush roller belt 2252 2489 22543 24899 3195 3196 3197 3197A 3198 3198A 1327 1333 1820, 2383, 1825, 1813, 1823, 18252, 1825R, 1836, 1838, 2256, 2254, 22543, 22548, 2255, 2739, 2256K, 2258, 22582, 2259, 1830, 2260, 2253, 22547, 22549, 2316, 2252, 2488, 2486, 2487, 2492, 2490, 2489, 24899, 2491, 2494, 2254 replacement part number 1604545, 1611230

Compatibility: Grooved belt for Triple Action Brush Roll, compatible with MultiClean Pet Vacuum Cleaner 2999, 2849, 3000, 3057, 28492; MultiClean Pet Slim Vacuum Cleaner 31269 3126, 31268; MultiClean Lift-Off Pet Slim Vacuum Cleaner 31259 3125, 31258, 3307; MultiClean Lift-Off Pet Vacuum Cleaner 2852 2998, 28524, 2920, 3059, 3399.

Complete Brush Roller Replacement Kit - The complete replacement kit helps you to make a perfect parts replacement for Bissell vacuum cleaner, making your vacuum cleaner work as efficiently as it did in the first place.
Clogs and Blockages
Check for clogs and blockages in various components, like hoses and filters. A blockage often leads to reduced suction power. Inspect each hose connection for debris buildup, and clear any obstructions you find. Cleaning or replacing filters also improves airflow. Don’t forget to look inside the dust container for accumulated dirt. Regularly addressing clogs maintains optimal performance and extends the life of your vacuum.
Worn Out Parts
Inspect internal parts for wear and tear. Commonly used components, such as the brush roll, belts, and gaskets, can wear out over time. Look for frayed belts or damaged bristles on the brush roll, which can hinder cleaning effectiveness. Replace these parts as necessary to improve functionality. Regular maintenance helps you avoid larger issues and ensures your vacuum continues to perform at its best.
Reassembling Your Vacuum Cleaner
Reassembling your vacuum cleaner is just as important as disassembling it. Following careful steps ensures your vacuum works efficiently again.
Recommended Products

【Compatible Model】 Fit for Shark AV2511AE AV2501S RV2502AE RV2502AE RV2410WD RV2610WA RV2610WD RV2520AOUS AV2510AOUS AI Robot Vacuum.Part number:137KY2500, XPRFRV2500, 102KY1000(Please check your machine model carefully before purchase)

Fit Model: Replacement Parts Rolling Brush Compatible with Eufy RoboVac 11S, RoboVac 12, RoboVac 30, RoboVac 15C, RoboVac 25C, RoboVac 30C, RoboVac 35C, RoboVac 15T, RoboVac 11S MAX,RoboVac 15C MAX, RoboVac 30C MAX, RoboVac G30, G30 Edge Robotic Vacuums

The replacement parts side brush compatible with Shark AV2501S/ AV2501AE/ RV2502AE/ RV2520AOUS/ AV2510AOUS Vacuum Cleaner.
Reversing the Disassembly Process
- Reconnect the Brush Roll: Position the brush roll back into its housing. Align it with any grooves or notches for a secure fit.
- Attach the Dust Container: Slide the dust container back into place. Ensure it clicks securely to avoid any leaks during operation.
- Reattach Hoses and Attachments: Connect all hoses and attachments you previously removed. Look for any clips you need to fasten, so everything sits snugly.
- Secure the Bottom Plate: Reinsert any screws or fasteners that hold the bottom plate in place. Tighten them appropriately, but avoid overtightening.
- Plug in Power Cord: Once all parts are back in place, plug in the vacuum. Check for any visible damage to the cord before use.
- Inspect for Loose Parts: After reassembly, check that all components are secure. Shake the vacuum gently to listen for any rattles.
- Turn on the Vacuum: Plug in the vacuum and turn it on. Listen for unusual noises, which may indicate improper assembly.
- Check Suction Power: Run the vacuum over a small area of carpet or floor. Watch for effective suction; if it’s inadequate, recheck your assembly.
- Examine Filters and Hoses: Inspect the filters and hoses during your test. Ensure there are no blockages hindering performance.
- Perform a Full Cycle: Run the vacuum for a complete cleaning cycle. Observe how it performs over different surfaces to confirm reliability.
By following these steps, you’re on your way to maintaining a fully operational vacuum cleaner.
Conclusion
Taking the time to disassemble your vacuum cleaner can lead to a cleaner home and a more efficient machine. By following the steps outlined and treating each part with care you’ll ensure your vacuum runs smoothly for years to come.
Remember that regular maintenance is key to preventing future issues. A little effort goes a long way in keeping your vacuum in top shape.
So don’t hesitate to dive in the next time your vacuum needs some TLC. You’ve got this!
Frequently Asked Questions
How do I disassemble my vacuum cleaner safely?
To disassemble your vacuum cleaner safely, start by unplugging it. Gather the right tools, usually including a screwdriver and a pair of pliers. Remove the dust container, then detach the brush roll carefully. Identify and disconnect hose connections, taking care not to force any parts. Always refer to your user manual for specific instructions tailored to your vacuum model.
What tools do I need for vacuum cleaner disassembly?
You typically need a screwdriver (usually Phillips or flat-head), pliers, and possibly a brush for cleaning debris. It’s also helpful to have a workspace to organize screws and components. Ensure you have the tools handy before starting the disassembly process to prevent interruptions.
How can I prevent damage while disassembling my vacuum?
To prevent damage, always handle each component gently and avoid using excessive force. Follow the disassembly steps in your user manual, and make sure to properly support parts while removing them. Taking your time and being organized can also help avoid mistakes that could lead to damage.
What are the key steps in reassembling my vacuum cleaner?
While reassembling, start by reconnecting the brush roll, then attach the dust container. Next, reattach the hoses and any additional attachments, making sure they fit securely. Secure the bottom plate and inspect all connections. Finally, check the power cord and ensure everything is in the correct place before plugging in.
How do I test my vacuum cleaner after reassembly?
After reassembly, plug in the vacuum cleaner and turn it on. Check for proper suction power by running it over various surfaces. Ensure there are no unusual sounds or vibrations. Inspect filters and hoses for blockages and consider running a full cleaning cycle. This ensures that your vacuum operates effectively post-reassembly.
Why is regular maintenance important for a vacuum cleaner?
Regular maintenance is crucial to extend the life of your vacuum cleaner. It helps to prevent clogs, maintain suction power, and ensure all parts function correctly. By following maintenance steps like cleaning filters and checking hoses regularly, you can keep your vacuum in optimal condition and reduce the need for repairs.
