
Have you ever found yourself struggling to put the filter back in your Eureka vacuum? You’re not alone! Many people face this common challenge, and it can be frustrating when you just want to get back to cleaning.
Key Takeaways
- Understanding Eureka Vacuum Filters: Familiarize yourself with the different types of filters (HEPA, foam, carbon) to choose the right one for your cleaning needs and enhance vacuum performance.
- Importance of Proper Installation: Ensure the filter is correctly installed to maximize suction power, improve air quality, and extend the lifespan of your vacuum cleaner.
- Safe Filter Removal Steps: Always unplug the vacuum before removing the filter, inspect for any damage, and handle tools carefully during the process.
- Steps for Reinstallation: Align the filter correctly according to orientation indicators, slide it into place securely, and engage any locking mechanisms to ensure stability.
- Avoid Common Mistakes: Double-check the filter’s direction and secure it properly to prevent performance issues or damage during use.
Understanding Eureka Vacuums
Eureka vacuums are designed for efficiency and ease of use. Knowing how they operate helps you maintain their functionality and prolong their lifespan.
Types of Filters Used
Eureka vacuums utilize several types of filters, including:
- HEPA Filters: High-Efficiency Particulate Air filters capture 99.97% of dust and allergens. They’re ideal for allergy sufferers.
- Foam Filters: These filters trap larger particles and help protect the motor. They often require periodic cleaning.
- Carbon Filters: These filters reduce odors in your home by absorbing unpleasant smells.
Choosing the right type of filter ensures optimal performance for your specific cleaning needs.
Importance of Proper Filter Installation
Proper filter installation significantly enhances your vacuum’s efficiency. A correctly placed filter ensures:
- Better Suction Power: Misplaced filters can obstruct airflow, reducing suction.
- Improved Air Quality: Filters that are in place correctly trap more dust and allergens.
- Extended Vacuum Lifespan: Correct installations reduce strain on the motor, preventing damage.
Always check the filter’s position before using your vacuum. If the filter isn’t seated properly, it can lead to costly repairs and decreased performance.
Steps to Remove the Filter
Removing the filter from your Eureka vacuum is a straightforward process. Follow these steps to ensure a proper removal.
Tools You May Need
- Screwdriver: A Phillips or flathead screwdriver may be necessary to access the filter compartment.
- Soft Cloth: Use a soft cloth for cleaning tasks to avoid scratching surfaces.
- Replacement Filter: Keep a compatible replacement filter on hand for quick changes.
- Unplug the Vacuum: Always disconnect the power before starting to avoid accidents.
- Check for Damage: Inspect the filter and its housing for any signs of wear or damage.
- Avoid Sharp Objects: Be cautious around sharp tools to prevent injuries.
Following these guidelines ensures you remove the filter safely and efficiently, keeping your vacuum in optimal working condition.
How to Put Filter Back in Eureka Vacuum
Reinstalling the filter in your Eureka vacuum is straightforward. Follow these steps to ensure a proper fit for optimal vacuum performance.
Recommended Products
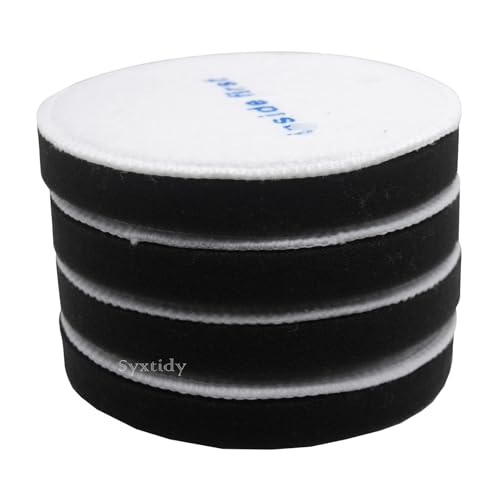
Contains 4 pack premium quality e0202 foam filters

Vacuum Filter Compatible with Eureka Vacuums,Fits Model:Included Eureka Flash - NES510 Series

【COMPATIBILITY】 This vacuum filter replacement is compatible with eureka vacuum power speed models NEU182B, NEU181, NEU182A, NEU188A, NEU192A, NEU180, NEU180C, NEU182, NEU202, NEU12CT, NEU186, NEU188, NEU190, NEU1982, NEU350, E10s, E20 Plus, NEU280,NEU652,NEU180B ,NEU612BL ,NEU181A ,NEU181D, Part #E0202.(Not For NEU180AE1/ AE2 / AE3 / AEC,NEU181A, NEU182C, NEU186C,NEU188B. NEU190, NEU192A,NEU202C(NEU200 series),NEU203)
Aligning the Filter Correctly
- Check Orientation: Look for markers on the filter and vacuum body, indicating the correct orientation. Most filters have a specific way they fit back in.
- Slide into Place: Gently slide the filter into the designated slot. Ensure it sits flush against the vacuum’s interior. Avoid forcing it, as this can damage the filter or vacuum.
- Lock Mechanism: Engage any locking mechanisms, if present. Some models feature tabs or clips that snap into place. Ensure these are secure to prevent the filter from dislodging during use.
- Test Stability: Gently tug on the filter to confirm it’s secured. If it moves easily, recheck the alignment and locking mechanism.
By following these steps, your Eureka vacuum filter will be properly reinstated, ready for efficient operation.
Common Mistakes to Avoid
Reinserting the filter in your Eureka vacuum can sometimes lead to errors. Here are common mistakes you should avoid.
Overlooking Filter Orientation
Always check the orientation of the filter before installation. Each filter type has a specific direction for airflow, clearly marked by arrows. Installing it backward reduces suction power and could harm the vacuum. Take a moment to ensure the filter aligns with the designated airflow direction.
Failing to Secure the Filter Properly
Secure the filter correctly to prevent it from dislodging during use. Many vacuums feature locking mechanisms or clips that hold the filter in place. If these aren’t engaged, the filter could move or fall out while vacuuming. After installation, give the filter a gentle tug to ensure it’s firmly in place.
Conclusion
Getting your Eureka vacuum filter back in place doesn’t have to be a hassle. With a little patience and the right approach you can ensure your vacuum runs smoothly and efficiently. Remember that a properly installed filter not only boosts suction power but also helps maintain air quality in your home.
Take your time to check the filter’s orientation and secure it well. This simple step can save you from future headaches and keep your vacuum in top shape. So next time you need to reinstall the filter just follow the steps you learned and enjoy a cleaner living space. Happy cleaning!
Frequently Asked Questions
What types of filters are used in Eureka vacuums?
Eureka vacuums typically use HEPA, foam, and carbon filters. HEPA filters capture allergens, foam filters help with larger debris, and carbon filters reduce odors. Each filter type serves a specific function to enhance air quality and vacuum performance.
How do I properly install a filter in my Eureka vacuum?
To install the filter, first, ensure the vacuum is unplugged. Align the filter correctly based on its orientation, then slide it into place. Engage any locking mechanisms and check its stability before using the vacuum to ensure optimal performance.
What are the common mistakes to avoid when reinserting a filter?
Common mistakes include inserting the filter incorrectly, overlooking the filter’s orientation, and failing to secure it properly. These errors can lead to reduced suction power and may cause the filter to dislodge during operation.
Why is filter maintenance important for my Eureka vacuum?
Proper filter maintenance is crucial for performance, as it ensures better suction power, improved air quality, and extends the vacuum’s lifespan. Regularly checking and cleaning filters helps prevent damage and costly repairs.
How can I safely remove the filter from my Eureka vacuum?
To safely remove the filter, first unplug the vacuum. Inspect for any damage, then use the appropriate tools, like a screwdriver and soft cloth, to access and gently detach the filter. Always follow the manufacturer’s guidelines for best practices.
