
Have you ever faced the frustration of a vacuum pump that just won’t work? You’re not alone. Many people rely on these handy devices for everything from automotive work to home projects, and when they break down, it can feel like a huge setback.
Rebuilding your vacuum pump might seem daunting, but it’s a rewarding process that can save you money and extend the life of your equipment. In this article, you’ll find easy-to-follow steps and helpful tips that will guide you through the rebuild. By the end, you’ll have a fully functional vacuum pump and the confidence to tackle similar projects in the future.
Key Takeaways
- Understanding the various types of vacuum pumps and their components is essential for effective rebuilding and maintenance.
- Gathering the right tools and materials, such as screwdrivers, socket wrenches, and cleaning supplies, streamlines the rebuild process.
- Following a step-by-step guide, including disassembly, cleaning, and replacing worn parts, is crucial for a successful vacuum pump rebuild.
- Identifying common issues like loss of vacuum, unusual noises, and overheating enables effective troubleshooting during the rebuild process.
- Replacing seals, lubricating moving parts, and maintaining proper alignment are key to ensuring the efficiency and longevity of your vacuum pump post-rebuild.
Understanding Vacuum Pumps
Vacuum pumps play a crucial role in various applications, from medical equipment to industrial processes. Understanding their operation and components helps you rebuild them effectively.
Types of Vacuum Pumps
- Positive Displacement Pumps: These pumps trap a fixed volume of gas and push it out of the system. Examples include diaphragm and rotary vane pumps.
- Momentum Transfer Pumps: These rely on high-speed blades to impart momentum to gas molecules, pushing them away from the pump. Turbo pumps are classic examples.
- Diffusion Pumps: These use vaporized fluid to create a vacuum. They excel in high-vacuum applications like electron microscopy.
- Cryogenic Pumps: These pumps cool gases to extremely low temperatures, causing them to condense. They require specialized equipment and are useful in research settings.
- Motor: Powers the pump and drives its components.
- Pump Chamber: The area where gas is evacuated. This chamber design impacts the pump’s efficiency.
- Inlet and Outlet Ports: Responsible for gas entry and exit. Proper sizing ensures optimal performance.
- Seals: Prevent gas leaks. Regular inspection for wear and tear helps maintain vacuum integrity.
- Filters: Protect internal components by trapping debris and contaminants from entering the system.
Understanding these types and components prepares you for the rebuilding process, ensuring effective troubleshooting and maintenance of your vacuum pump.
Tools and Materials Needed
Gathering the right tools and materials is crucial for a successful vacuum pump rebuild. This section outlines everything you’ll need to complete the task efficiently.
Essential Tools
- Socket Wrench Set: Use this set for removing and tightening bolts securely.
- Screwdriver Set: Different sizes of screwdrivers help with securing the various components.
- Torque Wrench: This tool ensures that you apply the proper amount of torque, preventing damage to the parts.
- Pliers: Use pliers for gripping and twisting wires or securing small components.
- Wire Cutters: These are helpful for trimming any old or damaged wires.
- Cleaning Supplies: Incorporate lint-free cloths and vacuum-safe cleaning solutions to clean components without leaving residue.
- Seals: Replace worn seals to avoid leaks, which can affect pump performance.
- Filters: Install new filters to ensure optimal air quality and reduce particulate accumulation.
- Motor Bearings: Swap out damaged or noisy bearings to restore smooth operation.
- Gaskets: Use fresh gaskets to maintain airtight connections between parts.
- O-rings: Select the correct size O-rings for proper sealing on joints and connections.
Having these tools and materials ready helps streamline your rebuilding process, making it efficient and effective.
Step-by-Step Guide to Rebuilding a Vacuum Pump
Rebuilding a vacuum pump involves a series of methodical steps. Following these guidelines ensures a successful rebuild, extending the pump’s life and maintaining efficiency.
Disassembling the Vacuum Pump
- Remove External Fasteners: Use a socket wrench set to unscrew all external bolts and nuts securing the pump housing.
- Take Off the Housing: Gently pry apart the housing to access the internal components. Avoid using excessive force to prevent damage.
- Document Parts Arrangement: As you remove parts, take notes or photos to ensure proper reassembly. Keep small parts in labeled containers to avoid confusion.
Cleaning the Components
- Clean Each Piece: Use a solvent-based cleaner to wipe down all components. Focus on removing dirt and old lubricant residues.
- Soak Smaller Parts: For heavily soiled items like filters and seals, soak them in a cleaning solution for several minutes.
- Dry Thoroughly: Ensure all components are completely dry before reassembling. Use compressed air to blow out hard-to-reach areas.
Replacing Worn Parts
- Inspect Each Part: Identify any worn or damaged components like seals, filters, and bearings. Replace all necessary parts to ensure optimal performance.
- Use OEM Parts: Whenever possible, opt for original equipment manufacturer (OEM) parts. They often provide better fitting and longer-lasting durability.
- Follow Manufacturer Specifications: Refer to the pump’s manual for specifications on part replacements and any torque settings for fasteners.
- Reinstall Components: Begin reassembly by placing components back in their original positions according to your notes or photos.
- Secure Housing: Once all inner parts are in place, align and secure the housing with fasteners. Tighten them to the specified torque settings.
- Test for Leaks: Before operating the pump, conduct a leak test. Apply a small amount of vacuum grease to joints and connections, and check for any signs of escaping air.
Following these steps methodically helps ensure your vacuum pump operates efficiently after rebuilding.
Common Issues and Troubleshooting
Rebuilding a vacuum pump involves understanding potential problems you might face. Identifying these issues early ensures a smoother rebuilding process.
Recommended Products
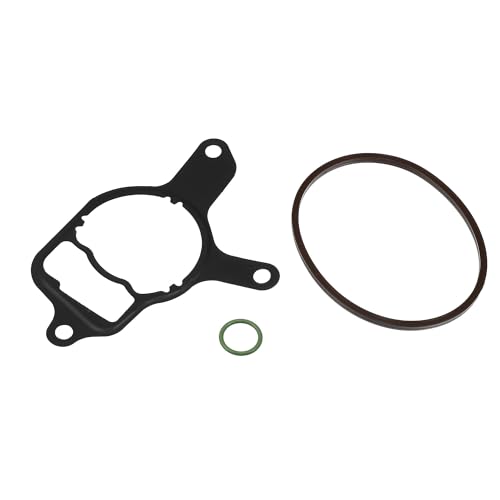
OE Number:07K145215A, 07K-145-215-A, 07K145215, 7K145215A, 07K145100B, 07K-145-100-B, 7K145100B, 07K145100G, 7K145100G
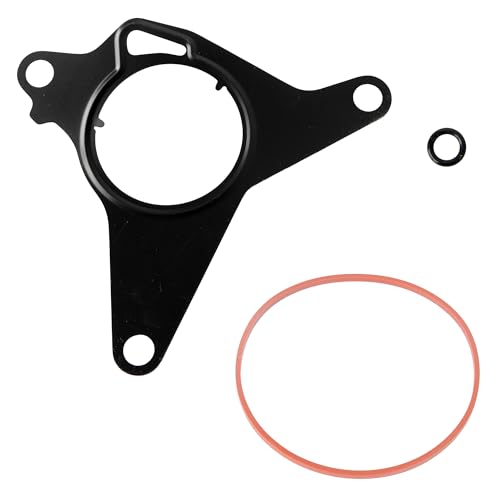
High quality:The Vacuum Pump Rebuild Seal Kit are made of high-quality metal and rubber materials,which has good sealing, durable, wear-resistant, corrosion-resistant, heat-resistant.

RKX PREMIUM vacuum pump reseal kit compatible with VW and Audi 2.5L Engines. The RKX kit is the highest quality kit available guaranteed! We are so confident in our gaskets we offer a no gimmick limited lifetime warranty on all gaskets included!
Identifying Problems
Check for common signs of malfunction. These include:
- Loss of vacuum: If your pump struggles to maintain pressure, inspect seals and gaskets for wear.
- Unusual noises: Grinding or rattling sounds often indicate mechanical failure, possibly from damaged bearings or rotors.
- Overheating: Excessive heat suggests insufficient lubrication or blocked airflow. Examine the oil level and filtration.
- Increased vibration: If the pump vibrates more than normal, misalignment or imbalance in components may be present.
Address each symptom as it arises to pinpoint the root cause of the problem.
Solutions to Common Issues
Troubleshoot common issues with these straightforward solutions:
- Replacing seals and gaskets: Use OEM parts to restore the vacuum. Ensure you apply the correct lubricant when installing them.
- Lubricating moving parts: Regularly check and refill oil per manufacturer instructions. This helps prevent overheating.
- Realigning components: If you notice vibrations, disassemble the pump and recheck the alignment of the motor and pump parts.
- Cleaning filters: Clogged filters reduce efficiency. Clean or replace filters as needed, following the specific maintenance schedule for your pump model.
- Monitoring operating conditions: Keep an eye on temperature and pressure levels during operation. Adjust settings according to the manufacturer guidelines to ensure optimal performance.
By systematically addressing these issues, you can restore your vacuum pump’s functionality effectively.
Conclusion
Rebuilding your vacuum pump can be a rewarding experience that saves you money and boosts its performance. By following the steps outlined in the guide and addressing common issues, you can restore your pump to its former glory.
Don’t forget to take your time during disassembly and reassembly. Proper documentation and attention to detail will make a world of difference.
With a little patience and the right approach, you’ll have a reliable vacuum pump ready to tackle your tasks. So roll up your sleeves and get started on that rebuild—you’ll be glad you did!
Frequently Asked Questions
What are the benefits of rebuilding a vacuum pump?
Rebuilding a vacuum pump can save you significant money compared to buying a new one. It also extends the pump’s lifespan, helps maintain optimal performance, and ensures that your equipment runs efficiently.
What steps are involved in rebuilding a vacuum pump?
Rebuilding a vacuum pump involves disassembling it, cleaning components, replacing worn parts with OEM parts, following manufacturer specs for reassembly, and testing for leaks. Documenting the parts arrangement during disassembly is also crucial.
What common issues might I face with a vacuum pump?
Common issues include loss of vacuum, unusual noises, overheating, and increased vibration. These problems can often be resolved through proper maintenance, such as replacing seals, lubricating moving parts, and cleaning filters.
How can I troubleshoot a malfunctioning vacuum pump?
To troubleshoot, check for leaks, inspect seals and gaskets, lubricate parts, and ensure proper alignment. Monitor operating conditions, and if needed, clean or replace filters to restore functionality.
Why is it essential to use OEM parts when rebuilding?
Using OEM (Original Equipment Manufacturer) parts ensures compatibility and reliability. These parts are designed specifically for your vacuum pump, which helps maintain its performance and prevents premature wear or malfunction.
