
Ever wondered how to clean your Dyson cordless vacuum head properly? You’re not alone. Many people face the same challenge when it comes to maintaining their vacuum’s performance. Over time, hair and debris can build up, affecting suction and efficiency.
This article will guide you through the simple steps to take apart your vacuum head. You’ll learn how to access those tricky areas and keep your vacuum running like new. With just a few tools and a little bit of time, you’ll be able to tackle this task with confidence and make your cleaning routine even more effective.
Key Takeaways
- Essential Tools: Gather a Phillips screwdriver, pliers, a soft-bristled brush, a clean towel, and a small container to streamline the disassembly process of your Dyson cordless vacuum head.
- Disassembly Steps: Start by unplugging the vacuum, removing the brush bar, unscrewing housing components, and detaching additional parts to access and clean hidden debris.
- Regular Maintenance: Regularly clean the brush bar, housing, and filters to prevent loss of suction and to maintain the vacuum’s efficiency.
- Troubleshoot Common Issues: Address common issues like loss of suction, brush bar non-spin, battery performance, and dust container blockages with specific checks and maintenance steps outlined in the article.
- Safety Precautions: Always disconnect the vacuum from the power source, use the appropriate tools, handle components carefully, and work in a well-lit area to avoid accidents during disassembly.
- Manufacturer Guidelines: Following the manufacturer’s guidelines and reviewing the user manual can provide additional safety advice and maintenance tips for optimal use.
Tools You Will Need
To take apart your Dyson cordless vacuum head efficiently, gather these essential tools:
- Screwdriver: A Phillips screwdriver is necessary for removing screws from the vacuum head.
- Pliers: Needle-nose pliers can help grip and pull components apart if they’re stuck.
- Brush: A soft-bristled brush aids in clearing debris and hair from difficult areas.
- Towel: A clean towel is useful for laying out parts and ensuring they don’t get lost during disassembly.
- Container: A small container will help keep screws and small parts organized as you work.
Having these tools at hand ensures a smoother disassembly process, allowing you to focus on cleaning and maintaining your vacuum head without frustration.
Recommended Products

Application - This item is a customized tool kit made for Dyson V6, V7, V8, V10, V11 and V15 vacuum cleaners. You can easily disassemble all the vacuum cleaner models above with this kit.

【Wide Compatibility】Our quick-release roller brush is designed to work seamlessly with V7 V8 V10 V11 V15 SV10 SV11 SV12 SV14 cordless vacuum cleaners, making it easy to upgrade your cleaning experience.(This roller brush doesn't fit V6, DC series, or Slim series).
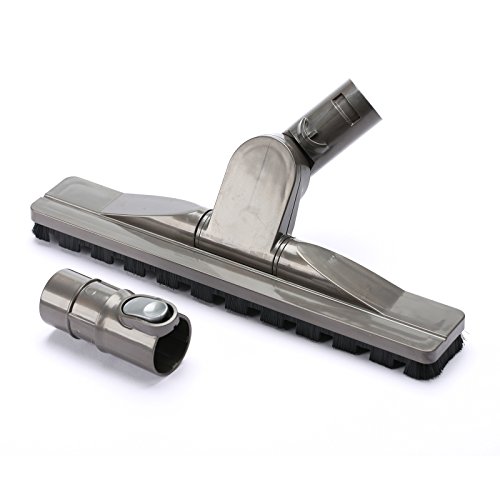
HARD FLOOR CLEANING – Bristled floor head picks up dust and debris from wood, tile, laminate and other hard surfaces.
Step-By-Step Guide
Taking apart the Dyson cordless vacuum head can enhance its performance. Follow these steps for a smooth process.
Preparing the Vacuum Head
- Unplug the vacuum. Ensure it’s turned off and disconnected from the power source.
- Gather your tools. You’ll need a screwdriver, pliers, a brush, a towel, and a container for small parts.
- Find a clean workspace. A flat surface makes it easier to handle parts and prevents loss.
Disassembling the Components
- Remove the brush bar. Locate the release button on the vacuum head. Press it to unlock, then gently pull out the brush.
- Unscrew the housing. Use the screwdriver to remove screws securing the vacuum head components. Place screws in your container for safekeeping.
- Detach additional parts. Carefully pull apart any remaining pieces, such as the nozzle or side attachments, to access hidden debris.
- Clean the brush bar. Use the brush to remove hair and dirt. Wipe it with a towel for extra cleanliness.
- Clear out debris. Check the housing for dust and dirt accumulation. Use a cloth or brush to clean it thoroughly.
- Reassemble the head. Start with the largest components first, ensuring everything clicks back into place securely. Reinsert screws as needed.
By following these steps, you’ll maintain the efficiency of your Dyson cordless vacuum and boost its suction power.
Common Issues and Troubleshooting
You might encounter several common issues when using your Dyson cordless vacuum. Addressing these problems can help maintain optimal performance.
Recommended Products

【Wide Compatible】The vacuum cleaner motor head replacement is fully compatible with Dyson V8 V10 V11 V15 cordless vacuums. Just confirm your vacuum model before purchasing for precise compatibility. NOT for use on Short Pile or Long Haired carpets!Product Dimensions: 9.84*3.9*6.1 inches
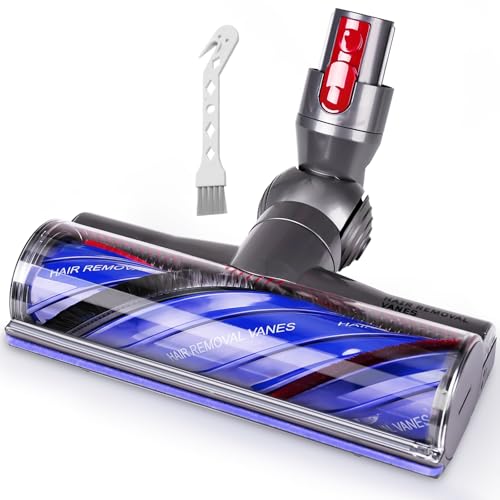
Wide Compatibility ---- Our upgraded vacuum head replacement for Dy-son V7 V8 V10 V11 V15 SV10 SV11 SV12 SV14 SV15 SV22 SV25 SV27 SV28 SV37 Cordless Vacuum Cleaner. Compare to Part # 968266-02, 968266-04, 967483-01, 967483-03, 967483-04. Doesn't fit V6 V12 DC Series.

WIDELY COMPATIBLE - The vacuum head replacement for Dyson V7 V8 V10 V11 V15 SV10 SV11 SV12 SV14 SV15 SV17 SV22 SV25 SV27 SV28 SV47 Cordless Vacuum Cleaner. NOT compatible with V6 V12 DC Gen5 Series. Compare to Part # 968266-02, 968266-04, 967483-01, 967483-03, 967483-04, 972163-01, 972182-01. Product Dimensions 9.8*3.8*6.1 inches. Please note that the brush head replacement is only 9.8 inches wide, not 12.6 inches.
Loss of Suction
Loss of suction often results from blockages or debris buildup. To troubleshoot this issue:
- Check the brush bar for tangled hair or debris. Clean it thoroughly.
- Inspect the wand and hose for clogs. Use a long, thin object to clear blockages.
- Ensure the filter is clean. Wash it under cold water and let it air dry for 24 hours.
Brush Bar Not Spinning
A non-spinning brush bar could indicate a jam or mechanical failure. You can resolve this by:
- Removing the brush bar and inspecting for obstructions. Clear any debris.
- Checking the motor’s function by listening for unusual sounds. If it’s silent, consider a repair.
Battery Issues
Battery performance may degrade over time. If you notice diminished power, consider the following:
- Ensure the battery is charged fully. Charge for at least 3.5 hours.
- Clean the battery contacts with a dry cloth to improve connectivity.
- If the battery drains quickly or doesn’t hold a charge, replacement may be necessary.
Dust Container Not Emptying
If the dust container doesn’t empty easily, follow these tips:
- Ensure you press the release button fully. If it’s stuck, check for blockages.
- Clean the container with warm soapy water. Ensure it’s dry before reattaching.
Using these steps will help you troubleshoot common issues with your Dyson cordless vacuum. Regular maintenance can prevent many of these problems, ensuring the vacuum operates efficiently.
Safety Precautions
Taking apart your Dyson cordless vacuum head requires attention to safety. Follow these precautions to ensure a smooth process.
- Unplug the Vacuum: Always disconnect the vacuum from the charger before starting any disassembly. This prevents accidental activation.
- Use Appropriate Tools: Use the right tools for disassembly. A screwdriver that fits the screws will minimize the risk of stripping them.
- Handle Components with Care: Be gentle with the parts, especially the brush bar and connectors. Dropping components can lead to damage.
- Wear Protective Gear: Consider wearing gloves to protect your hands from sharp edges. Safety goggles may also help if debris is present.
- Work in a Well-Lit Area: Good lighting helps you see small parts and any potential hazards. A clutter-free workspace reduces the risk of accidents.
- Keep Small Parts Safe: Use a container to hold screws and small components. This prevents loss and makes reassembly easier.
- Check for Damage: Inspect parts for wear or damage before reassembling. Damaged components can hinder performance and safety.
- Follow Manufacturer’s Guidelines: Review the user manual for specific safety advice. Adhering to manufacturer recommendations ensures proper handling.
Conclusion
Taking apart your Dyson cordless vacuum head doesn’t have to be daunting. With the right tools and safety precautions you can keep your vacuum running smoothly. Regular maintenance not only improves suction but also extends the life of your vacuum.
Remember to handle each component with care and stay organized to avoid losing any small parts. By staying proactive about cleaning and troubleshooting you’ll ensure your vacuum remains a reliable cleaning companion. Happy vacuuming!
Frequently Asked Questions
How can I improve the performance of my Dyson cordless vacuum?
To enhance your Dyson cordless vacuum’s performance, regularly clean the vacuum head, brush bar, and filters. Address common issues like loss of suction by checking for blockages, ensuring the brush bar is free of hair and debris, and emptying the dust container frequently.
What should I do if my Dyson vacuum has lost suction?
If your Dyson vacuum is losing suction, start by checking for clogs in the hose or filters. Make sure the dust container is not full and that the brush bar is functioning properly. Clean or replace filters as needed.
How can I fix a malfunctioning brush bar?
To troubleshoot a malfunctioning brush bar, first check for tangled hair or debris. Ensure that it spins freely and is not obstructed. If problems persist, refer to the user manual for instructions on removing and cleaning the brush bar.
What common battery issues might I face with my Dyson vacuum?
Common battery issues for Dyson vacuums include reduced runtime, no charge, or slow charging. Ensure the battery is properly connected and clean the terminals. If issues continue, consider replacing the battery or contacting customer support for assistance.
How do I safely disassemble my Dyson vacuum head?
To safely disassemble your Dyson vacuum head, first unplug the device. Use appropriate tools and handle components carefully. Wear protective gear, work in a well-lit area, and keep small parts organized. Follow the manufacturer’s guidelines for specific instructions.
