
Have you ever faced the frustration of air bubbles in your brake lines? It can be a real hassle when your brakes feel spongy or unresponsive. Using a vacuum brake bleeder kit can make this process a whole lot easier and more efficient.
In this article, you’ll learn how to properly use a vacuum brake bleeder kit to ensure your braking system functions at its best. With a few simple steps, you can eliminate air from your brake lines and restore your vehicle’s braking power. Whether you’re a seasoned DIYer or just starting out, this guide will empower you to tackle brake bleeding with confidence.
Key Takeaways
- Understanding the Kit: A vacuum brake bleeder kit simplifies air removal from brake lines, enhancing overall braking performance and efficiency.
- Preparation is Key: Gather necessary tools such as the kit, brake fluid, wrenches, and safety gear before beginning the bleeding process to ensure smooth operation.
- Follow Safety Protocols: Always wear safety glasses and gloves, work in a well-ventilated area, and secure the vehicle to prevent accidents while bleeding brakes.
- Step-by-Step Process: Properly connect the kit, activate the vacuum pump, and monitor fluid levels to ensure a thorough removal of air bubbles from each brake line.
- Troubleshooting Tips: Address issues like trapped air by checking connections, repositioning the bleeder kit, and repeating the bleeding process as necessary for optimal braking performance.
Understanding Vacuum Brake Bleeder Kits
Vacuum brake bleeder kits simplify the process of removing air bubbles from brake lines, enhancing braking performance. Using one saves time and ensures a more thorough job compared to traditional methods.
Recommended Products
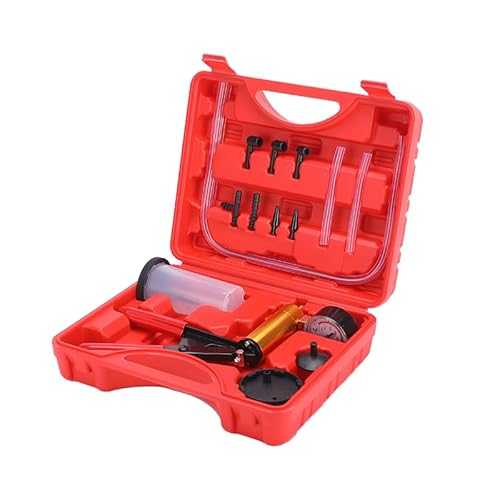
Versatile: Hand vacuum pump kit comes with a vacuum gauge to help you take accurate readings. Pressure range: 0-30 inches Hg, 0-760 mmHg. It includes accessories for brake bleeding and automotive diagnostics. The vacuum pump kit can test and diagnose a variety of parts and general systems on bikes motorcycles trucks pickups or any other vehicle.

Vacuum Pump Test Set includes different adapters designed for all vehicles. suitable for both home and business applications,Hand vacuum pump is easy to bleed your car brakes,Made by high quality material, durable and rugged, Contained in a blow mold case for easy transportation and storage.

【One-Person Brake Bleeding Made Easy】 Connects to air compressor to let you bleed brakes or clutch lines on your own—no need for a helper or repeated pedal pumping. Operates at 87–170 PSI (6–12 bar) for stable, professional results.
What Is a Vacuum Brake Bleeder Kit?
A vacuum brake bleeder kit consists of a vacuum pump and a collection reservoir. This kit connects to your brake system, allowing you to create a vacuum that draws brake fluid through the lines. It effectively removes air trapped in the brake lines, which can cause a spongy brake feel. You can find various models, ranging from hand-operated pumps to electric units.
Benefits of Using a Vacuum Brake Bleeder Kit
Using a vacuum brake bleeder kit offers several advantages:
- Efficiency: You can complete the bleeding process faster than conventional methods, saving valuable time.
- Less Mess: Most kits include a reservoir to capture fluid and air, reducing spills and clean-up.
- Improved Results: Vacuum bleeding tends to remove more air, improving brake responsiveness and safety.
- User-Friendliness: These kits typically come with straightforward instructions, making them accessible for both seasoned DIYers and beginners.
Using a vacuum brake bleeder kit enhances both the experience and outcome of brake bleeding tasks.
Preparing for the Bleeding Process
Before you start using the vacuum brake bleeder kit, ensure you’re fully prepared. This preparation will streamline the entire process, making it efficient and effective.
Necessary Tools and Equipment
Gathering the right tools and equipment is crucial. You’ll need:
- Vacuum Brake Bleeder Kit: This includes a vacuum pump and a collection reservoir.
- Brake Fluid: Use the manufacturer’s recommended fluid type.
- Wrenches: A socket or open-end wrench for loosening bleeder valves.
- Shop Towels: To clean any spills and catch drips.
- Safety Glasses: Protect your eyes from brake fluid, which can be corrosive.
Gather all these items before starting. This ensures you won’t have to stop mid-process to find something.
Safety Precautions
Safety is paramount during brake bleeding. Follow these precautions:
- Wear Safety Glasses: Always protect your eyes from brake fluid.
- Use Gloves: Prevent skin contact with brake fluid which can irritate your skin or damage surfaces.
- Work in a Well-Ventilated Area: Ensure good airflow to minimize inhaling fumes.
- Secure the Vehicle: Use jack stands if lifting the vehicle. Ensure it’s stable and won’t roll.
- Keep Brake Fluid Away from Paint: Brake fluid can damage paint. Wipe up any spills immediately.
By following these safety precautions, you will ensure a smooth and safe bleeding process.
Step-by-Step Guide on How to Use Vacuum Brake Bleeder Kit
Using a vacuum brake bleeder kit simplifies the process of removing air from brake lines. Follow these steps carefully for optimal results.
Recommended Products
【One-Person Brake Bleeding Made Easy】 Connects to air compressor to let you bleed brakes or clutch lines on your own—no need for a helper or repeated pedal pumping. Operates at 70–170 PSI (4.8–11.6 bar) for stable, professional results.

Brake booster kit comes with a vacuum gauge that can be widely used to test vehicle vacuum systems/as a vacuum sealer. Equipped with a vacuum gauge to help you take accurate readings. Pressure range: 0-30 in/Hg, 0-760 mm/Hg
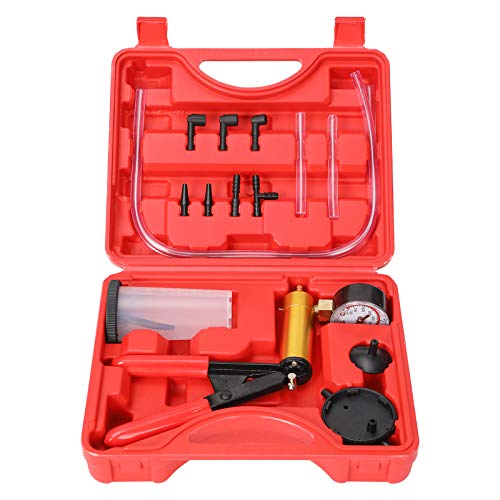
Multi-Functional Professional Testing Kit:The handheld vacuum pump kit with a vacuum pressure gauge enables precise pressure readings, covering a measurement range of 0-30 inches Hg (0-760 mmHg). Equipped with accessories for brake bleeding and automotive diagnostics, it is suitable for testing and diagnosing components and systems of bikes, motorcycles, trucks, pickups, and various vehicles, meeting professional needs in multiple scenarios.
Initial Setup
- Gather your tools. Ensure you have the vacuum brake bleeder kit, fresh brake fluid, wrenches, shop towels, and protective gear.
- Prepare your vehicle. Park it on a flat surface and engage the parking brake.
- Check your vehicle’s owner manual for the brake bleeding procedure specific to your model. Familiarizing yourself with the layout makes the process smoother.
Connecting the Kit
- Locate the brake bleeder screws on your vehicle’s brake calipers or wheel cylinders.
- Attach the vacuum hose from the bleeder kit to the bleeder screw. Ensure it fits snugly to create a proper seal.
- Secure the collection reservoir at a suitable height, ideally above the brake caliper level, to prevent overflow and ensure effective suction.
Performing the Bleeding Process
- Open the bleeder screw slightly using the wrench. Turn it counterclockwise to allow brake fluid to flow out.
- Activate the vacuum pump. This process creates suction that pulls fluid and air through the line.
- Monitor the fluid level in the reservoir. Maintain adequate fluid to prevent air from re-entering the lines.
- Once you see a steady stream of clear fluid free of bubbles, close the bleeder screw by turning it clockwise.
- Inspect the brake fluid reservoir. Ensure it remains at the recommended level throughout the bleeding process to avoid introducing air.
- Repeat the process on each wheel, working in the correct order: farthest from the master cylinder to closest (usually right rear, left rear, right front, left front).
- After bleeding all brakes, double-check each bleeder screw for proper closure and clean any spilled fluid with shop towels.
- Test the brake pedal pressure. A firm pedal indicates successful bleeding; a spongy pedal suggests air remains in the system.
Following these steps enhances your braking performance, ensuring a safer driving experience.
Troubleshooting Common Issues
Dealing with issues during the brake bleeding process can be frustrating. Here are some common problems and tips for resolving them.
Recommended Products

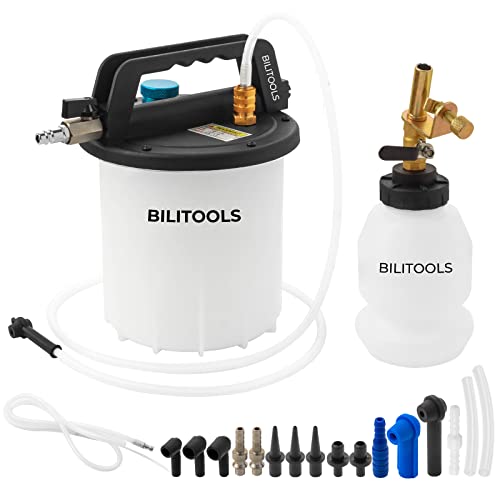
YOUR TRIP COMPANION: With Orion Motor Tech's brake bleeder kit, say goodbye to the old days when it takes two or more to bleed brakes and pump out fluids; thanks to the well-designed handheld vacuum pump and clear instructions, brake bleeding of each wheel only takes one less than 5 minutes with great ease

One Person Operation: This one person brake bleeder vacuum pump kit features a large 2L fluid reservoir and 1L brake bleeder refill bottle for easy bleeding of hydraulic brakes and clutches. This pneumatic brake bleeder is designed for one-person operation, keeps extracting oil continuously, efficiently and quicker

Complete Kit: The brake system bleeding tools contain 2*6.02" long inlet hose, 2*13.77" long outlet hose, 2*check valve, 4*0.24" ID small clamps, 2*0.31" ID large clamps, 6*bleeder screw caps. Fit for hydraulic brakes on most motorcycles, cars, and bikes
Air Bubbles in the Brake Line
Air bubbles trapped in the brake line can cause spongy brakes. If you suspect this issue, follow these steps:
- Check Connections: Ensure all connections between the vacuum bleeder kit and the bleeder screws are airtight.
- Reposition the Bleeder Kit: If air bubbles persist, adjust the position of the bleeder kit. A higher position may help eliminate trapped air.
- Repeat the Bleeding Process: Gradually pump the brake pedal or operate the vacuum bleeder again to push out any remaining air. Monitor fluid levels in the reservoir throughout this process.
- Inspect the Bleeder Screw: Make sure the bleeder screw is fully opened during the bleeding process. A partially closed screw can impede fluid flow.
- Use a Helper: Having someone assist you can improve results. While you operate the brake pedal, your helper can monitor fluid levels.
- Perform Multiple Cycles: Go through the bleeding cycle several times to ensure all air is removed. Focus on each wheel in the proper order, usually starting from the wheel furthest from the master cylinder.
- Check for Leaks: Inspect all connections and hoses for leaks. Fix any leaks and retry the bleeding process if necessary.
Conclusion
Using a vacuum brake bleeder kit can make a world of difference in your brake maintenance routine. With the right preparation and a little patience you can ensure your brakes perform at their best. Don’t hesitate to troubleshoot any issues that pop up along the way.
Remember that taking your time and double-checking your connections can save you from potential headaches down the road. Whether you’re a seasoned pro or just starting out you’ve got the tools and tips to make brake bleeding a breeze. Enjoy the peace of mind that comes with knowing your brakes are in top shape for safer driving.
Frequently Asked Questions
What causes air bubbles in brake lines?
Air bubbles in brake lines typically result from improper brake fluid changes, leaks, or worn components. When these air pockets enter the system, they reduce braking pressure, leading to diminished performance.
How does a vacuum brake bleeder kit work?
A vacuum brake bleeder kit creates suction to draw brake fluid from the reservoir through the brake lines. This process effectively removes air bubbles, ensuring a better fluid flow and improved brake responsiveness.
What safety precautions should I take while bleeding brakes?
Always wear safety glasses and gloves to protect yourself from brake fluid, which can be corrosive. Work in a well-ventilated area, ensure the car is securely raised, and use jack stands.
What should I do if I still see air bubbles after bleeding?
If air bubbles persist after bleeding, check for airtight connections, reposition the bleeder kit, and repeat the bleeding process. You may also need to inspect the bleeder screw for leaks or use a helper to assist in the process.
How often should I bleed my brakes?
You should bleed your brakes whenever you notice a spongy brake pedal feel, after replacing brake components, or at least every two years to remove moisture and maintain optimal brake system performance.

