
Have you ever struggled with sealing liquids in a vacuum sealer? You’re not alone. Many people find it tricky to keep soups, sauces, or marinades from spilling during the sealing process. It can feel frustrating when you want to preserve your favorite recipes without the mess.
Key Takeaways
- Types of Vacuum Sealers: Understand the differences between external, chamber, and handheld vacuum sealers to choose the best option for sealing liquids effectively.
- Proper Techniques: Use specific strategies such as allowing liquids to cool, utilizing funnels for pouring, and leaving headspace in bags to avoid spills during the sealing process.
- Right Bags: Select heavy-duty, liquid-compatible vacuum seal bags designed to withstand moisture and ensure a strong seal.
- Maximize Freshness: Vacuum sealing extends the shelf life of foods, preserves flavors, and reduces waste, making it a valuable method for meal preparation.
- Mess-Free Process: Implement tricks like briefly freezing liquids before sealing and using paper towels to absorb excess liquid to maintain a clean sealing environment.
- Avoid Common Mistakes: Prevent issues by not overfilling bags and confirming your vacuum sealer’s compatibility with liquid sealing techniques for optimal results.
Understanding Vacuum Sealers
Vacuum sealers play a vital role in food preservation. They remove air from bags and create airtight seals, keeping your liquids safe and fresh.
Types of Vacuum Sealers
- External Vacuum Sealers
External vacuum sealers suck air out by using an external pump. These devices often work well for solid foods, but sealing liquids can be tricky. - Chamber Vacuum Sealers
Chamber sealers operate by placing bags in a chamber and removing air from the entire chamber, making them ideal for liquids. They maintain pressure and seal without spillage. - Handheld Vacuum Sealers
Handheld sealers are portable and ideal for small tasks. They typically work well with bags designed for liquids but may not be as efficient as chamber sealers.
- Longer Shelf Life
Vacuum sealing extends the shelf life of foods. Removing air slows spoilage, keeping your liquids fresh for weeks or months. - Flavor Preservation
Vacuum sealing locks in flavors and aromas. Enjoy your soups, sauces, or marinades with enhanced taste. - Space Efficiency
Vacuum-sealed bags take up less space in your fridge or freezer. Saving space helps keep your food organized. - Waste Reduction
By extending the life of your food, vacuum sealing minimizes waste. Less waste means saving money in the long run. - Easy Meal Preparation
Vacuum sealing allows for batch cooking. Prepare and seal meals in advance for quick and convenient weeknight dinners.
Preparing to Vacuum Seal Liquids
Vacuum sealing liquids requires special attention to ensure a mess-free process. Following these guidelines makes sealing liquids easier and more effective.
Recommended Products

LIQUID BLOCK TECHNOLOGY: Specially designed bags feature an integrated liquid block layer that prevents liquids from being drawn into the vacuum sealer during the sealing process

BAGS STAND UPRIGHT FOR EASY FILLING: Easily add soups, stews, marinades, fruit purees, and other liquids and foods to these freestanding vacuum sealer bags. With expandable-bottoms, they stand upright on the counter for easy, mess-free filling.

Includes (25) pre-cut 11" x 14" gallon-sized bags for high-capacity food storage
Choosing the Right Bags
Choose vacuum seal bags designed for liquids. Use heavy-duty, multi-layer bags that create a strong seal. Look for bags labeled as compatible with liquids or specifically for vacuum sealing. Ensure bags are freezer-safe to prevent leaks when frozen. Consider using pre-formed bags with gussets for soups or sauces, as they provide extra stability.
- Cool Down: Let hot liquids cool to room temperature before sealing. This prevents steam buildup, which might compromise the seal.
- Use a Funnel: A funnel can help direct liquids into the bag without spills. This makes the process cleaner and more efficient.
- Fill Levels: Leave enough space at the top of the bag. Leave at least 2-3 inches to avoid liquid reaching the sealing area.
- Separate Freezing: Freeze liquids in the bag for a short time (about 1-2 hours) before vacuum sealing. This solidifies the liquid, reducing the chance of spills.
- Soak Up Splashes: If you’re still concerned about spills, use a paper towel or sponge at the bag’s opening to absorb any liquid.
Using these tips ensures successful vacuum sealing of liquids, preserving flavor and extending shelf life while keeping your kitchen clean.
The Vacuum Sealing Process for Liquids
Vacuum sealing liquids requires specific techniques to ensure effective and mess-free results. Follow these steps for successful vacuum sealing of soups, sauces, and other liquid items.
Recommended Products

MULTIPURPOSE, REUSABLE BAGS: These BPA-free, multilayer FoodSaver vacuum seal bags are durable and easy to hand-wash; also safe to use in the microwave, for sous vide cooking, and for freezer storage

Compatible with All Desktop Vacuum Sealers: These vacuum sealer bags are designed to work with all traditional desktop vacuum sealer machines. Simple to operate and convenient to use. (Note: These bags do not feature an air valve and are not compatible with handheld vacuum sealers.)
Universal Design:Compatible with All 'Clamp Style' Vacuum Sealer Machines
Setting Up Your Vacuum Sealer
- Confirm your vacuum sealer’s capabilities. Check if it’s designed for liquids, as chamber sealers excel at this task.
- Choose vacuum sealer bags made for liquid contents. These bags are thicker and better equipped to handle moisture.
- Organize your workspace. Prepare a clean, flat surface to prevent spills and ensure easy access to your supplies.
- Gather necessary tools like a funnel, measuring cups, and paper towels for cleanup.
- Allow liquids to cool before sealing. Hot liquids can cause steam buildup, potentially damaging your vacuum sealer and compromising the seal.
- Use a funnel when filling bags. A funnel prevents spills and makes it easier to pour liquid contents into the bag.
- Leave adequate headspace in the bag. This space, typically 1-2 inches, ensures a proper seal and accommodates any liquid expansion.
- Briefly freeze liquids before sealing. Chill liquids for about 30 minutes to create a thicker consistency, reducing the likelihood of spills during sealing.
- Manage potential spills with paper towels. Place a paper towel in the bag’s opening to absorb any excess liquid, leading to cleaner sealing.
Using these techniques ensures a smooth vacuum sealing process for liquids, preserving your food effectively and maintaining an organized kitchen.
Common Mistakes to Avoid
Avoiding common mistakes makes vacuum sealing liquids easier and more effective. Pay attention to these crucial areas to ensure a successful sealing process.
Recommended Products

FOOD GRADE AND BPA FREE MATERIAL: KVSK vacuum sealer bag cotton pads are crafted from eco-friendly wood pulp, not come with any adhesive, can direct access to fresh food ingredients to ensure food safety, protect you and your family's health;
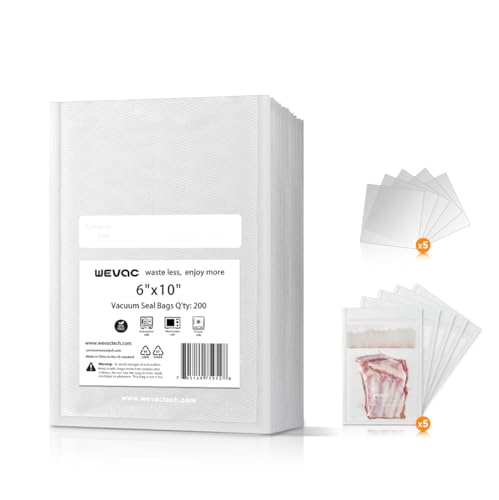
Versatile 200-Pack of 6"x10" Bags: Perfect for preserving freshness and Nutrients, storing food, and sous vide cooking, these BPA-free bags ensure air-tight sealing for long-lasting storage.

Economical and Custom Sized:6 Pack 8"x20'(3Rolls) and11"x20'(3Rolls) Food Vacuum Sealer Bags Rolls (total 120 feet)
Overfilling Bags
Overfilling bags leads to leaks and ineffective seals. Leave at least 2-3 inches of space at the top of each bag. This headspace accommodates the liquid during sealing and prevents spills. For wet items, consider using a separate bag for solids and liquids if necessary, allowing for better control.
Not Using the Right Technique
Not using appropriate techniques can compromise your results. Always confirm that your vacuum sealer is compatible with liquids. If using an external vacuum sealer, use the “gentle” or “liquid” setting if available. When filling, use a funnel to minimize spills and keep the bag steady. Apply these techniques to ensure a tight seal, preserving freshness and flavor.
Conclusion
Using a vacuum sealer with liquids can be a game changer for your food preservation efforts. By following the right techniques and tips you can ensure your soups and sauces stay fresh and flavorful. Remember to take your time with preparation and always keep an eye on those small details that make a big difference.
With practice you’ll become more comfortable and confident in vacuum sealing liquids. Soon enough you’ll be enjoying the convenience of having perfectly sealed meals ready to go whenever you need them. Happy sealing!
Frequently Asked Questions
What is vacuum sealing and why is it important?
Vacuum sealing is a method of packaging that removes air from containers to preserve food. It’s essential for extending shelf life, preventing freezer burn, and maintaining freshness, especially for liquids like soups and sauces.
What type of vacuum sealer is best for liquids?
Chamber sealers are best for liquids as they provide a spill-free sealing process. They can handle liquids effectively, ensuring a tight seal without creating messes.
How do I prepare liquids for vacuum sealing?
To prepare liquids for vacuum sealing, cool them first, use a funnel for filling, leave headspace in the bag, and consider briefly freezing the liquids to reduce spills.
Can I use any bags for vacuum sealing liquids?
No, you should use specific vacuum-sealable bags that are designed for liquids. These bags are thicker and more durable, preventing leaks and ensuring a proper seal.
What common mistakes should I avoid when vacuum sealing?
Avoid overfilling bags, not leaving enough headspace, and using the wrong settings on your vacuum sealer. These mistakes can lead to poor seals and spoilage.
How does using a funnel help in vacuum sealing?
Using a funnel helps control the flow of liquids into the bag, minimizing spills and ensuring that the bags fill evenly for a secure seal.
Should I freeze liquids before vacuum sealing?
Yes, briefly freezing liquids can help solidify them, making it easier to vacuum seal without spills. This technique prepares your liquids for a better sealing process.
How do I manage spills when vacuum sealing?
To manage spills, place paper towels around the edge of the bag before sealing. This will catch any overflow and help maintain a clean sealing area.
