
Have you ever faced a spongy clutch pedal that just doesn’t feel right? It can be frustrating when your vehicle’s clutch isn’t functioning properly, leaving you unsure about your next drive. If you’ve noticed issues like difficulty shifting or a low pedal, it might be time to vacuum bleed your clutch system.
This article will guide you through the vacuum bleeding process, making it easier to restore your clutch’s performance. You’ll learn the steps to effectively remove air from the hydraulic system, ensuring smooth operation and enhanced safety. By the end, you’ll have the confidence to tackle this task and keep your vehicle running smoothly.
Key Takeaways
- Understand Vacuum Bleeding: A crucial method for removing air from the clutch hydraulic system, improving pedal feel and gear shifts.
- Tools Needed: Essential tools include a vacuum bleeder kit, brake fluid, clear hose, funnel, wrenches, and shop towels.
- Safety First: Work in a well-ventilated area, wear protective gear, and handle brake fluid with care due to its corrosive nature.
- Step-by-Step Process: Follow the correct steps: locate the bleeder valve, set up the vacuum pump, open the bleeder valve, and monitor fluid levels for optimal results.
- Common Pitfalls: Avoid overfilling the reservoir and ignoring air bubbles to enhance bleeding efficiency and improve clutch performance.
Understanding Vacuum Bleeding
Vacuum bleeding is an effective method to remove air from your clutch hydraulic system. This process enhances clutch performance, ensuring smooth gear shifts.
Recommended Products

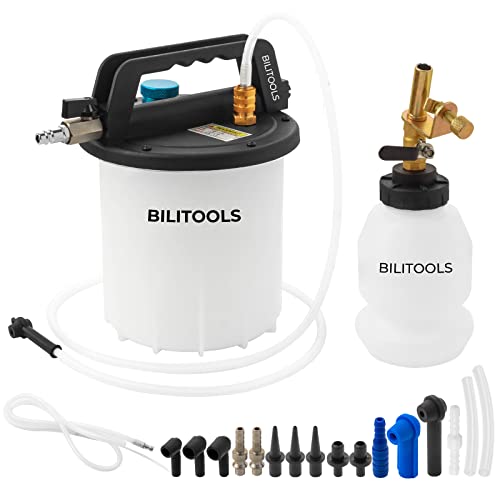
Multifunction Vacuum Pump: The brake breeder kit equips with vacuum gauge, help you read data accurately.Pressure range: 0-30 in Hg, 0-760 mm Hg. Not just for bleeding brakes, this brake bleeding kit also clears oil, power steering fluid, and other hydraulic systems; test vacuum systems, carburetors, fuel petcocks, and even use with compatible containers to do some vacuum sealing.

UNIVERSAL BLEEDING KIT: Orion Motor Tech's brake bleeding vacuum pump with an adapter set works with nearly any vehicle's system and lets you bleed your brakes, clutch, or any other vehicular hydraulic system in under 5 minutes all by yourself
Brake Bleeding: Using our brake bleeder tool can help you to improve the bleeding efficiency of the brake system, guide the old brake fluid out, effectively drain out the air bubbles/air in the brake fluid, and restore the sensitivity of the brake system
What Is Vacuum Bleeding?
Vacuum bleeding involves using a vacuum device to draw fluid and air out of the clutch system. This method creates a negative pressure that helps eliminate trapped air, which often leads to a spongy pedal feel. It’s essential for maintaining proper hydraulic function.
- Improved Pedal Feel: Vacuum bleeding restores firmness to the clutch pedal, enhancing your control over the clutch.
- Increased Safety: A properly bled system ensures reliable clutch engagement, reducing the risk of unexpected gear shifts.
- Reduced Maintenance: This method minimizes the risk of future air entrapments, cutting down on frequent bleeding tasks.
- Efficiency: Vacuum bleeding typically requires less time compared to traditional bleeding methods, making it a convenient option.
- Minimal Mess: This technique generates less fluid spillage, keeping your workspace cleaner.
By understanding and using vacuum bleeding, you can significantly improve your vehicle’s clutch performance, leading to a safer and more enjoyable driving experience.
Preparing for Vacuum Bleeding
Preparing for vacuum bleeding ensures a smoother process and better results. Gather the right tools and familiarize yourself with essential safety precautions.
Recommended Products
【One-Person Brake Bleeding Made Easy】 Connects to air compressor to let you bleed brakes or clutch lines on your own—no need for a helper or repeated pedal pumping. Operates at 70–170 PSI (4.8–11.6 bar) for stable, professional results.

Vacuum Pump Test Set includes different adapters designed for all vehicles. suitable for both home and business applications,Hand vacuum pump is easy to bleed your car brakes,Made by high quality material, durable and rugged, Contained in a blow mold case for easy transportation and storage.
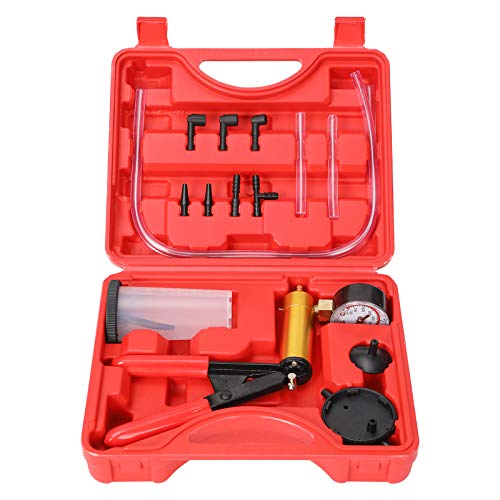
Multi-Functional Professional Testing Kit:The handheld vacuum pump kit with a vacuum pressure gauge enables precise pressure readings, covering a measurement range of 0-30 inches Hg (0-760 mmHg). Equipped with accessories for brake bleeding and automotive diagnostics, it is suitable for testing and diagnosing components and systems of bikes, motorcycles, trucks, pickups, and various vehicles, meeting professional needs in multiple scenarios.
Tools and Equipment Needed
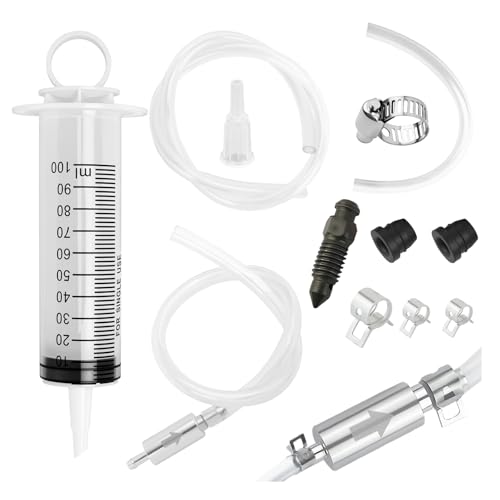
- Vacuum Bleeder Kit: This essential tool creates a vacuum to draw fluid and air from the system. Look for kits compatible with your vehicle.
- Brake Fluid: Use the specific fluid recommended by your vehicle manufacturer. Check the owner’s manual for details.
- Clear Hose: A clear hose connects the bleeder valve to the vacuum bleeder. This helps you visualize the fluid and air exiting during the process.
- Funnel: A funnel makes filling the master cylinder easier, preventing spills and ensuring proper fluid levels.
- Wrenches: A set of wrenches will help open the bleeder valves. Make sure you have the correct size for your vehicle.
- Shop Towels: Keep shop towels on hand to clean up any spills that may occur during the bleeding process.
- Work in a Well-Ventilated Area: Ensure that you’re in a space with plenty of airflow. Brake fluid can release harmful fumes.
- Wear Protective Gear: Use gloves and safety goggles. Brake fluid can irritate skin and eyes.
- Handle Fluids Carefully: Brake fluid is corrosive. Avoid spills on painted surfaces and clean up any drips immediately to prevent damage.
- Secure the Vehicle: Use wheel chocks and a jack stand to stabilize your vehicle during the bleeding process, preventing any accidents.
- Follow Manufacturer Guidelines: Adhere to your vehicle manual for specific instructions regarding the vacuum bleeding process, ensuring safety and effectiveness.
Step-by-Step Guide to Vacuum Bleeding a Clutch
Vacuum bleeding a clutch is a straightforward process that enhances clutch performance. Follow these steps carefully for best results.
Recommended Products

YOUR TRIP COMPANION: With Orion Motor Tech's brake bleeder kit, say goodbye to the old days when it takes two or more to bleed brakes and pump out fluids; thanks to the well-designed handheld vacuum pump and clear instructions, brake bleeding of each wheel only takes one less than 5 minutes with great ease
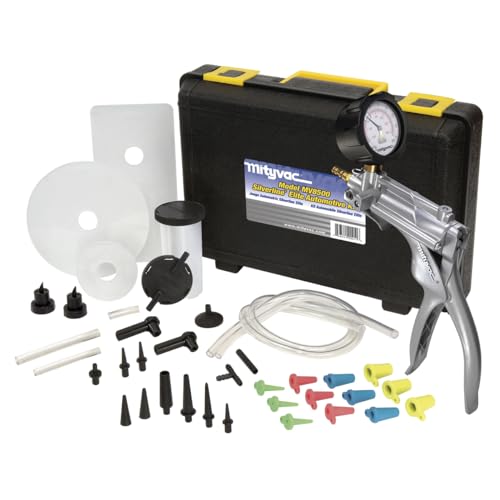
VERSATILE BRAKE AND CLUTCH BLEEDING TOOL: The Mityvac MV8500 Silverline Elite is a multi-functional kit designed for vacuum and pressure bleeding of brake and clutch systems, making it ideal for routine maintenance on motorcycles, cars, trucks, and SUVs

One Man Brake Bleeding: No more shouting instructions or messy oil spills! This one-man brake bleeder effortlessly flushes out old fluid while drawing in fresh oil, clearing trapped air for firmer, faster-replying brakes with every press.
Step 1: Locate the Clutch Bleeder Valve
Locate the clutch bleeder valve on the slave cylinder. Typically, it’s a small brass or steel screw, often near the transmission. Check your vehicle’s manual for exact placement details. Ensure the area is clean before proceeding. This will prevent contaminants from entering the system during bleeding.
Step 2: Set Up the Vacuum Pump
Attach the vacuum pump to the bleeder valve. Choose a vacuum bleeder kit that matches your vehicle. Place the clear hose from the pump onto the bleeder valve, ensuring a tight fit. This connection ensures that air will be drawn out effectively as you pump. Make certain your vacuum pump is ready to create a proper vacuum for the bleeding process.
Step 3: Open the Bleeder Valve
Slowly open the bleeder valve using the appropriate wrench. Turn it counterclockwise until you hear a hissing sound, which indicates air is escaping. Maintain a watchful eye on the fluid flow through the hose. This moment shows whether air is moving out of the system. Tighten the bleeder valve again as the fluid starts to flow, preventing spills.
Step 4: Monitor Fluid Levels
Regularly check the brake fluid reservoir during the process. Keep it filled to prevent air from re-entering the system. If the fluid level drops too low, stop bleeding immediately. Refill as necessary, then continue until you see clear, bubble-free fluid. This signals that all air has been removed from the clutch system.
By following these steps precisely, you can effectively vacuum bleed your clutch. A clear understanding of the procedure leads to a more reliable and efficient clutch performance.
Common Mistakes to Avoid
Avoiding common mistakes during the vacuum bleeding process ensures efficiency and effectiveness. Being aware of these pitfalls helps achieve optimal clutch performance.
Overfilling the Reservoir
Overfilling the reservoir can lead to fluid spillage, which creates a mess and risks damaging components. Always fill the reservoir to the manufacturer’s recommended level. Use a funnel for precision. After performing vacuum bleeding, check the fluid level again and top off as necessary.
Ignoring Air Bubbles
Ignoring air bubbles during the bleeding process undermines the effectiveness of vacuum bleeding. Always observe the fluid flowing through the clear tubing as you bleed. Look for consistent streams without interruptions. If bubbles appear, continue the process until the flow is clear and steady. This ensures that all air is expelled from the system, enhancing overall clutch performance.
Conclusion
Vacuum bleeding your clutch can make a world of difference in your driving experience. By following the steps outlined and avoiding common pitfalls you can ensure a smooth and effective process.
Taking the time to do this not only enhances your clutch’s performance but also contributes to your vehicle’s overall safety and reliability. Remember to keep an eye on fluid levels and always prioritize safety as you work.
With a little patience and the right tools you’ll have that clutch feeling firm and responsive in no time. Happy driving!
Frequently Asked Questions
What causes a spongy clutch pedal?
A spongy clutch pedal is usually caused by air trapped in the hydraulic system, low fluid levels, or a worn clutch master or slave cylinder. These issues can prevent the system from functioning optimally, leading to difficulty in gear shifting.
How does vacuum bleeding improve clutch performance?
Vacuum bleeding removes air from the hydraulic system, which restores the firmness of the clutch pedal. This enhances control, ensures reliable clutch engagement, and ultimately improves overall vehicle safety and performance.
What tools do I need for vacuum bleeding a clutch?
To vacuum bleed a clutch, you will need a vacuum pump, a clear plastic hose, a wrench for the bleeder valve, and fresh hydraulic fluid. Having these tools ready makes the process smoother and more efficient.
What are the steps to vacuum bleed a clutch?
- Locate the clutch bleeder valve.
- Set up the vacuum pump and attach the hose to the valve.
- Open the bleeder valve.
- Monitor fluid levels and ensure there are no air bubbles.
- Close the valve once done.
What mistakes should I avoid during vacuum bleeding?
Common mistakes include overfilling the reservoir, neglecting to monitor for air bubbles, and not maintaining the proper fluid level. These errors can hinder the effectiveness of the bleeding process and affect clutch performance.
Why is preparing for vacuum bleeding important?
Preparing properly ensures a smoother process and better results. By gathering tools and following safety precautions, you reduce the risk of making mistakes and can effectively restore clutch performance.

