
Ever wondered how to keep your Dyson stick vacuum handy without taking up precious floor space? You’re not alone. Many people struggle with finding the perfect spot for their vacuum, often leading to clutter and inconvenience.
Key Takeaways
- Essential Tools and Materials: Gather necessary tools such as a drill, screwdriver, stud finder, level, and materials including a mounting bracket and screws to ensure a smooth installation process.
- Location Selection: Choose a wall that’s stable and near high-traffic areas for easy accessibility, while ensuring it provides access to an electrical outlet for charging.
- Mounting Process: Follow a step-by-step guide for wall mounting, including marking the bracket placement, drilling holes, and securing the mounting bracket correctly.
- Vacuum Maintenance: Regularly clean the filter, empty the dust bin after each use, and inspect the brush bar to maintain performance and prolong the vacuum’s lifespan.
- Smart Storage Solutions: Always store the vacuum on the wall mount when not in use, organize attachments wisely, and avoid exposing the vacuum to extreme heat or moisture.
Tools And Materials Needed
To wall mount your Dyson stick vacuum, gather these tools and materials for a smooth installation process:
Recommended Products

SUPER COMPATIBILITY - This Wall Mount is perfectly compatible with Dyson V10 Vacuum, replacing part No.969042-01. Does NOT fit Dyson V11 Vacuum Cleaners.

Stay Organized: Easily organize the storage of your Dyson stick tube, save space in small areas, and keep convenient access
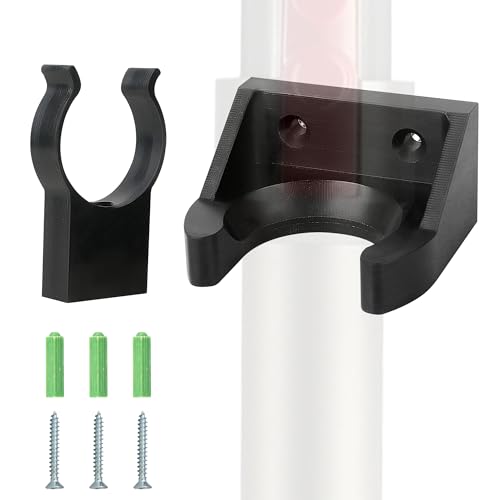
COMPATIBLE WITH DYSON VACUUM CLEANER: This wall mount holder is for stick tube compatible with Dyson V15, V11, V10, V8, and V7 vacuum cleaners. The wall mount bracket is designed to securely hold for your wand tube or stick. Wall hook hanger offers a snug and stable fit without tools or complicated setup
Tools
- Drill: Use a cordless drill for drilling holes into the wall.
- Screwdriver: A Phillips head screwdriver will work for securing screws.
- Stud Finder: This tool helps locate wall studs for a sturdy mount.
- Level: A level ensures your mount is straight and secure.
- Measuring Tape: Use this for precise measurements of your mount’s height and positioning.
Materials
- Mounting Bracket: Most Dyson vacuums come with a compatible wall mounting bracket.
- Screws: Confirm you have the correct screws recommended for your specific mount.
- Wall Anchors: If mounting into drywall, wall anchors provide extra support for your mount.
- Pencil: A pencil helps mark drill holes on the wall before drilling.
- Safety Glasses: Protect your eyes while drilling or working with tools.
Collecting these items beforehand makes the installation process efficient and straightforward.
Choosing The Right Location
Choosing the right location for mounting your Dyson stick vacuum significantly impacts convenience and accessibility. A well-placed vacuum can streamline your cleaning routine while minimizing clutter.
Factors To Consider
- Wall Stability: Ensure the wall can support the mounting bracket. Check for studs or strong materials.
- Proximity to Use Areas: Mount the vacuum near high-traffic areas like hallways or living rooms for easy access.
- Available Space: Verify the installation area allows for adequate clearance. Avoid crowded spaces to prevent interference.
- Charging Access: Position the mount close to an electrical outlet; this allows for quick recharging.
- Visibility: Choose a spot where the vacuum remains visible, encouraging regular use.
- User Height: Mount the vacuum at a height that aligns with the average user’s reach. Aim for 5 to 6 feet off the ground.
- Easy Access: Ensure the vacuum is accessible for both adults and older children, allowing effortless removal and replacement.
- Floor Space: Avoid mounting too low; this can impede floor cleaning and increase dust accumulation around the base.
By considering these factors and recommendations, your wall-mounted Dyson stick vacuum will fit seamlessly into your home, providing quick access whenever you need it.
Step-By-Step Installation Guide
This guide provides detailed steps to wall mount your Dyson stick vacuum efficiently. Follow these instructions to ensure a secure and accessible setup.
Recommended Products

【Compatibility】This Wall Mount ONLY compatible with Dyson V10 Vacuum Cleaner. Replace Part no. 969042-01 *Does Not fit Dyson v11 Vacuum Cleaner*

Compatibility: The vacuum wall mount holder is for Dyson V11 and V15 SV14 SV15 SV17 SV22 vacuum cleaners. Package Includes: 1* charging bracket attachment, 2* drilling screws, 2 * plastic anchors

Compatibility - The wall mount dock is compatible with dyson v11 and v15 series vacuum cleaner. Replacement parts No.970011-01/ 970011-02.
Preparing The Wall
- Choose A Location: Select a wall space that’s near a power outlet, away from furniture, and at a height you can reach comfortably.
- Check Wall Type: Identify whether the wall is drywall, concrete, or brick. Each requires different anchors for mounting.
- Gather Tools: Collect a drill, screwdriver, level, stud finder, and measuring tape. These tools help ensure a stable installation.
- Find Studs: Use a stud finder to locate studs if mounting on drywall. Mark their positions with a pencil for anchor placement.
Mounting The Bracket
- Mark Bracket Placement: Hold the bracket against the wall at the desired height, ensuring it’s level. Mark the screw holes with a pencil.
- Drill Holes: Drill holes at the marked positions. If using anchors, match the drill bit size to the anchors.
- Insert Anchors: Push the anchors into the drilled holes for drywall. For concrete or brick, use expansion bolts.
- Attach Bracket: Align the bracket with the holes and secure it using screws. Tighten screws firmly but don’t over-tighten to avoid stripping.
- Align Charging Dock: Position the charging dock on the bracket, ensuring it lines up with the bracket’s slots or hooks.
- Secure The Vacuum: Slide the vacuum into the dock until you hear a click. This indicates proper alignment with the charging pins.
- Plug In Charger: Connect the charging dock to the power outlet. Ensure the vacuum charges properly while docked.
Following these steps, you’ll enjoy a clutter-free space and easy access to your Dyson stick vacuum whenever needed.
Tips For Maintenance And Storage
- Clean the Filter Regularly: Wash the filter every month to maintain suction power. Soak it in cold water, gently shake, and let it dry for 24 hours before reinstalling.
- Empty the Dust Bin: Empty the dust bin after each use. This prevents clogging, ensures optimal performance, and makes the vacuum easier to store.
- Store It on the Wall Mount: Keep your Dyson stick vacuum on the wall mount when not in use. This safeguards the device, prevents damage, and keeps your space organized.
- Charge the Battery: Keep the vacuum charged to preserve battery health. Don’t let it run completely out of power before recharging.
- Inspect the Brush Bar: Check the brush bar for hair and debris every few uses. Cleaning it ensures effective cleaning, prolongs the life of the vacuum, and helps avoid jams.
- Wipe the Exterior: Use a damp cloth to clean the vacuum’s exterior. This eliminates dust and keeps the vacuum looking new.
- Store Accessories Wisely: Organize attachments in a designated space if they don’t fit on the wall mount. This avoids misplacing them and makes them easy to access when needed.
- Avoid Excessive Heat or Moisture: Store the vacuum in a cool, dry place. Extreme temperatures or humidity can damage the battery and affect performance.
Implementing these maintenance and storage tips keeps your Dyson stick vacuum in excellent condition, enhancing its lifespan and efficiency.
Recommended Products

Wide Compatibility: The wall mount are perfectly compatible for vacuum cleaner V7 V8 V10 V11 V12 V15 Shark IZ141 IZ562H IZ682H IZ361H IZ462H IZ163H IZ363HT IZ483H and other brands of cordless vacuum cleaners

Perfect Fits: Fit for Dyson V8 Absolute, V8 Animal, V7 Absolute, V7 Motorhead, Dyson V7 Animal Plus Vacuum Cleaner
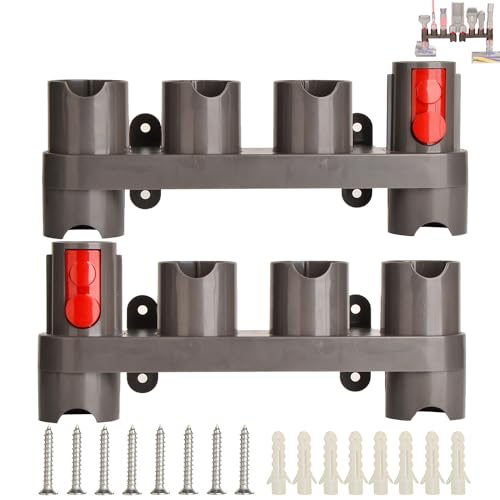
Fullclean Attachments Holders are compatible with Dyson Gen 5 G5 V15 V12 V11 V10 V8 V7 vacuum cleaners docking charging station and acessories including the motorized parts.
Conclusion
Mounting your Dyson stick vacuum not only saves space but also keeps it easily accessible for quick cleanups. By taking care of your vacuum through regular maintenance and proper storage you’ll ensure it performs at its best for years to come.
With a little effort you can enjoy a tidy home and a reliable cleaning companion. So go ahead and enjoy the benefits of a well-mounted Dyson vacuum while keeping your living space organized and clutter-free. Happy cleaning!
Frequently Asked Questions
How can I efficiently store my Dyson stick vacuum?
To store your Dyson stick vacuum efficiently, consider wall mounting it. Ensure the wall is stable and accessible for easy retrieval and storage. This method helps in saving space and keeping the vacuum ready for use.
What maintenance tips should I follow for my Dyson vacuum?
Regular maintenance includes cleaning the filter, emptying the dust bin after each use, and inspecting the brush bar periodically. These practices help maintain performance and prolong the vacuum’s lifespan.
How often should I clean the filter of my Dyson vacuum?
It is recommended to clean the filter every month or whenever it appears dirty. Regular cleaning ensures optimal airflow and suction performance.
Should I store my Dyson vacuum on its wall mount?
Yes, storing your Dyson vacuum on its wall mount is ideal for saving space and keeping it easily accessible. This prevents physical damage and makes charging convenient.
Can excessive heat or moisture damage my Dyson vacuum?
Yes, exposing your Dyson vacuum to excessive heat or moisture can damage its electronic components and reduce its lifespan. Store it in a cool, dry location.

